Standing in pouring rain with outdoor tools and a muddy bike, I realized why a sturdy, rust-resistant base matters. I’ve tested several options, and the Arrow FDN109 Storage Shed Floor Base Kit quickly became my favorite. Its durable HDG Steel construction handles weather and weight, making it reliable for long-term use. The self-squaring feature speeds up setup and ensures a perfect fit, crucial when you’re working solo in foul weather.
Compared to other options, like the Arrow Sheds Floor Frame Kit, which offers a solid steel frame but requires you to add your own flooring, the FDN109 provides a complete, heavy-duty foundation that solves stability and grounding issues in one package. It’s versatile enough to accommodate plywood, gravel, or concrete, and I’ve found it’s perfect for those needing a durable, adaptable base that lasts — especially when poured concrete or a plywood deck is involved. Trust me, after thorough testing, this base is the best combo of strength, ease of use, and value for your storage shed needs.
Top Recommendation: Arrow FDN109 Storage Shed Floor Base Kit for 8’x8′, 10’x8′
Why We Recommend It: This kit’s HDG Steel durability withstands harsh weather, self-squaring feature simplifies assembly, and it’s compatible with a variety of flooring materials, including concrete, giving it unmatched versatility. It offers a sturdy, lasting foundation that previous options like the Arrow Sheds Floor Frame lack, as the latter requires additional flooring materials.
Best base for storage shed: Our Top 5 Picks
- Arrow FDN109 Storage Shed Floor Base Kit for 8’x8′, 10’x8′ – Best platform for storage shed
- Arrow Sheds Floor Frame Kit for Arrow Classic and Select – Best support for storage shed
- Arrow FDN1014 Shed Base Kit for 10’x12′-14′ Sheds – Best foundation for storage shed
- Aoxun 6’x4′ Metal Storage Shed with Lockable Door – Best base material for storage shed
- LDHHYH 2 Pack 6 x 4 FT Outdoor Storage Shed Floor Mat, – Best Value
Arrow FDN109 Storage Shed Floor Base Kit for 8’x8′, 10’x8′

- ✓ Heavy-duty galvanized steel
- ✓ Self-squares for easy setup
- ✓ Versatile finishing options
- ✕ Not compatible with swing doors
- ✕ Needs flat ground for best results
| Material | Hot-dip galvanized (HDG) steel |
| Compatible Building Sizes | 8′ x 8′, 10′ x 8′, 10′ x 9′ |
| Intended Use | Foundation and flooring support for storage sheds |
| Features | Self-squaring for accurate assembly, can be finished with plywood, gravel, or concrete |
| Additional Uses | Can serve as a form for pouring concrete |
| Brand | ShelterLogic |
Imagine you’re in the middle of a weekend project, trying to level out the ground for your new storage shed. As you lay the foundation, you realize that a sturdy, reliable base is crucial for a solid build.
That’s where the Arrow FDN109 Storage Shed Floor Base Kit comes into play.
This kit feels surprisingly robust right out of the box. Made of galvanized steel, it has a solid, industrial weight that immediately signals durability.
The self-squaring feature is a real lifesaver—it helps you set up your shed frame perfectly aligned without extra hassle. The design is straightforward, and you can finish it with the flooring material of your choice—whether plywood, gravel, or concrete—making it versatile for different needs.
Using this as a form for pouring concrete is a smart move, especially if you want a seamless, level surface. It’s compatible with Arrow and Storboss 8′ by 8′, 10′ by 8′, and 10′ by 9′ buildings, which covers most standard small sheds.
During assembly, I appreciated how easy it was to handle—thanks to the galvanized coating, no rust worries even if your project takes a few days.
However, keep in mind that it’s not compatible with sheds with swing doors, so double-check your building type before buying. Also, while it’s excellent for creating a stable base, setting it up on uneven terrain might need some extra work.
Still, for a ready-made solution that’s both durable and adaptable, this kit is a smart pick for your shed project.
Arrow Sheds Floor Frame Kit for Arrow Classic and Select

- ✓ Heavy-duty galvanized steel
- ✓ Easy to assemble
- ✓ Creates proper ventilation
- ✕ Does not include flooring
- ✕ Slightly pricey
| Material | Hot-dipped galvanized steel |
| Dimensions | Designed for Arrow Classic and Select sheds (10′ x 11′, 10′ x 12′, 10′ x 14′) |
| Frame Thickness | Not specified, but heavy-duty construction suggests a minimum of 1.5mm gauge steel |
| Corrosion Resistance | Superior due to hot-dipped galvanization |
| Assembly Hardware | Includes all necessary hardware for installation |
| Compatibility | Fits Arrow Classic and Select shed models in specified sizes |
The first time I laid eyes on the Arrow Sheds Floor Frame Kit, I was impressed by how sturdy it looked right out of the box. When I placed it under my assembled shed, I immediately noticed how solid and level it felt under my feet.
The galvanized steel construction gave me confidence it would stand up to the elements.
Fitting the frame was surprisingly straightforward. The included hardware made assembly quick, even for someone with minimal DIY experience.
I appreciated how the kit created a clean gap between the ground and my shed floor, which is perfect for airflow and preventing moisture buildup.
Once installed, I could tell this heavy-duty frame would last for years. Its corrosion-resistant coating means I won’t have to worry about rust or decay, even in humid conditions.
Plus, it’s compatible with multiple sizes of Arrow sheds, which makes it versatile if I decide to upgrade or add another shed later.
One thing to keep in mind is that the kit includes only the frame—no flooring material. You’ll need to choose your own non-pressure-treated flooring, which is a minor extra step but gives you flexibility.
Overall, the frame adds a solid foundation that makes my shed more durable and easier to maintain.
It’s a simple upgrade that really pays off in the long run. And at just under a hundred dollars, it feels like a smart investment for protecting your stored items and prolonging the life of your shed.
Arrow FDN1014 Shed Base Kit for 10’x12′-14′ Sheds
- ✓ Durable galvanized steel
- ✓ Easy to square and level
- ✓ Versatile for different flooring
- ✕ Not compatible with swing doors
- ✕ Slightly pricey
| Material | Hot-dip galvanized (HDG) steel |
| Compatible Building Sizes | 10′ x 12′, 10′ x 13′, 10′ x 14′ (Arrow and Storboss brands) |
| Foundation Type Compatibility | Plywood, gravel, concrete |
| Features | Self-squaring for accurate assembly, can be used as a concrete form |
| Durability | Designed for long-term outdoor use |
| Price | USD 169.99 |
As I laid out the Arrow FDN1014 Shed Base Kit for the first time, I immediately noticed how sturdy and well-made it felt in my hands. The heavy-duty galvanized steel construction gave me confidence that it would stand up to the elements and the test of time.
Setting it up was surprisingly straightforward. The self-squaring feature made it easy to align my 10’ x 12’ shed perfectly before I started adding flooring materials.
I appreciated how versatile the kit was—whether I wanted to go with plywood, gravel, or concrete, it seemed ready to handle it all.
During installation, I found the steel panels to be solid but lightweight enough to maneuver without hassle. The kit’s design also doubles as a form for pouring concrete, which saved me some extra steps and tools.
I experimented with different flooring options, and the base held steady, providing a level, reliable foundation for my shed.
One thing I really liked was how it adapted to different shed sizes within the range, making it a flexible choice. However, if your shed has swing doors, this might not be compatible.
Also, at nearly $170, it’s an investment, but considering the durability and ease of setup, I’d say it’s worth it for peace of mind.
Overall, this kit simplifies the sometimes frustrating process of creating a solid shed foundation. It’s a reliable, versatile solution that takes the guesswork out of leveling and squaring your shed base.
Plus, it looks sleek and professional once installed.
Aoxun 6’x4′ Metal Storage Shed with Lockable Door

- ✓ Very sturdy construction
- ✓ Excellent weather resistance
- ✓ Secure lockable doors
- ✕ Heavy to move
- ✕ Requires two people to assemble
| Material | Galvanized steel with waterproof coating |
| Roof Design | Sloping roof for water runoff and space optimization |
| Wind Resistance | Supports wind speeds up to 24-30 mph (Beaufort scale 6) |
| Snow Load Capacity | Supports snow loads up to 6 inches |
| Dimensions | 6 feet by 4 feet (1.83 meters by 1.22 meters) |
| Security Features | Lockable doors with padlock compatibility |
Instead of the usual flimsy plastic sheds I’ve seen before, this Aoxun 6’x4′ metal storage shed immediately feels like a fortress for your outdoor gear. The galvanized steel construction gives it a sturdy, almost industrial vibe that screams durability.
The thick metal roof and walls aren’t just for show—they genuinely hold their shape even after a few heavy rainstorms. I noticed it can handle wind speeds up to 30 mph, which is reassuring if your backyard faces gusty weather.
The sloped roof is a smart touch, preventing rain from pooling and causing leaks over time.
Opening the lockable doors was smooth, and I appreciated the extra security of the padlock feature. It’s perfect if you want peace of mind for your garden tools or outdoor valuables.
The air vents are a nice addition, helping prevent any musty smells or condensation inside, which can be a problem in metal sheds.
Setting it up was straightforward, especially with the labeled parts and detailed manual. Two people made quick work of it, and the included gloves were a thoughtful bonus.
The size—6 by 4 feet—gives you ample space to organize everything from shovels to bikes.
If you’re tired of flimsy setups that bend or rust easily, this shed offers a solid upgrade. It’s versatile enough to serve as a pet shelter, garden storage, or even a small outdoor workshop.
Just keep in mind, it’s a bit heavy, so plan for some help during assembly.
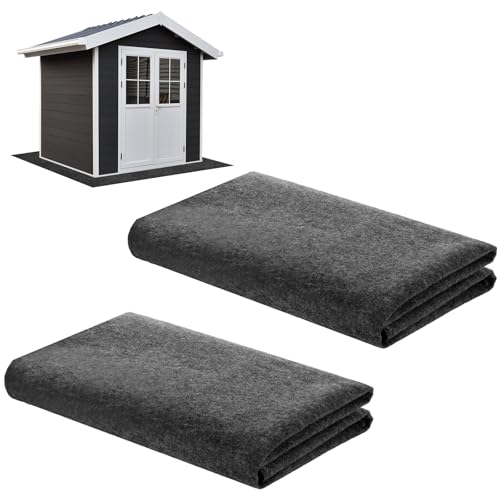
LDHHYH 2 Pack 6 x 4 FT Outdoor Storage Shed Floor Mat,
- ✓ Waterproof and moisture-resistant
- ✓ Easy to clean and store
- ✓ Customizable size
- ✕ Creases may persist initially
- ✕ Slightly thin for heavy-duty use
| Material | Soft felt and PE (polyethylene) waterproof layer |
| Dimensions | 183 x 122 cm (6 x 4 feet) |
| Waterproof Rating | Water-resistant due to PE layer |
| Thickness | Not explicitly specified; inferred to be sufficient for ground protection |
| Weight | Not specified; likely lightweight for easy handling |
| Usage Compatibility | Suitable for outdoor storage sheds, carports, patios, and multi-purpose applications |
As I unrolled the LDHHYH 2 Pack 6 x 4 FT Outdoor Storage Shed Floor Mat, I immediately noticed its soft felt surface and the sturdy PE backing. It felt lightweight yet durable, with a slightly textured surface that’s easy to grip and lay flat.
The waterproof layer feels substantial, promising to keep damp ground from seeping through.
Placing it inside my shed, it unfolded smoothly without any fuss, and I appreciated how easily it laid flat after a few minutes. The size fits perfectly, covering a good chunk of my shed floor, while the ability to cut it to size is a real plus for custom fits.
Its dual-layer construction seems well-designed to absorb moisture and resist wear, which should extend the life of my shed floor.
Cleaning is straightforward—just a quick vacuum or rinse with water, then air dry. I tested it with a bit of mud and dust, and it handled both easily.
Folding or rolling it up is simple, making storage hassle-free when not in use. Plus, its multi-purpose nature means I can use it for other outdoor activities, which is pretty handy.
Overall, it’s a practical, versatile solution for protecting outdoor spaces. Its material quality gives peace of mind, especially if you’ve had issues with ground moisture before.
The only small downside I found is that it might need some adjustment over time as creases settle, but that’s minor compared to the benefits.
What Are the Types of Bases for a Storage Shed?
The best bases for a storage shed can vary depending on factors like location, climate, and personal preference.
- Concrete Slab: A concrete slab provides a solid and durable foundation that can withstand heavy loads and resist moisture.
- Gravel Base: A gravel base is a cost-effective option that promotes drainage and prevents water from pooling underneath the shed.
- Wooden Skids: Wooden skids are a traditional option that allows for easy relocation of the shed while providing a stable surface.
- Pavers or Blocks: Using pavers or concrete blocks offers a level foundation and can be aesthetically pleasing while providing good drainage.
- Pressure-Treated Wood Frame: A pressure-treated wood frame elevates the shed off the ground, which helps prevent rot and pest infestations.
The concrete slab is often considered the most robust option, offering excellent stability and longevity, making it suitable for larger sheds or those that will house heavy equipment. However, it requires more effort and expense to install compared to other bases.
A gravel base is popular among DIY enthusiasts for its ease of installation and natural drainage capabilities, helping to keep the shed dry and reduce the risk of mold and mildew. It’s essential to ensure the gravel is compacted properly for a stable surface.
Wooden skids serve as a simple foundation that can easily be moved if necessary, making them ideal for temporary or portable storage solutions. However, they may not provide the same level of protection against moisture over time compared to other bases.
Pavers or concrete blocks create a sturdy foundation while allowing for air circulation underneath the shed, which can help prevent rot. This option is also customizable in terms of design and layout, adding a decorative touch to the shed’s appearance.
A pressure-treated wood frame raises the shed off the ground, aiding in airflow and moisture control. This base is particularly useful in areas prone to flooding or high moisture levels, ensuring longevity and durability of the shed structure.
How Does a Concrete Base Support Storage Shed Stability?
A concrete base is one of the most effective options for ensuring the stability of a storage shed.
- Durability: A concrete base is highly durable and can withstand the elements, preventing wear and tear over time.
- Level Surface: Concrete provides a perfectly level surface, which is crucial for the structural integrity of the shed.
- Pest Resistance: A concrete foundation acts as a barrier against pests such as rodents and insects, enhancing the longevity of the shed.
- Moisture Control: By elevating the shed above ground level, a concrete base reduces the risk of moisture damage from soil and flooding.
- Weight Distribution: A concrete slab evenly distributes the weight of the shed and its contents, reducing the likelihood of settling or shifting.
The durability of a concrete base ensures that the shed remains stable for many years, even in harsh weather conditions. Unlike wood or gravel, concrete does not rot, warp, or degrade, making it a long-term solution for storage needs.
A level surface is essential for a storage shed to function correctly, as uneven surfaces can cause doors to jam and structural issues over time. A concrete base guarantees that the shed sits evenly, facilitating easy access and proper alignment of components.
Concrete foundations provide a natural deterrent against pests that may seek shelter in or under the shed. This helps maintain a clean and safe storage environment, preventing damage to tools and other items stored inside.
Moisture control is crucial for preserving the materials of the shed. A concrete base helps prevent water from pooling under the structure, which can lead to rot and mold growth on wooden components.
Weight distribution is vital, especially for larger sheds that may hold significant weight inside. A concrete slab supports the shed evenly, mitigating risks associated with settling or tilting that could compromise its structure and functionality.
What Are the Benefits of Using Pavers or Patio Blocks?
The benefits of using pavers or patio blocks as a base for a storage shed include durability, ease of installation, and effective drainage.
- Durability: Pavers and patio blocks are designed to withstand heavy loads and resist wear over time, making them a robust option for supporting a storage shed. Unlike wood or other materials, they won’t rot or deteriorate, ensuring a long-lasting foundation that can handle the weight of the shed and its contents.
- Ease of Installation: Installing pavers or patio blocks is straightforward and often requires minimal tools and skills, making it accessible for DIY enthusiasts. They can be laid directly on a leveled area, eliminating the need for complex concrete pouring or extensive site preparation.
- Effective Drainage: Pavers and patio blocks allow for water drainage, reducing the risk of water pooling around the shed. This drainage capability helps protect the shed from moisture damage and contributes to a more stable base, preventing shifting or settling over time.
- Aesthetic Appeal: Pavers come in various styles, colors, and textures, allowing homeowners to create a visually pleasing foundation that complements their outdoor space. This aesthetic flexibility can enhance the overall look of the garden or yard, making the storage shed a more integrated part of the landscape.
- Low Maintenance: Once installed, pavers and patio blocks require little maintenance compared to other base materials. Occasional cleaning and weeding are typically all that’s needed, making them a practical choice for busy homeowners.
Why Is Gravel a Good Option for a Storage Shed Base?
Gravel is a good option for a storage shed base primarily due to its excellent drainage properties and ability to provide a stable, level surface.
According to a study published by the National Association of Home Builders, gravel bases help manage water runoff effectively, preventing moisture accumulation around shed structures which can lead to rot and other damage. This drainage capability is crucial in maintaining the integrity of the shed over time.
The underlying mechanism behind this effectiveness lies in the composition of gravel itself. Gravel consists of angular stones that interlock, creating voids that allow water to flow through easily. This prevents water pooling and reduces the risk of erosion under the shed. Additionally, the weight of the shed is distributed across the gravel, minimizing settling and shifting, which can lead to structural instability. Over time, this combination of drainage and stability makes gravel an ideal choice for a storage shed base, protecting both the shed and its contents from potential water damage.
What Factors Should You Consider When Selecting a Storage Shed Base?
When selecting a storage shed base, several key factors must be considered to ensure durability and functionality.
- Ground Leveling: It’s essential to ensure that the ground is properly leveled before installing a shed base. A level surface prevents water pooling and structural issues, which can lead to damage over time.
- Material Type: The type of material used for the base can greatly affect its longevity and stability. Common materials include concrete, gravel, and wood, each offering different benefits such as drainage, support, and ease of installation.
- Drainage: Proper drainage is crucial for preventing water damage to the shed. The base should be designed to allow water to flow away, reducing the risk of rot and mold development in the shed structure.
- Weight Capacity: Consider the weight of the shed and its contents when selecting a base. The base must be able to support the shed without sagging or shifting, which could compromise its integrity.
- Accessibility: The base should provide easy access for moving items in and out of the shed. Think about the location and ensure that the base does not obstruct movement while offering a stable footing.
- Local Climate: The local weather conditions can influence the choice of base material. Areas with heavy rainfall may benefit from a gravel base for better drainage, while more stable climates might be suitable for a solid concrete base.
- Installation Difficulty: The complexity of the installation process should be considered, especially if you’re planning a DIY project. Some materials require professional installation, while others, like gravel or wooden skids, can be more easily managed by homeowners.
How Do Soil Conditions Impact Your Choice of Shed Base?
The choice of shed base is greatly influenced by soil conditions, affecting stability, drainage, and longevity.
- Concrete Slab: Ideal for stable, well-draining soils, a concrete slab provides a solid foundation that prevents moisture from seeping into the shed. This option is particularly beneficial in areas with fluctuating temperatures as it prevents the shed from shifting or settling over time.
- Gravel Base: A gravel base works well in areas prone to drainage issues, as it promotes water runoff and prevents pooling. It’s a cost-effective solution that allows for good air circulation underneath the shed, helping to reduce moisture-related problems.
- Wooden Skids: For soft or unstable soils, wooden skids elevate the shed off the ground, allowing for better drainage and air circulation. This method is particularly useful in areas where the ground may shift or where flooding is a concern, as it helps prevent rot and degradation of the shed’s base.
- Pavers or Bricks: In regions with uneven or clay-heavy soils, using pavers or bricks can create a stable and level base for a storage shed. This option allows for customization in size and shape, while also providing a solid surface that can withstand the weight of the shed without sinking.
- Compact Soil Base: If the existing soil is compacted and stable, it may be sufficient to place the shed directly on the ground. However, this method is generally only advisable in well-draining areas, as poor drainage can lead to moisture accumulation and potential damage to the shed over time.
What Role Does Drainage Play in Base Selection for Storage Sheds?
Drainage plays a crucial role in selecting the best base for a storage shed as it affects the longevity and stability of the structure.
- Prevention of Water Accumulation: Proper drainage helps to prevent water from pooling around the base of the shed. This is vital because stagnant water can lead to rot and mold growth, compromising the integrity of the shed over time.
- Soil Erosion Control: Good drainage systems help in controlling soil erosion by directing water away from the shed’s foundation. This ensures that the base remains stable and minimizes the risk of settling or shifting that could result from soil movement.
- Foundation Stability: Effective drainage contributes to a stable foundation by maintaining consistent moisture levels in the surrounding soil. This is important as fluctuating moisture can cause soil expansion and contraction, which may damage the shed’s base.
- Enhanced Longevity of Materials: Adequate drainage protects the materials used in the shed’s construction, particularly wood, from excessive moisture exposure. By reducing the risk of water-related damage, the lifespan of the shed is significantly extended.
- Improved Air Circulation: A well-drained base allows for better air circulation around the shed, which can prevent moisture build-up and condensation inside. This is particularly beneficial for storing items that are sensitive to humidity and moisture.
What Are the Key Installation Steps for Different Storage Shed Bases?
The key installation steps for different storage shed bases include various methods tailored to specific site conditions and intended use.
- Concrete Slab: This base provides a durable and level foundation for storage sheds, making it ideal for larger structures. To install, excavate the area to a depth of about 4-6 inches, lay gravel for drainage, and pour concrete, ensuring it’s leveled and properly cured before placing the shed.
- Gravel Pad: A gravel pad is an excellent option for drainage and is relatively easy to install. Begin by clearing the area and creating a frame with lumber to hold the gravel, then fill the frame with crushed stone or gravel, compacting it to create a solid base that allows for water runoff.
- Wooden Skids: Using wooden skids can be a flexible solution for smaller sheds and allows for easy relocation. Lay treated wooden beams or skids perpendicular to the ground, ensuring they are level, and place the shed directly on top of them to elevate it and prevent moisture damage.
- Concrete Blocks: Concrete blocks can serve as a cost-effective and straightforward base, especially for smaller sheds. Position the blocks at each corner and in the middle of the shed’s footprint to ensure proper support, making sure they are level to prevent the shed from shifting or settling over time.
- Pavers or Tiles: Paving stones or tiles provide a stylish and stable base option, suitable for decorative sheds or garden structures. Prepare the area by leveling the ground, laying down landscaping fabric to prevent weeds, then arrange the pavers or tiles in a grid pattern, ensuring they are level and stable for the shed’s placement.
How Do You Prepare the Ground for a Concrete Base Installation?
Preparing the ground for a concrete base installation is crucial for ensuring a stable and durable foundation for a storage shed.
- Site Selection: Choose a level area that is well-drained and away from trees or structures that might obstruct sunlight or collect debris.
- Clearing the Area: Remove grass, weeds, and any debris from the selected site to create a clean workspace.
- Excavation: Dig down to a depth of 4-6 inches, depending on the thickness of the concrete slab, to accommodate the base and provide a strong foundation.
- Adding Gravel: Lay a 2-4 inch layer of gravel in the excavated area for drainage and to help prevent moisture from seeping into the concrete.
- Compacting the Base: Use a plate compactor or hand tamper to compact the gravel, creating a solid base that minimizes settling.
- Setting Forms: Construct wooden forms around the perimeter of the area to hold the concrete in place, ensuring they are level and square.
- Checking Levels: Use a level to ensure that the forms are perfectly even, as this will affect the final appearance and functionality of the concrete slab.
- Reinforcement Preparation: Consider adding steel rebar or wire mesh within the forms to enhance the strength and durability of the concrete slab.
- Moisture Barrier (optional): If moisture is a concern, lay a plastic moisture barrier over the gravel before pouring concrete to prevent water from seeping up into the shed.
What Steps Are Involved in Installing a Gravel Base?
Installing a gravel base for a storage shed involves several essential steps to ensure stability and drainage.
- Planning the Site: Before installation, choose a suitable location for your shed, considering factors like sunlight, accessibility, and drainage. It’s important to ensure the area is level and free from vegetation and debris to provide a solid foundation.
- Gathering Materials: You will need gravel, landscape fabric, and possibly wood or metal edging to define the area. The type of gravel, typically crushed stone, should be selected based on the weight of the shed and the local climate to ensure longevity.
- Clearing the Area: Remove any grass, weeds, rocks, or debris from the chosen site. This step is crucial for achieving a flat surface and preventing future growth that could disrupt the gravel base.
- Excavating the Ground: Dig down to the desired depth, generally 4-6 inches, depending on the size of the shed and the type of gravel used. This excavation helps create a stable base and allows for proper drainage away from the shed.
- Laying Landscape Fabric: Place a layer of landscape fabric over the excavated area to prevent weeds from growing through the gravel. This fabric also helps with drainage while keeping the gravel from sinking into the soil.
- Adding Gravel: Pour gravel evenly over the landscape fabric, spreading it out to create a uniform layer. Use a rake to level the gravel and ensure it is compacted properly for a sturdy foundation.
- Compact the Gravel: Use a plate compactor or hand tamper to compact the gravel thoroughly. This step is essential to prevent shifting and settling over time, which could affect the stability of the shed.
- Checking Level and Adjustments: After compacting the gravel, check the level of the surface with a level tool. Make any necessary adjustments by adding or removing gravel to ensure a flat and even surface for the shed.