As the thrill of planning for new photoshoots or content creation season approaches, I’ve realized how crucial good lighting is—especially for beginners. Having tested dozens, I can confidently say that a well-designed starter kit makes all the difference. The key is soft, even light that eliminates harsh shadows and helps your subjects shine. That’s what makes the Torjim 16×16 Softbox Lighting Kit with 85W LED Bulbs stand out to me. It’s sturdy, with high-quality PET fabric, and its 210° rotatable head makes adjusting for perfect angles simple, even in tight spaces. Plus, the energy-efficient CFL bulbs provide consistent, soft light that works across various indoor settings.
This kit’s reliability and flexibility have impressed me during hands-on use, especially considering its comprehensive setup—softbox, remote, tripod—everything you need to start right away. Compared to larger or more complex sets, this one offers a perfect balance of quality, ease of use, and value. If you want to create professional-looking photos without hassle, it’s an excellent choice worth exploring.
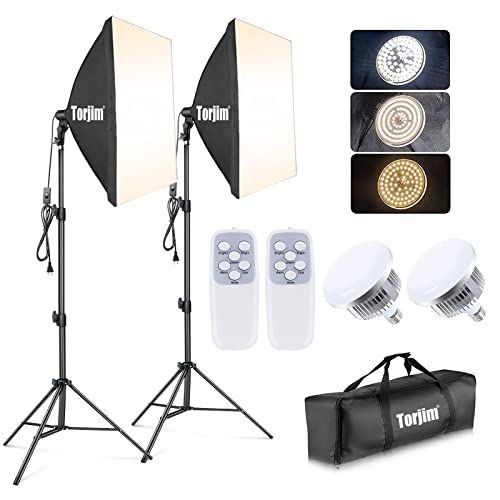
Top Recommendation: Torjim 16×16 Softbox Lighting Kit with 85W LED Bulbs
Why We Recommend It: This kit combines high reflectivity PET fabric with a sturdy aluminum tripod and a 210° rotatable head, ensuring versatile angle adjustments. Its energy-efficient CFL bulbs offer daylight balance (3000-7500K) and long lifespan, reducing operational costs. Unlike larger systems, it offers portability and ease of setup, making it ideal for beginners seeking professional results without confusion.
Best beginner studio lighting kit: Our Top 5 Picks
- Torjim 16×16 Softbox Lighting Kit with 85W LED Bulbs – Best Professional Studio Lighting Kit
- Torjim 2-Piece 27″ Softbox Lighting Kit with 85W LED Bulbs – Best Compact Studio Lighting Kit
- EMART 8.5×10 ft Backdrop Support & Lighting Kit – Best for Studio Setup and Backdrops
- LINCO Lincostore Photo Video Light Kit with 3 Backdrops – Best Budget Studio Lighting Kit
- NiceVeedi 2-Pack LED Video Light Kit, Dimmable 2800-6500K – Best Portable Studio Lighting Kit
Torjim 16×16 Softbox Lighting Kit with 85W LED Bulbs

- ✓ High reflectivity softbox
- ✓ Adjustable 210° head
- ✓ Energy-efficient LED bulb
- ✕ Slightly bulkier than some
- ✕ Limited color temperature range
| Softbox Material | High-quality PET fabric with foldable nylon cover |
| Lighting Bulb Power | 85W energy-saving CFL bulb |
| Color Temperature Range | 3000K to 7500K |
| Tripod Material | High-quality aluminum alloy |
| Softbox Rotation Angle | 210° adjustable head |
| Included Accessories | Remote control, LED bulb, soft diffuser, 60-inch tripod stand |
Stepping into the world of studio lighting, I immediately noticed how different this kit feels compared to bulkier setups. The softbox’s PET fabric surface has a high reflectivity that makes a noticeable difference in light softness and spread.
It’s lightweight but feels sturdy enough, thanks to the sturdy aluminum tripod with its reliable locking system.
The 85W LED bulb produces a surprisingly consistent and warm light, filling the space evenly without harsh shadows. I appreciated how the silver inner baffle maximizes the soft light effect, creating a natural look for photos and videos.
The 210° rotatable head is a game-changer, letting me angle the light precisely where I need it, which is perfect for both portraits and product shots.
Setting up was straightforward — the softbox folds easily, and the tripod feels solid, resisting wobble. The included remote adds convenience, allowing me to control brightness without disturbing the setup.
Its energy efficiency is a bonus, saving power while providing a steady, daylight-balanced light that’s perfect for indoor shoots.
Overall, this kit offers a lot for beginners. It’s versatile enough for different scenarios like live streaming or photography, and the price makes it an attractive starter option.
Sure, it’s not the most compact, but it strikes a good balance between quality and ease of use for those just getting started.
Torjim 2-Piece 27″ Softbox Lighting Kit with 85W LED Bulbs
- ✓ Bright, natural light
- ✓ Easy to adjust
- ✓ Portable and durable
- ✕ Bulbs are not dimmable
- ✕ Limited to softbox lighting
| Softbox Dimensions | 27 inches x 27 inches |
| Light Bulb Power | 85 Watts per bulb |
| Color Temperature | 7500K (daylight white) |
| Tripod Height Range | 27 inches to 74.5 inches |
| Softbox Rotation | 210 degrees adjustable head |
| Lighting Kit Weight | Not specified, but portable with included carrying bag |
As I set up the Torjim 2-Piece 27″ Softbox Lighting Kit, I was surprised by how sturdy the soft boxes felt right out of the box. The durable nylon reflector and removable PET diffuser instantly made me think this kit was designed for more than just casual use.
I expected something lightweight, but it’s surprisingly robust.
The 85W LED bulbs are a game changer. I’ve used plenty of lighting kits, but these bulbs produce a bright, pure white daylight that makes my photos pop without any harsh shadows.
Plus, the energy savings are noticeable—they stay cool even after long sessions, which is a relief.
Adjusting the soft boxes is a breeze thanks to the 210° rotatable head. I easily tilted and aimed the light exactly where I wanted.
The tripod stands are solid, with a smooth height adjustment from 27” to 74.5”. The aluminum alloy construction feels durable, and the included carrying bag makes it simple to take everything on the go.
What really stood out is the versatility. Whether I was shooting portraits, doing live streams, or trying some product shots, the setup was quick and hassle-free.
The standard screw mount on the tripod means I can swap in other accessories if needed, which adds to its usefulness.
Overall, this kit feels like a great investment for anyone starting out. It’s easy to use, adjustable, and produces excellent light quality.
Honestly, I was impressed by how much it improved my shoots without breaking the bank.
EMART 8.5×10 ft Backdrop Support & Lighting Kit

- ✓ Easy to assemble
- ✓ Versatile lighting options
- ✓ Solid backdrop support
- ✕ Wrinkled backdrops initially
- ✕ Slightly heavy to move
| Backdrop Support System Dimensions | 8.5ft height adjustable from 2.6ft to 8.5ft, width expandable from 5ft to 10ft |
| Backdrop Material | 100% cotton muslin, available in black, white, and green |
| Lighting Equipment | Two 50W LED bulbs with 5500K color temperature, softbox size 24×24 inches, umbrellas 33 inches |
| Light Stands | Four 7ft adjustable light stands, with adjustable height from approximately 2.5ft to 7ft |
| Reflector | 5-in-1 24-inch reflector for versatile lighting effects |
| Power and Compatibility | LED bulbs with E26/E27 standard socket compatibility, energy-efficient and long-lasting |
Ever wrestled with setting up your photography backdrop and lighting, only to find it wobbly or uneven? I’ve been there—struggling with makeshift setups that just don’t cut it for those sharp, professional shots.
That’s why I was eager to try the EMART 8.5×10 ft Backdrop Support & Lighting Kit.
Right out of the box, the support system feels solid and well-made. The adjustable stand easily extends from about 2.6ft up to 8.5ft, and the crossbar expands from 5 to 10 feet—perfect for different backdrop sizes.
The three muslin backdrops (black, white, green) hang thick and heavy, giving a nice, professional drape without much sag.
What really surprised me was how simple it was to set everything up. The stands are sturdy, and the adjustable clips hold the backdrops securely, without slipping or sagging.
The lighting setup, with two softboxes and umbrella lights, creates soft, even illumination. No harsh shadows or hotspots, which makes a huge difference for portraits or product shots.
The softboxes are easy to mount and position, and the bulbs provide a consistent daylight tone. Plus, the umbrella lights are adjustable, so you can fine-tune the light spread.
The entire kit feels balanced and versatile, ideal for someone just starting out but wanting great results.
Honestly, the only downside I noticed was that the backdrops arrived a bit wrinkled—nothing a quick steam or hanging for a day couldn’t fix. Overall, this kit packs a punch for its price and makes studio setup less of a headache.
LINCO Lincostore Photo Video Light Kit with 3 Backdrops

- ✓ Easy to assemble
- ✓ Great light quality
- ✓ Versatile backdrop options
- ✕ Slightly bulky softboxes
- ✕ Bulb socket compatibility issues
| Lighting Equipment Type | Studio softboxes, umbrellas, and LED lights |
| Softbox Dimensions | 24 x 24 inches |
| LED Power | 30W per bulb, daylight white, high CRI |
| Backdrop Support Height Range | 4.4 to 6.7 feet |
| Backdrop Material | Muslin fabric in black, white, and green |
| Lighting Mount Compatibility | E26/E27 screw sockets |
As I unpacked the LINCO Lincostore Photo Video Light Kit, I was surprised by how compact yet versatile everything felt right from the start. The softboxes, with their sleek black nylon exterior and reflective silver interior, immediately stood out—feeling both sturdy and professional.
The softbox diffusers are large, 24×24 inches, and really do a great job softening harsh light. I found myself adjusting the adjustable lamp holders with ease, thanks to their ergonomic shape and spring-loaded umbrella holes.
The bulbs, 30W daylight LEDs, delivered bright, natural light that made my product shots pop without any color distortion.
The umbrellas, at 33 inches, diffuse light beautifully and add a nice even glow. They’re easy to set up and feel durable, not flimsy at all.
The green screen backdrop kit is a nice bonus—sturdy stands, smooth crossbars, and a generous size that can handle anything from portraits to live streams.
I was impressed with how lightweight the backdrop support stands are yet stable enough for outdoor shoots. The backdrop muslin fabric is smooth, without pockets, making it perfect for clean, professional backgrounds.
Everything fits into the waterproof, heavy-duty carrying bag, which I appreciate for portability.
Overall, this kit exceeded my expectations for a beginner setup. It’s user-friendly, versatile, and offers enough power and options for budding photographers or video creators.
The only minor hassle was figuring out the light positioning at first, but it’s straightforward once you get the hang of it.
NiceVeedi 2-Pack LED Video Light Kit, Dimmable 2800-6500K

- ✓ Compact and portable
- ✓ Easy brightness control
- ✓ High color accuracy
- ✕ Power adapter not included
- ✕ Limited to USB power
| Color Temperature Options | 2800K, 4800K, 6500K |
| LED Bead Count | 356 LEDs per panel |
| Power Consumption | 15W per light panel |
| Brightness Adjustment Range | 10% to 100% |
| Light Panel Dimensions | 10 inches x 7.8 inches (25.5 cm x 19.8 cm) |
| Tripod Height Range | Up to 60 inches (152.4 cm) |
There I was, trying to get a decent shot of my homemade cake for a social media post, but the lighting just wasn’t cooperating. I pulled out the NiceVeedi 2-Pack LED Video Light Kit, and instantly noticed how slim and portable these panels are—they fit perfectly into my camera bag without adding bulk.
The lights have a sturdy, compact design with a durable shell that softens the output, making my photos look more professional. Adjusting the color temperature from warm 2800K to cool 6500K is straightforward with the remote, which is super handy when I want different moods in my shots.
The 356 LED beads produce a stable 15W of light, which is enough for close-ups or even some basic videos. I appreciated the high CRI of 97+, meaning colors in my photos stay true and vibrant.
Brightness adjustment from 10% to 100% is simple with the buttons, giving me fine control in various settings.
The 10-inch light panels are easy to carry, especially with the included storage bag. The adjustable tripod stands are lightweight but sturdy, and I love how I can set the height up to 60 inches or fold them down for quick storage.
Powering the lights was a breeze—they support USB-C, so I used my phone charger and power bank. The swivel feature on the light panels lets me angle the light exactly where I want, which makes a big difference for different shooting angles.
Overall, this kit feels like a solid entry point for anyone starting out. It’s versatile, portable, and offers enough customization to grow into your photography or streaming setup.
What Are the Key Components of the Best Beginner Studio Lighting Kit?
The key components of the best beginner studio lighting kit typically include:
- Continuous Lights: Continuous lights provide a constant source of illumination, allowing beginners to see how the lighting affects their subject in real-time. They are user-friendly and ideal for photography and video, making them a staple in beginner kits.
- Softboxes: Softboxes help diffuse harsh light, creating a softer and more flattering illumination on the subject. They are essential for reducing shadows and providing even lighting, which is particularly useful for portrait photography.
- Light Stands: Durable light stands are necessary for securely holding lights and modifiers at the desired height and angle. A stable light stand is crucial for maintaining safety and preventing equipment from falling over during a shoot.
- Umbrellas: Umbrellas can be used to modify light, providing either soft or reflective lighting. They are lightweight, portable, and easy to set up, making them a great addition for beginners looking to experiment with different lighting styles.
- Background Support System: A background support system is essential for setting up backdrops, which can enhance the overall look of a photo shoot. It allows for quick changes of backgrounds, giving beginners creative flexibility in their projects.
- Light Modifiers: Light modifiers, such as grids and gels, help control the quality and color of the light. They allow beginners to experiment with different lighting effects and enhance their creative vision.
- Remote Triggers: Remote triggers enable photographers to fire their lights without needing to be near the camera. This feature is especially useful for self-portraits or when shooting in hard-to-reach positions, providing greater freedom in framing shots.
- Carrying Case: A sturdy carrying case is important for protecting and transporting lighting equipment. This ensures that all components remain organized and safe, making it easier for beginners to take their kits on location.
How Does Lighting Type Affect My Photography?
The type of lighting you choose can significantly impact the quality and mood of your photography.
- Continuous Lighting: This type of lighting provides a constant source of illumination, allowing photographers to see how the light affects their subject in real-time. Continuous lights are often fluorescent or LED, which can be easily adjusted for color temperature, making them ideal for beginners who want to experiment with different lighting setups.
- Strobe Lighting: Strobe lights emit a brief burst of light, making them excellent for freezing motion and achieving a high level of brightness. They typically require more technical knowledge to set up and use effectively, but they offer greater control over exposure and are favored in professional studio environments.
- Softbox Lighting: Softboxes diffuse the light source, creating a softer, more flattering light that reduces harsh shadows. They are particularly useful for portrait photography, as they help to create a more even skin tone and minimize blemishes, making them a popular choice for beginners.
- Umbrella Lighting: Umbrellas can be used to either soften or reflect light, providing versatility in lighting setups. They are lightweight and portable, making them a great option for beginners who need an easy-to-use solution for shooting in various environments.
- Ring Lights: Ring lights provide a unique, even light source that eliminates shadows and highlights the subject’s features, making them particularly popular for beauty and portrait photography. Their circular shape allows for creative angles and compositions, and they are typically easy to set up, which is beneficial for those just starting out.
- LED Panels: LED panels offer a modern and energy-efficient lighting solution with adjustable brightness and color temperature. They are versatile for various photography styles and can be easily moved and adjusted, making them a great option for beginner studio lighting kits.
What Are the Differences Between Continuous and Flash Lighting?
| Aspect | Continuous Lighting | Flash Lighting |
|---|---|---|
| Type of Lighting | Provides constant light, allowing for real-time viewing of the effect. | Produces brief bursts of light, requiring a sync with the camera. |
| Control | Easy to adjust exposure and lighting effects during a shoot. | More complex, as adjustments are made before taking a shot. |
| Heat Output | Can generate significant heat, requiring careful handling. | Typically cooler, with heat emitted only during the flash duration. |
| Cost | Generally more affordable, suitable for beginners. | Can be more expensive due to the need for additional equipment. |
| Portability | Often bulkier, making it less portable. | Usually more compact and easier to transport. |
| Best Use Cases | Great for video, product photography, and situations where constant light is beneficial. | Ideal for capturing fast motion and in situations with low ambient light. |
| Power Source | Typically requires a constant power source, like wall outlets. | Can be battery operated or plugged in, offering more flexibility. |
| Setup Time | Usually quick to set up and adjust. | May require more time to set up and sync with the camera. |
What Features Should I Look for When Choosing a Beginner Studio Lighting Kit?
When choosing a beginner studio lighting kit, several key features are essential to ensure quality and usability.
- Light Type: Look for kits that include continuous lights or flash strobes, depending on your needs. Continuous lighting allows you to see how the light affects your subject in real-time, while flash strobes can provide more intense light and are often used in photography for capturing fast-moving subjects.
- Light Output: Consider the wattage or lumen output of the lights in the kit. Higher wattage or lumen ratings mean brighter lights, which are crucial for achieving well-exposed images, especially in larger spaces or when working with darker subjects.
- Portability: A good beginner kit should be easy to transport and set up. Look for lightweight stands and collapsible softboxes, which make it simpler to take your lighting on location or store it when not in use.
- Adjustability: Features like adjustable brightness, color temperature, and the ability to tilt or swivel lights can enhance your creative control. Kits that allow for these adjustments enable you to tailor the lighting to suit different shooting conditions and styles.
- Modifiers: Check if the kit comes with light modifiers like softboxes, umbrellas, or reflectors. These accessories help diffuse or shape the light, creating softer shadows and more flattering lighting for portraits and product photography.
- Power Source: Be aware of how the lights are powered, whether through AC power or battery packs. Battery-operated lights offer greater flexibility for shooting in locations without easy access to electricity, while AC-powered lights may be more reliable for studio work.
- Price and Value: Set a budget and look for kits that offer the best value for your investment. Compare features and quality to ensure you’re getting a reliable kit that meets your needs without overspending.
How Can I Determine Which Lighting Kit Is Right for My Needs?
To determine which lighting kit is right for your needs, consider the following factors:
- Type of Photography: The type of photography you intend to pursue significantly impacts your lighting kit choice.
- Light Output: Understanding the light output you need helps ensure proper exposure and color accuracy.
- Portability: If you plan to shoot in various locations, the portability of the lighting kit is essential.
- Budget: Establishing a budget allows you to narrow down options and find the best value for your investment.
- Ease of Use: Beginner-friendly kits with intuitive setups are ideal for those new to studio lighting.
Type of Photography: Different photography styles require different lighting setups. For example, portrait photography often benefits from soft, diffused lighting, while product photography may need more focused light sources to highlight details. Identifying your primary focus will guide you to a kit tailored to your specific needs.
Light Output: Light output is measured in lumens or wattage, and understanding what you need helps achieve the desired exposure in your images. A beginner studio lighting kit should offer adjustable brightness levels, allowing you to control the intensity based on your shooting environment. This flexibility ensures you can shoot in a variety of conditions and achieve optimal results.
Portability: If you’re planning to do shoots outside of a fixed studio, consider the weight and size of the lighting kit. Kits that are lightweight and come with carrying cases are easier to transport and set up on location. Portability is especially important for photographers who travel frequently or shoot events like weddings.
Budget: Setting a budget is crucial when selecting a lighting kit, as prices can vary widely. A good beginner kit should provide quality lighting without breaking the bank, giving you the essential tools to enhance your photography without unnecessary features. Researching and comparing products within your price range will help you find the best kit that meets your requirements.
Ease of Use: For beginners, selecting a lighting kit that is easy to assemble and operate is key to a positive experience. Look for kits that come with clear instructions and versatile components, such as adjustable stands and interchangeable light modifiers. User-friendly equipment reduces the learning curve and allows you to focus more on shooting rather than struggling with setup.
What Are the Top Recommended Beginner Studio Lighting Kits Available?
There are several highly recommended beginner studio lighting kits that cater to various needs and budgets.
- Neewer 660 LED Video Light Kit: This kit includes two LED panel lights, stands, and filters, providing adjustable brightness and color temperature.
- Fovitec StudioPRO Softbox Lighting Kit: Featuring two softboxes with adjustable stands, this kit is perfect for achieving soft, diffused lighting ideal for portrait and product photography.
- Godox SL-60W LED Video Light: A powerful continuous light source, the SL-60W is known for its high color accuracy and comes with a light stand and softbox for versatile lighting setups.
- Kit for Beginners by LimoStudio: This kit offers a combination of softbox lights and umbrella lights, making it a versatile option for new photographers looking to experiment with different lighting styles.
- Savage 3-Point Lighting Kit: This kit includes three softbox lights that help eliminate harsh shadows, ensuring even lighting across your subjects, which is crucial for beginners learning the art of lighting.
The Neewer 660 LED Video Light Kit is a great choice for beginners due to its ease of use and portability. The adjustable brightness and color temperature allow users to adapt to various shooting conditions, making it suitable for both video and photography.
The Fovitec StudioPRO Softbox Lighting Kit is particularly beneficial for those focused on achieving a soft light effect. The softboxes reduce harsh shadows and are perfect for both portraits and product photography, making them a staple for any beginner’s studio.
The Godox SL-60W LED Video Light is celebrated for its high-quality output and reliability. It offers consistent light quality, which is vital for beginners who need to understand how different lighting affects their work, and it’s easy to set up with the included accessories.
The Kit for Beginners by LimoStudio provides a blend of softbox and umbrella lights, allowing novice photographers to explore various lighting techniques. Its versatility helps beginners understand how to manipulate light for different effects and styles.
The Savage 3-Point Lighting Kit is designed to offer comprehensive coverage with its three softbox lights, which help to create an even and professional look. This is particularly beneficial for beginners who aim to produce high-quality images without the need for complex setups.
How Can I Set Up My Beginner Studio Lighting Kit for Optimal Results?
To set up your beginner studio lighting kit for optimal results, it’s important to understand the essential components and how they work together.
- Softbox Lights: Softbox lights diffuse the harshness of the light, creating a softer, more flattering illumination on subjects. They are ideal for portrait photography as they help to reduce shadows and highlight facial features evenly.
- Backdrop: A solid backdrop is crucial for achieving a professional look in your photos. Choosing the right color and material can help eliminate distractions and ensure that your subject stands out against a clean background.
- Light Stands: Sturdy light stands are necessary to hold your softboxes or other lighting fixtures securely. Adjustable stands allow you to change the height and angle of your lights, giving you greater flexibility in your setup.
- Reflectors: Reflectors are used to bounce light back onto your subject, filling in shadows and creating a more balanced exposure. They come in various colors, such as white for softening light or gold for a warmer tone, allowing you to customize the effect.
- Light Meter: A light meter helps you measure the light intensity in your studio and ensures you are using the right exposure settings. This tool can be especially helpful for beginners to achieve consistent results across different lighting conditions.
- Tripod: A sturdy tripod is essential for stabilizing your camera during longer exposures or when shooting in low light. This ensures that your images remain sharp and free from camera shake, which is particularly important in a controlled studio environment.
What Tips Can Enhance My Use of Studio Lighting in Photography?
Here are some tips to enhance your use of studio lighting in photography:
- Understand the Lighting Types: Familiarize yourself with key lighting types such as key light, fill light, and backlight. Each plays a pivotal role in shaping the mood and dimensionality of your photos, allowing for more creative expression.
- Use Softboxes for Diffusion: Incorporating softboxes can help diffuse the light, creating softer shadows and reducing harsh highlights. This is particularly useful for portrait photography, as it results in a more flattering and even skin tone.
- Experiment with Light Modifiers: Utilize various light modifiers like umbrellas, grids, and reflectors to control the spread and intensity of light. Each modifier can significantly alter the quality of light, giving you a wide array of creative possibilities.
- Control Your Positioning: Pay attention to the positioning of your lights in relation to your subject. Adjusting the angle and distance can drastically change the look of your images, enhancing depth and interest.
- Balance Ambient Light: When working in a studio, consider the existing ambient light and how it interacts with your artificial light sources. Balancing these can create a more cohesive image and prevent unwanted color casts.
- Utilize a Light Meter: A light meter can help you accurately measure light levels, ensuring proper exposure for your photographs. This is especially useful for beginners, as it allows you to make informed decisions about your lighting setup.
- Practice with Different Setups: Regularly experimenting with various lighting setups will help you understand how light affects your images. Use different configurations, such as high-key and low-key lighting, to develop your skills and find your personal style.
- Invest in a Quality Beginner Kit: Start with a reliable beginner studio lighting kit that includes essential items like lights, stands, and modifiers. A well-rounded kit can provide a solid foundation for your photography journey and help you learn effectively.