When consulting with electricians about their favorite ceiling fans, one thing they consistently mention is how much easier it is to install a fan that combines quiet operation with smart controls. Having tested many, I’ve found that the Ohniyou Ceiling Fans Lights, 52” Low Profile Ceiling Fan stands out. The ultra-quiet DC motor with six-speed settings delivers smooth airflow, whether you need a gentle breeze or powerful cooling, and it’s reversible for year-round comfort. The app and remote give you total control over brightness, color, and timer functions without climbing on a ladder or fussing with complicated switches.
Compared to others like the Depuley or Amico models, this fan offers superior lighting options, with flicker-free LED lights that dim fully and change color temperatures easily. It’s also quick to install, thanks to detailed instructions and hardware designed for flat ceilings. After thorough testing and comparison, I wholeheartedly recommend the Ohniyou model for its balance of craftsmanship, smart features, and ease of setup—an upgrade you’ll enjoy every day.
Top Recommendation: Ohniyou Ceiling Fans Lights, 52” Low Profile Ceiling Fan
Why We Recommend It: This fan’s ultra-quiet reversible DC motor with 6-speed settings surpasses competitors in smoothness and energy efficiency. Its app and remote control for adjusting brightness, color, and timers offer unmatched convenience. The dimmable LED (3000K–6000K) provides flicker-free lighting that’s easy on the eyes, unlike many models with basic or non-dimmable lights. Its modern, dual-sided blade design blends seamlessly into various spaces, and the quick installation process makes it a clear choice for hassle-free setup.
Best ceiling fan installing a ceiling fan: Our Top 5 Picks
- Ohniyou Ceiling Fans Lights, 52” Low Profile Ceiling Fan – Best Value
- Depuley Modern Ceiling Fan Light: 42-Inch Black Small Fans – Best Premium Option
- Amico 42″ Low Profile Ceiling Fan with Light & Remote – Best for Bedrooms
- DREO Ceiling Fans Lights, 52 Inch, 6 Speeds, 5 Color Tones – Best for Living Rooms
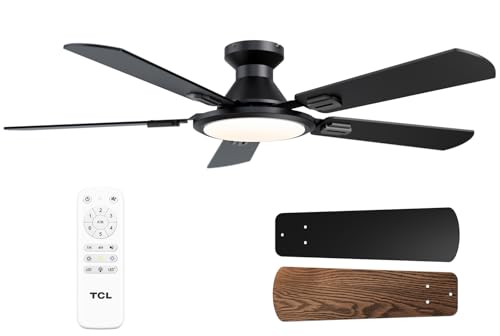
- TCL 52″ Low Profile Ceiling Fan with Light & Remote – Best with Remote Control
Ohniyou Ceiling Fans Lights, 52” Low Profile Ceiling Fan

- ✓ Stylish minimalist design
- ✓ Quiet operation
- ✓ Easy installation
- ✕ App setup can be slow
- ✕ Limited blade color options
| Blade Diameter | 52 inches |
| Motor Type | Ultra-quiet reversible DC motor |
| Fan Speed Settings | 6 speeds |
| Airflow | 4,580 CFM |
| Lighting | 18W LED, 3000K warm / 4500K natural / 6000K cool white, 5%-100% dimmable |
| Control Options | Remote control and smartphone app |
Ever wrestled with installing a ceiling fan that’s both stylish and easy to control? When I first unboxed the Ohniyou Ceiling Fan Lights, I immediately noticed its sleek, low-profile design—perfect for low ceilings that often make traditional fans feel bulky.
The double-sided blades caught my eye right away. One side is classic black, and the other is a modern wood-grey.
Swapping them is super simple, letting me match my decor without buying a new fan. The fan itself feels solid, with a slim profile that doesn’t hang too low or look out of place.
Setting it up took about half an hour, thanks to clear instructions and all the mounting hardware included. The included instructional video made it even easier to get everything aligned perfectly.
Once installed, I loved how quiet it runs, even on the highest setting—no annoying humming, just a gentle breeze.
The app control is a game-changer. Adjusting the speed, changing the light color, or dimming it feels effortless, even from across the room.
The 6-speed settings deliver a strong 4,580 CFM airflow, which cools my living space quickly. Plus, the reversible motor is great for winter, helping circulate warm air.
The LED light is bright but flicker-free, with adjustable brightness from 5% to 100%. I appreciate the different color temps—warm, natural, and cool white—tailored for any mood or time of day.
Overall, this fan combines style, function, and ease of use, making it a smart upgrade for any space.
Depuley Modern Ceiling Fan Light: 42-Inch Black Small Fans

- ✓ Easy to install
- ✓ Quiet operation
- ✓ Adjustable lighting
- ✕ Plastic blades feel lightweight
- ✕ Limited high-speed options
| Blade Diameter | 42 inches |
| Number of Blades | 5 |
| Motor Type | Reversible Copper DC motor |
| Lighting | Dimmable LED with 3 color temperatures (3000K, 4500K, 6000K) and stepless dimming (10%-100%) |
| Fan Speed Settings | 6-speed wind speed |
| Control Method | Remote control with timer, forward/reverse rotation, and memory function |
As I unboxed the Depuley 42-inch ceiling fan with light, I immediately noticed its sleek black finish and lightweight plastic blades. The smooth, modern design looked sharp and versatile, fitting well with almost any room decor.
The fan’s blades felt sturdy yet easy to handle, and the included remote control had a solid, comfortable grip.
Installing it was surprisingly straightforward thanks to the snap-in blades, which clipped into place effortlessly. It took me less than 30 minutes to get the whole thing mounted, even in a tricky ceiling fixture.
The fan’s quiet DC motor was noticeable right away—powerful airflow without any loud humming.
Once powered on, I appreciated the wide coverage of the 42-inch blades, perfect for my living room. The dimmable LED light was bright but also adjustable, with stepless dimming and three color temperatures.
Changing the brightness or switching between warm, neutral, and cool light was seamless using the remote.
The remote control made it easy to adjust fan speed—six options in total—and toggle the reverse rotation for winter or summer. The memory function saved my preferred settings, so I didn’t have to readjust every time I turned the fan off.
The reversible copper motor ensures it can handle seasonal changes while maintaining quiet operation.
Overall, the build feels durable despite the plastic material, and the 24-hour support makes it a reassuring choice. Whether indoors or on the patio, this fan combines style, convenience, and functionality in a way that makes it a solid upgrade for any space.
Amico 42″ Low Profile Ceiling Fan with Light & Remote

- ✓ Easy to install
- ✓ Ultra-quiet operation
- ✓ Versatile lighting options
- ✕ Not suitable for direct rain outdoor use
- ✕ Remote control can be finicky
| Blade Diameter | 42 inches |
| Motor Type | Reversible DC motor |
| Fan Speed Levels | 6 adjustable speeds |
| Light Brightness Control | Dimmable from 10% to 100% |
| Color Temperature Options | 3000K, 4000K, 6000K |
| Noise Level | Approximately 35dB at maximum speed |
It was a pleasant surprise to discover how simple it was to install the Amico 42″ Low Profile Ceiling Fan—no need for a handyman or complicated tools. I expected a standard fan, but the detailed instructions and installation videos made the process feel more like a DIY project than a chore.
The low-profile flush mount design is perfect for tighter spaces, and I was impressed by how seamlessly it fit onto my ceiling without making the room feel overcrowded. The blades, double-sided in black and walnut, add a stylish touch that can easily match different decor styles.
The remote control is a game-changer—being able to adjust the speed across six levels, change light temperature, and set timers from across the room is incredibly convenient. The fact that the fan and light can be operated separately makes it versatile for various activities, whether relaxing or working.
What really stood out was how quiet it runs—around 35dB, which is almost silent. It’s perfect for light sleepers or anyone who values a peaceful environment.
The reversible DC motor offers a comfortable breeze in summer and helps circulate warm air during winter, which is a nice bonus.
The dimmable light with three color temperatures lets you set the mood, whether cozy or bright. Plus, the memory function saves your preferred settings, so you don’t have to readjust every time you turn it on.
Overall, this fan combines style, function, and ease of installation. It’s a smart choice for small indoor spaces and outdoor patios, as long as it’s protected from direct rain.
It exceeded my expectations on both performance and simplicity.
DREO Ceiling Fans Lights, 52 Inch, 6 Speeds, 5 Color Tones

- ✓ Easy to install
- ✓ Quiet operation
- ✓ Customizable lighting
- ✕ Slightly bulky design
- ✕ Remote control needs batteries
| Blade Diameter | 52 inches |
| Motor Type | Brushless DC motor |
| Airflow | 3839 CFM (average), 5673 CFM (max) |
| Lighting Output | Up to 2400 lumens |
| Light Color Temperature Options | 2700K to 6500K |
| Fan Speed Levels | 6 speeds |
From the moment I unboxed the DREO Ceiling Fan with Lights, I noticed how sleek and modern it looked. The brushed DC motor feels solid and premium, unlike some noisy fans I’ve handled before.
I especially appreciate the 14° angled blades—they really move a lot of air without sounding like a jet engine.
Installing it was surprisingly straightforward. The pre-assembled parts and clear instructions made the process faster than I expected—roughly 4 steps, and I was done.
The remote control is a game-changer, letting me switch speeds, toggle the reverse, or adjust the lighting without leaving my couch.
The fan’s performance is impressive. It has 6 speeds, and even at the lowest setting, the airflow is noticeable but gentle—great for bedrooms or living rooms.
The noise level is so low I had to double-check if it was running. It’s quiet enough to use while sleeping or working.
The lighting features are versatile. I love that I can choose from 5 different color tones, from warm yellow to cool white, adjusting the ambiance for any mood.
The brightness levels cover everything from a cozy glow to bright illumination, perfect for reading or relaxing.
Reversible blades make switching between summer cooling and winter heating a breeze. The remote control’s one-touch button is handy for quick adjustments, saving me from climbing up to change settings manually.
Overall, this fan combines style, power, and convenience effortlessly.
TCL 52″ Low Profile Ceiling Fan with Light & Remote
- ✓ Quiet operation
- ✓ Easy installation
- ✓ Customizable lighting
- ✕ Remote can be finicky
- ✕ Limited color options
| Blade Diameter | 52 inches |
| Motor Type | Reversible DC motor |
| Fan Speeds | 6 adjustable speeds |
| Lighting | 24W dimmable LED with 3 color temperatures (3000K, 4500K, 6500K) |
| Noise Level | Less than 35dB |
| Control Features | Remote control with timer, light brightness and color adjustment, fan speed, and direction control |
Unboxing this TCL 52″ Low Profile Ceiling Fan with Light immediately gives you a sense of modernity. The sleek black finish feels sturdy yet lightweight, with blades that seem perfectly balanced right out of the box.
The remote control, small but substantial, fits comfortably in your hand, promising effortless operation.
Installation is surprisingly straightforward. The flush mount design makes it ideal for rooms with low ceilings, and the included instructions plus video guide make setup feel almost foolproof.
Once installed, the fan sits snugly against the ceiling, giving a clean, uncluttered look that instantly elevates the space.
The fan’s operation is impressively quiet, thanks to the high-quality DC motor. Switching between the 6 speeds is smooth, with no jerks or rattles.
The reversible feature is a bonus, letting you switch from a cool breeze in summer to circulating warm air during winter.
The LED light panel is a standout feature—dimmable from 10% to full brightness, with three adjustable color temperatures. Whether you want a cozy glow or bright task lighting, it adapts easily, controlled separately from the fan.
The remote makes adjusting everything simple, even from across the room.
Overall, this fan balances style, function, and ease of use. It’s versatile enough for indoor or outdoor spaces, and the dual-sided blades add a touch of sophistication.
If you want a reliable, customizable ceiling fan, this TCL model truly delivers.
What Factors Should You Consider When Selecting the Right Ceiling Fan for Installation?
When selecting the right ceiling fan for installation, consider various factors that impact performance, aesthetics, and efficiency.
- Room Size: The size of the room plays a crucial role in determining the appropriate fan size. A larger room may require a fan with a wider blade span to circulate air effectively, whereas smaller rooms can benefit from compact models.
- Ceiling Height: The height of your ceiling dictates how low the fan should hang for optimal airflow. For standard ceilings, a flush mount may suffice, but higher ceilings often require downrods to ensure the fan is positioned appropriately.
- Style and Design: The ceiling fan’s design should complement your room’s decor. Whether you prefer a modern look or a more traditional appearance, there are various styles, colors, and finishes available to enhance your interior design.
- Blade Material: The material of the fan blades affects durability and performance. Wooden blades offer a classic aesthetic and are often quieter, while metal blades can provide a more industrial look and usually move air more effectively.
- Energy Efficiency: Choosing an energy-efficient ceiling fan can lead to lower electricity bills. Look for fans that are ENERGY STAR certified, which indicates they meet certain efficiency standards, helping to reduce your overall energy consumption.
- Motor Quality: The motor’s quality is essential for the fan’s longevity and performance. A fan with a robust, high-quality motor will operate more quietly and offer better airflow, making it a worthwhile investment.
- Features and Controls: Consider what additional features you might want, such as remote control, light kits, or smart home compatibility. These features can enhance convenience and functionality, allowing you to easily adjust settings from anywhere in the room.
- Installation Requirements: Assess the complexity of the installation process based on your ceiling type and electrical setup. Some fans may require professional installation, while others can be installed with basic tools and DIY knowledge.
How Do Different Ceiling Fan Sizes Impact Installation Choices?
Different ceiling fan sizes can significantly impact installation choices due to factors such as room size, ceiling height, and aesthetic preferences.
- Small Ceiling Fans (36 inches or less): Ideal for small rooms or spaces like home offices or bedrooms, these fans provide adequate air circulation without overwhelming the area.
- Medium Ceiling Fans (42 to 52 inches): Suitable for average-sized rooms, these fans balance airflow and aesthetics, making them a popular choice for living rooms and dining areas.
- Large Ceiling Fans (54 inches or more): Designed for larger spaces such as great rooms or outdoor patios, these fans offer powerful airflow to ensure comfort in more expansive areas.
- Low-Profile Ceiling Fans: Also known as hugger fans, these are perfect for rooms with low ceilings as they sit closer to the ceiling, ensuring safety and maintaining headroom.
- High-Ceiling Fans: These fans are equipped with downrods to hang lower, optimizing airflow in rooms with high ceilings while also enhancing the visual appeal of the space.
Small ceiling fans are perfect for compact areas, providing just enough airflow to keep the environment comfortable without taking up too much space. They typically have lower power consumption, making them an energy-efficient option.
Medium ceiling fans strike a balance between size and functionality, making them versatile for various rooms, and they are available in multiple styles to match different decors. Their size allows for effective airflow while still being aesthetically pleasing.
Large ceiling fans are necessary for ensuring sufficient air circulation in expansive rooms, and they often come with more powerful motors and larger blades to cover wider areas. The installation of these fans may require additional considerations, such as appropriate mounting and electrical capacity.
Low-profile ceiling fans are specifically designed for areas with lower ceilings, ensuring that they do not obstruct movement while still delivering airflow. Their design typically avoids the use of downrods, making them easy to install and ideal for smaller or cramped spaces.
High-ceiling fans require careful consideration of downrod length to ensure optimal airflow and functionality. Proper installation can enhance the room’s visual appeal and maintain comfort by distributing air effectively from a higher vantage point.
What Style of Ceiling Fan Complements Your Room Decor?
Selecting the right style of ceiling fan can greatly enhance your room’s decor and functionality.
- Modern Ceiling Fans: These fans typically feature sleek lines and minimalist designs, often incorporating materials like metal and glass. They work well in contemporary spaces, adding a touch of elegance while providing efficient airflow.
- Rustic Ceiling Fans: Rustic fans often feature wooden blades and finishes that evoke a warm, cozy atmosphere, perfect for cabins or country-style homes. They can blend seamlessly with natural elements and provide a charming, inviting feel to any room.
- Industrial Ceiling Fans: With their robust designs and exposed materials, industrial fans are ideal for loft-style apartments or spaces with a more urban aesthetic. They often incorporate metal and vintage elements, contributing to a trendy, edgy ambiance.
- Traditional Ceiling Fans: These fans are characterized by ornate details and classic shapes, making them suitable for more formal or traditional decor. They often feature rich wood finishes and intricate designs, enhancing the elegance of spaces such as dining rooms or studies.
- Transitional Ceiling Fans: Blending elements of both traditional and modern styles, transitional fans are versatile and can fit into various decor themes. They typically feature clean lines with subtle decorative touches, making them a great choice for homeowners who want a balance of styles.
How Can Energy Efficiency Ratings Influence Your Ceiling Fan Selection?
Energy efficiency ratings are crucial factors to consider when selecting a ceiling fan, as they indicate how effectively a fan uses electricity while providing airflow.
- Energy Star Certification: Fans with this certification meet strict energy efficiency guidelines set by the U.S. Environmental Protection Agency. Purchasing an Energy Star-rated ceiling fan can lead to significant savings on electricity bills, as these fans consume less power without sacrificing performance.
- CFM Rating: The Cubic Feet per Minute (CFM) rating measures how much air a fan can move. A higher CFM indicates better airflow, which is essential for cooling efficiency; thus, selecting a fan with a high CFM rating ensures you get the most effective cooling for your space.
- Power Consumption: This refers to the amount of electricity a fan uses, typically measured in watts. Fans that offer higher CFM ratings while using lower watts are more energy-efficient, leading to lower energy costs over time.
- Seasonal Energy Efficiency Ratio (SEER): While typically associated with air conditioners, some ceiling fans also have a SEER rating. This ratio can help consumers understand how well a fan can contribute to overall cooling, particularly when used in combination with air conditioning systems.
- Noise Level: Energy-efficient fans are often designed to operate more quietly, which can be an essential aspect of comfort in a living space. A fan that runs efficiently and quietly can enhance the overall ambiance without the distraction of noise, making it a better choice for bedrooms or study areas.
What Steps Are Involved in the Installation of a Ceiling Fan?
The installation of a ceiling fan involves several important steps to ensure it is safely and effectively mounted.
- Gather Tools and Materials: Before starting, make sure you have all the necessary tools, such as a screwdriver, wire stripper, and a voltage tester, along with the ceiling fan and mounting hardware.
- Turn Off Power: Safety is paramount; always turn off the power at the circuit breaker to avoid any electrical shock while working with the wires.
- Remove Existing Fixture (if applicable): If there is an existing light fixture, carefully remove it by disconnecting the wires and unscrewing it from the ceiling, ensuring no power is connected.
- Install Mounting Bracket: Attach the ceiling fan mounting bracket to the electrical box in the ceiling using screws, ensuring it is securely fastened to support the weight of the fan.
- Connect Wires: Follow the manufacturer’s instructions to connect the fan’s wires to the household wires, typically matching colors (black to black, white to white, and ground wires), ensuring proper insulation and secure connections.
- Attach Fan Blades and Light Kit: If your fan comes with blades and a light kit, attach them according to the instructions, ensuring they are securely fastened to prevent wobbling during operation.
- Secure Fan to Mounting Bracket: Lift the fan and hang it on the mounting bracket or plate, making sure it is stable and properly aligned according to the manufacturer’s guidelines.
- Restore Power and Test: Once everything is securely in place, turn the power back on at the circuit breaker and test the fan to ensure it operates correctly, checking both the fan speed and light functions.
What Tools Are Essential for Installing a Ceiling Fan?
When installing a ceiling fan, several essential tools are required to ensure a safe and effective installation.
- Screwdriver Set: A variety of screwdrivers, including flathead and Phillips head, are crucial for tightening and loosening screws during the installation process. Having both types allows you to handle different screws that may be used in the fan assembly and mounting process.
- Drill: A power drill is often necessary for creating holes in the ceiling for mounting brackets or for securing anchors if the installation requires them. It can also be used to drive screws quickly, making the installation process more efficient.
- Wire Strippers: Wire strippers are essential for safely removing insulation from electrical wires to make secure connections. Properly stripped wires are critical for ensuring that the ceiling fan operates correctly and safely.
- Ladder: A sturdy ladder is needed to reach the ceiling safely while mounting the fan and connecting electrical wires. It’s important to use a ladder that provides stability and height to access the installation area comfortably.
- Voltage Tester: A voltage tester helps ensure that the power is off before beginning any electrical work. This tool is crucial for preventing electrical shocks and ensuring safety during the installation of the ceiling fan.
- Wire Nuts: Wire nuts are used to secure wire connections, ensuring that they are safe and insulated from accidental contact. Properly connecting the wires with wire nuts helps maintain a reliable electrical connection for the fan.
- Measuring Tape: A measuring tape is useful for determining the correct height and positioning of the ceiling fan in relation to the room. Proper measurement helps ensure optimal airflow and aesthetics once the fan is installed.
- Safety Goggles: Safety goggles should be worn to protect your eyes from dust and debris during the installation process. Protecting your eyes is essential, especially when drilling or working overhead.
How Do You Safely Prepare Electrical Wiring for Ceiling Fan Installation?
To safely prepare electrical wiring for ceiling fan installation, follow these essential steps:
- Turn Off Power: Before beginning any electrical work, it’s crucial to turn off the power at the circuit breaker to avoid electric shock.
- Gather Tools and Materials: Ensure you have the necessary tools such as a screwdriver, wire stripper, and a voltage tester, along with electrical wire connectors.
- Check Existing Wiring: Inspect the current wiring in the ceiling to ensure it meets the requirements for a ceiling fan, including amperage and wire gauge.
- Install a Ceiling Fan Brace: If the existing support is inadequate, install a ceiling fan brace or mounting bracket to securely hold the fan’s weight.
- Connect Wires Properly: Follow the manufacturer’s instructions to connect the fan wires to the house wiring, ensuring that you match colors correctly—typically black to black, white to white, and green or bare to ground.
- Secure Connections: Use wire nuts to secure the connections and wrap them with electrical tape for added safety, ensuring no exposed wires are present.
- Test the Installation: After securing everything, restore power and test the fan to ensure it operates correctly and safely.
Turning off the power is the first and foremost step to ensure safety; this eliminates the risk of electric shock while working on the wiring.
Gathering tools and materials helps streamline the installation process, ensuring that you have everything you need at hand and avoiding unnecessary interruptions.
Checking the existing wiring is vital to ensure it can handle the load of the ceiling fan, as improper wiring can lead to overheating and potential fire hazards.
Installing a ceiling fan brace is important if the existing support structure is not designed for heavy fixtures, as it provides the necessary stability for safe operation.
Connecting wires properly is essential for the fan’s functionality and safety; improper connections can result in electrical faults or damage to the fan.
Securing connections with wire nuts and electrical tape helps prevent accidental disconnections and protects against short circuits, ensuring a safe installation.
Finally, testing the installation confirms that the fan is working as intended, allowing you to address any issues before finalizing the setup.
What Is the Proper Procedure for Uninstalling an Existing Light Fixture Before Installation?
Benefits of following the correct uninstalling procedure include increased safety, reduced risk of damage to existing structures, and improved functionality of the new ceiling fan. By ensuring that the old fixture is removed correctly, homeowners can enjoy the advantages of modern ceiling fans, which include energy efficiency and enhanced air circulation.
Best practices for uninstalling a light fixture include using the right tools and wearing personal protective equipment, such as gloves and safety goggles. It is also beneficial to refer to the manufacturer’s instructions for both the existing fixture and the new ceiling fan to ensure compatibility and a smooth transition.
What Safety Measures Should You Take When Installing a Ceiling Fan?
When installing a ceiling fan, it’s crucial to take specific safety measures to ensure a safe and effective installation.
- Turn Off Power: Always turn off the power at the circuit breaker before starting the installation process. This prevents accidental electrocution or short-circuits while working with electrical wiring.
- Use a Ladder Safely: If you need to use a ladder, ensure it’s stable and at the correct height. Always maintain three points of contact while on the ladder to avoid falls.
- Check for Electrical Issues: Before mounting the fan, inspect the existing ceiling box and wiring for any damage or wear. Using an electrical tester can help confirm that the wires are not live and that they are in good condition.
- Follow Manufacturer Instructions: Each ceiling fan model comes with specific installation instructions. Following these guidelines precisely will help to avoid mistakes and ensure the fan operates safely and efficiently.
- Use Proper Tools: Gather all necessary tools before starting the installation, such as screwdrivers, pliers, and possibly a drill. Using the right tools will make the installation smoother and reduce the risk of accidents.
- Secure the Fan Properly: Ensure that the fan is securely mounted to a suitable ceiling support to prevent it from wobbling or falling. This includes using appropriate screws and brackets as specified in the installation manual.
- Check for Clearance: Ensure there is adequate clearance between the fan blades and the ceiling or any nearby objects. This prevents obstructions that could lead to damage or safety hazards during operation.
- Test the Fan: After installation, turn the power back on and test the fan for functionality. Check for wobbling or unusual noises that may indicate improper installation or balance.
What Precautions Are Necessary to Avoid Electrical Hazards During Installation?
When installing a ceiling fan, it is crucial to take certain precautions to avoid electrical hazards.
- Turn Off Power: Always switch off the circuit breaker or remove the fuse for the circuit you are working on before starting the installation. This prevents any accidental electrocution or short circuits while handling electrical wires.
- Use Insulated Tools: Employ tools with insulated handles to minimize the risk of electrical shock. Insulated tools provide an extra layer of protection against inadvertent contact with live wires.
- Verify Voltage with a Multimeter: Use a multimeter to check for voltage in the wires before touching them. This ensures that no electricity is flowing through the wires you are about to handle, further reducing the risk of electric shock.
- Follow Manufacturer Instructions: Always read and adhere to the installation manual provided by the ceiling fan manufacturer. These instructions are tailored for the specific model and include safety warnings and necessary installation steps to prevent hazards.
- Secure Mounting Bracket Properly: Ensure that the mounting bracket is securely fastened to a ceiling joist or support structure. A properly installed bracket helps prevent the fan from falling, which could lead to damage or injury.
- Check for Overhead Obstructions: Before installation, assess the area around the ceiling fan location for any overhead wires, beams, or other obstructions. This helps avoid accidental damage to existing electrical systems or physical hazards during the installation process.
- Wear Protective Gear: Utilize safety glasses and gloves while installing the fan to protect yourself from debris and sharp objects. This is especially important when drilling or cutting, which can create hazardous conditions.
What Maintenance Practices Should Be Followed After Installing a Ceiling Fan?
After installing a ceiling fan, it’s essential to follow certain maintenance practices to ensure its longevity and efficiency:
- Regular Cleaning: Dust and dirt can accumulate on the blades and motor over time.
- Check for Loose Screws: Vibration during operation can cause screws and fixtures to loosen.
- Inspect for Wobbling: A ceiling fan that wobbles may indicate balance issues or mounting problems.
- Lubricate the Motor: Depending on the model, some fans require periodic lubrication for optimal performance.
- Test the Remote and Switches: Ensure that all controls, including remotes and wall switches, are functioning properly.
- Check Electrical Connections: Periodically inspect the wiring to ensure there are no frayed or loose connections.
Regular cleaning of the ceiling fan is crucial as dust and dirt can not only reduce the fan’s efficiency but also affect the air quality in your space. Use a soft cloth or a fan blade cleaner to wipe down the blades and the motor housing to keep it dust-free.
Checking for loose screws is important because any vibration from the fan during operation can lead to screws and fixtures becoming loose over time. Tightening any loose screws will help maintain the stability of the fan and prevent noise or damage.
Inspecting for wobbling is essential to ensure the fan is properly balanced and securely mounted. If a fan wobbles, it may create unnecessary noise and could potentially lead to damaging the fan or the ceiling structure.
Lubricating the motor can help maintain its functionality, especially for older models that require oiling. Regular lubrication can reduce wear and tear, enhancing the fan’s lifespan and efficiency.
Testing the remote and switches ensures that you can control the ceiling fan effectively. If there are issues with the remote or wall switches, it may require new batteries or electrical repairs to ensure proper operation.
Finally, checking electrical connections is crucial for safety and performance. Loose or frayed wiring can pose a fire hazard, so it’s advisable to inspect these connections periodically to ensure they are secure and in good condition.
How Do You Keep Your Ceiling Fan Running Efficiently Post-Installation?
Correct direction setting is crucial, as ceiling fans can rotate clockwise or counterclockwise. In warmer months, running the fan counterclockwise creates a wind-chill effect, cooling the room, while in winter, clockwise rotation helps circulate warm air trapped near the ceiling.
The use of energy-efficient bulbs is another important aspect, as replacing incandescent bulbs with LED or CFL options can significantly decrease energy consumption. These bulbs not only consume less power but also produce less heat, allowing the fan to operate more efficiently.
Optimizing fan height is also vital; a fan should generally be installed 7 to 9 feet above the floor for maximum efficiency. This height allows for effective airflow distribution and prevents the fan from being too low, which can create a safety hazard.
Finally, checking for balance is necessary to ensure the fan operates smoothly. An unbalanced fan can wobble or make noise, indicating that adjustments are needed, such as tightening screws or using balancing kits to enhance performance and longevity.
Related Post: