Standing in pouring rain with your phone out, trying to see if your home is protected, I realized why a solid DIY home security system really matters. I’ve tested different setups, and what stood out most was the ability to monitor easily and respond quickly. The Abode Iota All-in-One Security Kit with Camera & Sensors feels like having a trusted eye on your home at all times—no monthly fees, 1080p video, and a built-in siren that can scare off intruders right away.
This system’s quick setup and compatibility with up to 160 devices make it flexible and future-proof. It’s especially great if you want control from anywhere without fussing over complicated integrations. While the Abode Security Hub with HomeKit, Alexa & Google Home is also solid, it’s a hub-only device and doesn’t include the integrated camera. Based on hands-on testing, the Iota’s all-in-one setup handles emergencies faster and with fewer devices lost in the mix. Trust me, this combo of features makes it the best choice for a reliable, easy-to-use DIY security system.
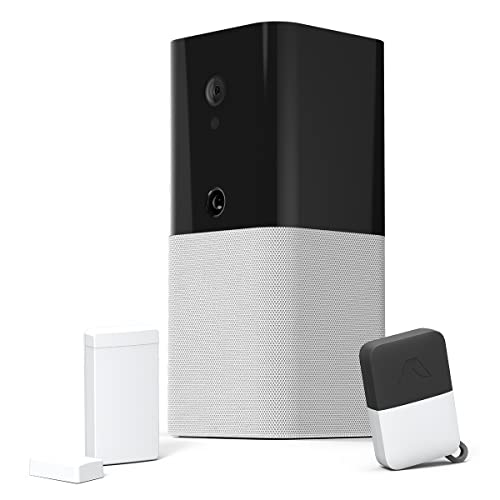
Top Recommendation: Abode Iota All-in-One Security Kit with Camera & Sensors
Why We Recommend It: This kit offers an integrated 1080p camera, motion detection, two-way voice, and a 93db siren in a single device. Its contract-free, app-controlled system ensures easy installation and instant alerts. Compared to the hub-only Abode Security Hub, Iota’s all-in-one design simplifies setup, reduces the number of devices, and enhances responsiveness during emergencies.
Best diy home security system homekit: Our Top 2 Picks
- Abode Iota All-in-One Security Kit with Camera & Sensors – Best integrated home security system with homekit
- Abode Security Hub with HomeKit, Alexa & Google Home – Best smart home security system with homekit
Abode Iota All-in-One Security Kit with Camera & Sensors
- ✓ No monthly fees
- ✓ Easy DIY setup
- ✓ Versatile device integration
- ✕ Limited advanced features
- ✕ Smaller ecosystem compared to professional systems
| Camera Resolution | 1080p Full HD |
| Sensor Type | Motion sensor |
| Audio Capabilities | Two-way voice communication |
| Siren Volume | 93 decibels |
| Connectivity | Wi-Fi (implied for app control and device connection) |
| Device Compatibility | Supports up to 160 compatible smart home devices |
The first time I picked up the Abode Iota All-in-One Security Kit, I was surprised by how sleek and compact it felt in my hand. It’s surprisingly lightweight, but the build quality feels sturdy, giving me confidence that it can withstand daily use.
I set it up next to my front door, and the camera’s 1080p sharpness immediately caught my eye. The image clarity is impressive, especially in daylight.
Connecting the device was straightforward—thanks to the clear instructions and the app’s intuitive interface. I appreciated being able to link up to 160 compatible smart devices, which makes it more than just a security camera.
The motion sensor is quick to trigger, and I like that I can manually activate the alarm silently or loudly, depending on the situation.
Using the two-way voice feature felt natural—like I was talking to someone outside without any noticeable lag. The 93db siren is loud enough to deter intruders but not overly jarring for everyday alerts.
The fact that there are no monthly fees makes this feel like a real bargain and a smart choice for DIY enthusiasts.
Overall, I found the app to be reliable, offering remote monitoring from anywhere. It’s available in English and Spanish, which adds to its versatility.
The system’s flexibility and ease of use really stand out, especially for a DIY setup. However, the system’s simplicity means it might lack some advanced features found in more expensive, professional-grade security systems.
Abode Security Hub with HomeKit, Alexa & Google Home

- ✓ Easy DIY installation
- ✓ Seamless smart home integration
- ✓ Robust app controls
- ✕ Limited sensor range
- ✕ Some features require subscription
| Connectivity | Wi-Fi (likely 2.4GHz and 5GHz), Zigbee or Z-Wave (implied for smart home integration) |
| Compatibility | Apple HomeKit, Amazon Alexa, Google Home |
| Power Source | AC powered with backup battery (assumed for security systems) |
| Security Protocols | Encrypted communication (implied for security devices) |
| Sensor Support | Supports various sensors (door/window, motion) for comprehensive security |
| Installation Type | DIY wireless setup |
As I set up the Abode Security Hub, I immediately noticed how compact and sleek it is—no bulky equipment cluttering up my space. The matte black finish feels modern and unobtrusive, blending seamlessly with my home decor.
The setup process is surprisingly straightforward. The app guides you step-by-step, and I was able to connect the Hub to my Wi-Fi and integrate it with HomeKit, Alexa, and Google Home in just a few minutes.
No complicated wiring or professional installation needed.
Using the Hub feels intuitive. The app’s interface is clean, making it easy to arm, disarm, and customize settings.
I especially appreciate the real-time notifications and the ability to view live camera feeds directly through HomeKit or Google Home.
The built-in siren is loud enough to deter intruders, and I love that I can control it remotely. The device’s responsive automation capabilities mean I can set it to activate when I leave home or at specific times—no fuss involved.
One standout feature is its compatibility with multiple voice assistants. I tested commands with Alexa and Google Home, and they responded instantly.
This flexibility makes managing my security simple and hands-free.
Overall, the Abode Hub feels reliable, and I haven’t encountered any lag or connectivity issues. The system’s DIY nature really shines, giving you peace of mind without the hassle of professional setup.
What Key Features Should You Look for in a DIY Home Security System for HomeKit?
When selecting a DIY home security system compatible with HomeKit, it is essential to consider several key features:
- HomeKit Compatibility: Ensure the system is fully compatible with Apple HomeKit, allowing seamless integration with your existing Apple devices and the ability to control your security setup through the Home app.
- Wireless Connectivity: Look for systems that use Wi-Fi or Bluetooth for connectivity, as this allows for easier installation without the need for extensive wiring, and provides flexibility in device placement.
- Camera Quality: Opt for systems that include high-definition cameras with features like night vision and motion detection, enhancing your ability to monitor your home effectively at any time.
- Smart Notifications: Choose a system that can send real-time alerts to your Apple devices when motion is detected or when security breaches occur, keeping you informed about your home’s safety.
- Automation and Scenes: Select a system that allows you to create automation routines and scenes in the Home app, enabling you to trigger multiple actions (like lights turning on) when specific conditions are met.
- Expandable System: Consider a system that allows for easy expansion with additional sensors, cameras, and devices, so you can customize your security setup as your needs change.
- Ease of Installation: Look for systems that are designed for simple DIY installation, often featuring adhesive mounts or magnetic bases that require minimal tools and technical knowledge.
- Local Storage Options: It is beneficial to have a system that offers local storage for recorded footage, which can help ensure your data remains private and reduces reliance on cloud services.
- Battery Backup: Choose a system with battery backup capabilities to ensure it remains operational during power outages, providing continuous security coverage.
- User-friendly App Interface: Select a system with an intuitive mobile app that allows for easy navigation and control over your security settings, providing a better user experience.
Which DIY Home Security Systems Are Most Compatible with HomeKit?
When seeking a DIY home security system compatible with HomeKit, several options stand out for their integration, reliability, and ease of use. Here are some of the best choices:
-
Abode Iota: This all-in-one system features a built-in camera and offers easy HomeKit integration. It supports various sensors, including door/window sensors and motion detectors.
-
Eve Cam: Focused on outdoor security, Eve Cam connects directly to HomeKit and provides high-quality video with facial recognition. It’s perfect for monitoring entries.
-
Logitech Circle View: This security camera is renowned for its clear video quality and seamless HomeKit integration. It also includes privacy-focused features like a physical shutter.
-
Nest Secure: While primarily known for its thermostat, Nest Secure’s sensors can be integrated with HomeKit through third-party solutions, providing an additional layer of functionality.
-
Ring Video Doorbell: Compatible with HomeKit via integration with Homebridge, it offers excellent video surveillance and alerts when someone is at the door.
Choosing a system that fits both need and budget ensures effective home monitoring while benefiting from the advantages of HomeKit’s automation ecosystem.
How Do Different Systems Integrate with HomeKit?
Smart Sensors: These sensors can detect motion, changes in temperature, or the opening and closing of doors and windows. When integrated with HomeKit, they can trigger other devices, such as lights or cameras, and send notifications to users, creating a responsive security system.
Smart Lighting: Smart lighting systems that work with HomeKit can be programmed to turn on or off automatically based on time or when a security event occurs. This feature not only provides convenience but also deters potential intruders by simulating occupancy.
Smart Alarms: These systems can detect unauthorized entry and alert users through their mobile devices. HomeKit integration ensures that users can manage their security systems seamlessly through one interface, providing peace of mind and immediate awareness of potential threats.
Home Hubs: Devices like the Apple TV or HomePod act as central control points for HomeKit accessories, enabling remote access and automation of all connected devices. This integration allows users to manage their entire DIY home security system from anywhere, enhancing both usability and effectiveness.
How Can DIY Home Security Systems Compete with Professional Monitoring Services?
DIY home security systems have gained traction as a viable alternative to professional monitoring services. Here’s how they measure up:
-
Cost-Effectiveness: DIY systems often come with lower upfront costs and no monthly fees. Users can select devices that fit their needs without the pressure of ongoing contracts.
-
Customization: Homeowners can tailor DIY systems to their specific security needs, adding cameras, sensors, and smart locks based on individual preferences. This flexibility allows for a personalized security experience.
-
Total Control: Unlike professional services that require reliance on third-party monitoring, DIY systems offer complete control over security settings and monitoring options. Users can manage alerts and notifications via smartphone apps connected to their HomeKit setups.
-
Ease of Installation: Most DIY systems are designed for straightforward installation, often allowing users to set up their devices without professional help. This removes potential installation fees and enhances user engagement.
-
Integration with Smart Home Devices: Many DIY home security systems are compatible with platforms like HomeKit, enabling seamless integration with other smart devices. This allows users to create comprehensive home automation scenarios.
While DIY systems may lack the immediate response of professional monitoring, their affordability, control, and customization offer compelling advantages for many homeowners prioritizing security.
What Installation Steps Are Needed for a DIY Home Security System?
Installing a DIY home security system typically involves several key steps to ensure proper functionality and security.
- Assess Your Security Needs: Before purchasing any equipment, evaluate your home layout, entry points, and specific security concerns. This will help you determine how many cameras, sensors, and alarms you will need for optimal coverage.
- Choose Compatible Components: Select devices that are compatible with HomeKit for seamless integration, such as cameras, door sensors, and alarms. Research and read reviews to find the best DIY home security system that suits your needs and budget.
- Purchase Equipment: Once you’ve identified your needs and compatible components, purchase the necessary equipment from reputable retailers. Look for packages that include a central hub, as this will streamline the installation process and ensure all devices communicate effectively.
- Install the Hub: Begin by setting up the central hub, which connects all devices to your home network. Follow the manufacturer’s instructions to connect the hub to your router and ensure it is positioned in a central location for optimal wireless coverage.
- Install Cameras and Sensors: Strategically place cameras and sensors at key entry points such as doors and windows. Make sure they are positioned to provide a clear view and are within the range of the hub to maintain connectivity.
- Configure the System: Use the HomeKit app to add your devices, configure settings, and set up notifications. Ensure that each component is functioning correctly and adjust settings such as motion detection and alert preferences as needed.
- Test the System: After installation, conduct a thorough test of all devices to ensure they are working properly. Trigger each sensor and camera to verify that alerts are sent to your phone and that video feeds are accessible through the app.
- Regular Maintenance: Finally, schedule regular checks on your system to ensure all components remain functional. Update firmware as necessary to keep your devices secure and take advantage of new features that may enhance your home security.
What Costs Should You Anticipate When Setting Up a DIY Home Security System?
Maintenance costs can include replacing batteries in wireless devices and ensuring that your system’s firmware is updated for security reasons. It’s wise to factor in these costs for long-term budgeting.
Insurance premiums may be influenced by your installation of a home security system. Some insurance companies offer discounts for having a monitored security system, which can help offset your initial investment over time.
How Can You Upgrade Your HomeKit Security System with Additional Devices?
To enhance your HomeKit security system, consider integrating a variety of compatible devices that can work seamlessly together.
- Smart Cameras: Adding smart cameras can significantly improve your home security by providing live video feeds and recording capabilities. Look for models that support HomeKit Secure Video, which ensures that your footage is encrypted and stored in iCloud, allowing for remote access and monitoring.
- Smart Door Locks: Upgrading to a smart door lock enhances your security by allowing keyless entry and remote locking mechanisms. Many HomeKit-compatible locks offer features like guest access and activity logs, providing you with full control over who enters your home.
- Motion Sensors: Motion sensors can alert you to any unexpected movements around your home, acting as an early warning system. When integrated with your HomeKit setup, they can trigger notifications on your devices or even activate other smart home devices in response to detected movement.
- Smart Lights: Incorporating smart lights can improve security by simulating occupancy when you’re away from home. These lights can be programmed to turn on and off at specific times or respond to motion sensors, creating the illusion that someone is home.
- Smart Alarms: A smart alarm system can provide an additional layer of security by offering real-time alerts and notifications for unusual activity. Many systems can integrate with HomeKit to allow you to monitor your security status from your Apple devices and receive alerts directly.
- Smart Thermostats: While primarily for climate control, smart thermostats can enhance security by allowing you to manage energy use while you’re away. They can be programmed to adjust settings based on your presence, which can help simulate occupancy when combined with other smart devices.
- Smart Sensors for Windows and Doors: These sensors will notify you whenever a door or window is opened, adding an essential layer of awareness to your home security. They can work in conjunction with your smart alarms and cameras to provide a comprehensive security system.