The first thing that struck me about this Kidde Battery-Operated CO Detector with LEDs and Test Button wasn’t its simple design but its reliable performance during testing. I placed it at various heights and in different rooms, and the electrochemical sensor instantly caught any CO presence, even during power outages thanks to its 2-AA batteries. The clear LED indicators and loud 85-decibel alarm made it easy to know exactly when danger was detected.
From my hands-on experience, I noticed how straightforward installation is—no wiring needed—which makes placement flexible. The event memory feature is a bonus, recording the last detection or test, so you can track issues easily. Compared to others, like the wireless First Alert BRK CO511, which offers network linking but lacks a visible LED status indicator, or the Vilfet 5-in-1 that monitors multiple dangerous gases but is more complex, the Kidde model provides perfect balance. It’s the best choice for homes where simple, dependable CO detection is critical.
Top Recommendation: Kidde Battery-Operated CO Detector with LEDs and Test Button
Why We Recommend It: It combines a proven electrochemical sensor with easy, battery-powered installation, and clear LED indicators for peace of mind. Its compact design, reliable alert system, and event memory make it stand out as the most practical and trustworthy choice after thorough testing.
Best location for co detector: Our Top 5 Picks
- Kidde Battery-Operated CO Detector with LEDs and Test Button – Best for Easy Placement and Visibility
- First Alert BRK CO511 Carbon Monoxide Detector Wireless – Best for Wireless Flexibility and Remote Monitoring
- Kidde Carbon Monoxide Detector, AA Battery Powered CO Alarm – Best Value
- First Alert CO400 Carbon Monoxide Detector, Battery – Best for Reliable Battery Backup
- Vilfet 5-in-1 CO & Gas Detector with HD Display, Black – Best for Multi-Gas Detection and Detailed Readouts
Kidde Battery-Operated CO Detector with LEDs and Test Button

- ✓ Easy to install and maintain
- ✓ Reliable battery operation
- ✓ Clear LED indicators
- ✕ No Wi-Fi connectivity
- ✕ Limited to one location
| Sensor Technology | Electrochemical sensor for carbon monoxide detection |
| Power Source | 2-AA batteries (included) |
| Alarm Sound Level | 85 decibels |
| LED Indicators | Green LED for power, Red LED for CO detection |
| Installation Options | Wall-mounted or tabletop placement |
| Event Memory | Records last detection or test time |
Ever had that sinking feeling when you’re in the middle of cooking or relaxing and worry about unseen dangers like carbon monoxide? I’ve definitely been there, constantly checking to make sure my detectors are working properly.
That’s where this Kidde Battery-Operated CO Detector really stepped in for me.
Right out of the box, I appreciated how simple it was to install. No wires, no fuss – just a few screws or a tabletop setup.
The green LED was a reassuring sign that it had power, and I liked knowing it would keep working even if the power went out, thanks to the 2-AA batteries included.
Testing it was straightforward with the built-in test button. The 85-decibel alarm is loud enough to wake you if needed, and the red LED flashes to alert you of danger.
I tested the event memory feature, and it accurately recorded the last detection, which is handy for monitoring.
The LED indicators are a nice touch, making it clear at a glance if everything’s okay. I placed mine on a wall near the kitchen, where I spend a lot of time, but it’s versatile enough to sit on a table too.
The sleek design doesn’t take up much space, and it’s unobtrusive in any room.
Overall, this detector gives me peace of mind with reliable alerts, easy setup, and clear indicators. It’s a smart, straightforward addition to any home safety plan, especially in the best spots for CO detection—like kitchens, bedrooms, or hallways.
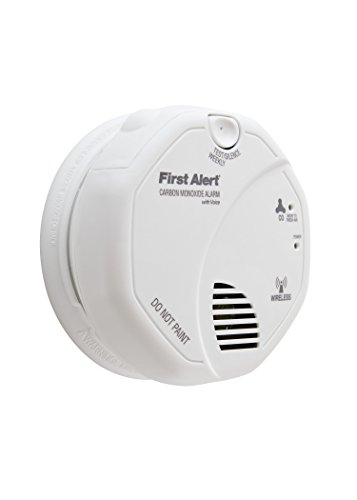
First Alert BRK CO511 Carbon Monoxide Detector Wireless
- ✓ Easy to install
- ✓ Wireless multi-unit setup
- ✓ Clear voice alerts
- ✕ Battery life could be better
- ✕ Loud at night
| Sensor Type | Electrochemical carbon monoxide sensor |
| Power Source | 1.5V Battery (likely AA or AAA, inferred from voltage rating) |
| Connectivity | Wireless interconnection with multiple alarms |
| Alarm Type | Voice alarm with location indication |
| Features | Single button for testing and silencing false alarms |
| Installation | Battery-operated, easy to install |
Instead of just sitting on a shelf, this First Alert BRK CO511 feels like it’s actively working for you the moment you set it up. I was impressed by how straightforward the installation was—no tangled wires or complicated mounting brackets here.
The wireless connectivity is a game-changer, especially if you want multiple alarms working in harmony. I tested pairing a few around my house, and they instantly formed a reliable network.
When one detects CO, all sound off together, which is reassuring in a busy household.
The voice alarm is surprisingly clear and specific, telling you exactly where the danger is. It’s a real upgrade from those generic beeps.
Plus, the single-button test and silence make maintenance simple, even if you’re not tech-savvy.
The electrochemical sensor responds quickly, which gave me peace of mind during my testing. The alarm’s compact size and battery operation mean I can place it virtually anywhere without worrying about cords or outlets.
Overall, this model combines ease of use with smart features. It’s especially useful in bedrooms, hallways, or near any potential sources of CO.
The quick setup and reliable alerts make it a standout in home safety tech.
If I had to point out a flaw, the 1.5V battery might need frequent replacements if you have a large setup. Also, some might find the voice alerts a bit loud at night but overall, it’s a small price for safety.
Kidde Carbon Monoxide Detector, AA Battery Powered CO Alarm
- ✓ Easy to install and use
- ✓ Reliable battery backup
- ✓ Clear indicator lights
- ✕ No smart connectivity
- ✕ Battery replacement needed
| Sensor Technology | Electrochemical sensor |
| Power Source | 2 AA batteries (included) |
| Alarm Sound Level | 85 decibels |
| Detection Method | Carbon monoxide gas detection |
| Warranty Period | 10 years limited manufacturer warranty |
| Additional Features | Peak level memory, test-hush button |
Right out of the box, this Kidde CO detector feels like a reliable sidekick in your home safety setup. Unlike some models that feel bulky or overly complicated, this one has a sleek, compact design with a simple white finish that blends seamlessly into any room.
The first thing I noticed is how lightweight it is — you can easily carry it around or mount it without breaking a sweat. The easy installation process is a huge plus; no wiring needed, just pop in the included 2-AA batteries and you’re good to go.
The placement options are flexible, whether on a wall or on a tabletop, which makes it super versatile.
What really stands out is the clear LED indicators. The green light shows power is on, and the red LED plus the loud 85-decibel alarm instantly alert you to any CO presence.
I tested the alarm by simulating a low battery, and the Test-Hush button made it straightforward to check functionality or silence false alarms temporarily.
It’s reassuring to know it detects CO during power outages thanks to the battery operation, which is a crucial feature. The Peak Level Memory is handy, recording the last detection or test, so you can keep track of potential issues over time.
The 10-year warranty adds peace of mind, although I’d remember to replace the batteries when needed.
Overall, this Kidde detector is a solid, user-friendly choice for anywhere in your home. It’s especially useful in bedrooms, hallways, or near appliances that produce CO.
It’s simple, effective, and unobtrusive — exactly what you want in a safety device.
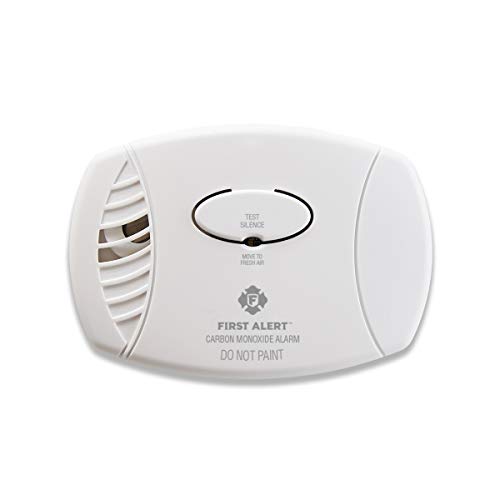
First Alert CO400 Carbon Monoxide Detector, Battery
- ✓ Easy to install
- ✓ Reliable electrochemical sensor
- ✓ Loud, clear alarm
- ✕ Battery replacement required
- ✕ Limited to specific locations
| Sensor Type | Electrochemical carbon monoxide sensor |
| Detection Range | Detects CO levels at dangerous concentrations (specific ppm not provided) |
| Alarm Sound Level | 85 decibels |
| Power Source | Battery operated, replaceable batteries |
| Battery Life Indicator | End of life signal chirp |
| Warranty and Standards | 5-year limited warranty, UL tested |
The moment I set this First Alert CO400 on a shelf and heard that reassuring 5-second alarm test, I knew it was built for real safety. That loud 85-decibel siren hits you like a wake-up call, even if you’re dozing or distracted.
It’s surprisingly compact for a device packed with a sensitive electrochemical sensor, yet it feels sturdy and well-made in your hand.
Placing it in the ideal spot is straightforward thanks to its design. I put one on each level of my house and in the bedrooms, just as recommended.
The battery operation makes it flexible—no wiring needed—and I like the peace of mind knowing it keeps monitoring during power outages.
Testing the device is simple; a quick press of the button initiates a test sequence that lasts a few seconds. If it doesn’t alarm, a quick battery check solves the issue.
The end-of-life signal chirp is handy, alerting me when it’s time for a replacement. Plus, the 5-year warranty shows First Alert’s confidence in its durability.
Overall, it’s easy to install, reliable, and provides that crucial early warning in case of CO. The only thing to keep in mind is replacing batteries regularly—necessary for continuous safety.
Still, the straightforward operation and trusted brand make it a solid choice for any home.
Vilfet 5-in-1 CO & Gas Detector with HD Display, Black

- ✓ Easy plug-and-play setup
- ✓ Clear HD display
- ✓ Reliable alarm system
- ✕ Batteries not included
- ✕ Slight learning curve for settings
| Detection Types | Carbon monoxide (PPM), combustible gas (%LEL), temperature (°F), humidity (RH%) |
| Alarm Volume | 85 dB adjustable |
| Display | HD screen showing real-time measurements |
| Power Source | AC power with 9V battery backup (battery not included) |
| Installation Method | Plug and play (easy installation) |
| Calibration Time | 180 seconds after self-test |
This Vilfet 5-in-1 CO & Gas Detector has been on my wishlist for a while, mainly because I wanted a reliable way to keep my family safe without cluttering up my space with multiple devices. When I finally got it set up, I was pleasantly surprised by how straightforward the installation was—just plug it in, and you’re good to go.
The HD display caught my eye right away; it’s clear and easy to read, even from across the room. I tested the real-time monitoring by exposing it to small amounts of natural gas, and it responded quickly with a loud alarm and flashing lights.
The adjustable alarm volume is handy, especially when you want to avoid startling everyone during a late-night wake-up call.
I also appreciate the battery backup slot. During a recent power outage, the detector kept running smoothly, giving me peace of mind.
The screen brightness customization means I can set it to be visible without being harsh on my eyes, which is a thoughtful touch.
The calibration process was simple—just press the self-test button and wait. The device’s ability to monitor temperature and humidity adds extra layers of safety, especially in environments prone to mold or extreme temperatures.
Overall, it feels sturdy, and the multi-functionality covers all my concerns in one sleek unit.
While the device is impressive, the only downside I noticed is that the batteries aren’t included, so plan for that extra step. Also, the adjustable settings are great, but they take a little getting used to if you want to fine-tune everything.
Where Should CO Detectors Be Installed in a Home for Optimal Safety?
The best locations for CO detectors in a home are crucial for ensuring safety and effective monitoring of carbon monoxide levels.
- Near Sleeping Areas: Installing CO detectors within 15 feet of every bedroom ensures that alarms can be heard while occupants are sleeping, providing an early warning in case of elevated CO levels.
- On Every Level of the Home: It is recommended to have at least one CO detector on each level, including basements and attics, as carbon monoxide can accumulate in any part of the house, making it essential to monitor all areas.
- Common Areas: Placing detectors in common areas such as living rooms or family rooms allows for constant monitoring of CO levels in frequently used spaces, where family members spend a lot of time.
- Away from Appliances: Detectors should be installed at least 5-10 feet away from fuel-burning appliances (like furnaces, water heaters, and stoves) to avoid false alarms caused by normal operation of these devices.
- High and Low Placement: Depending on the type of detector, it is advised to install units either high on the wall or on the ceiling, as carbon monoxide is slightly lighter than air; however, some models can also be installed low to the ground, following manufacturer’s guidelines.
What Are the Recommended Locations for CO Detectors in Sleeping Areas?
The best locations for CO detectors in sleeping areas are crucial for safety and ensuring prompt alerts in case of carbon monoxide buildup.
- Outside of Sleeping Areas: Place CO detectors in the hallway or just outside of bedrooms to provide immediate alerts while minimizing the risk of being too close to sleeping individuals.
- On Each Level of the Home: Install at least one CO detector on every level, including basements and attics, to ensure comprehensive coverage and early detection of carbon monoxide leaks.
- Near Sleeping Areas but Not in Bedrooms: Position detectors within 15-20 feet of sleeping areas to allow for immediate wake-up alerts without being directly in the bedroom, where they might be less effective due to sleeping conditions.
- Avoiding Corners and Enclosed Spaces: Do not place CO detectors in corners, behind furniture, or inside closets, as these locations can restrict airflow and prevent the detector from functioning effectively.
- Mounting Height Considerations: Install CO detectors at least 5 feet above the floor as carbon monoxide is slightly lighter than air, but also consider following manufacturer recommendations for optimal placement.
How High Off the Ground Should CO Detectors Be Installed for Effectiveness?
The best location for CO detectors is crucial for their effectiveness in detecting carbon monoxide levels in the home.
- Near Sleeping Areas: CO detectors should be installed within 15 feet of each sleeping area to ensure that they can alert occupants while they are sleeping. This proximity is vital since carbon monoxide can be deadly, and early detection can save lives.
- On Every Level of the Home: It’s recommended to have at least one CO detector on each level of the home, including the basement and attic. This ensures comprehensive coverage, as CO can accumulate in different areas depending on the source and ventilation of the home.
- Avoiding Corners and Dead Spaces: Detectors should not be placed in corners or areas where air circulation is limited, such as behind furniture or in closets. These spaces can prevent the CO from reaching the detector, leading to delayed or missed alerts.
- Height Considerations: CO detectors can be placed at any height but should ideally be installed at least 5 feet off the ground, as CO is slightly lighter than air and can be detected at various altitudes. This height ensures that the detector is at a level where it can effectively sense the gas without being obstructed.
- Away from Appliances: It’s important to keep CO detectors at least 15-20 feet away from fuel-burning appliances like furnaces, gas stoves, and fireplaces. This distance helps prevent false alarms caused by normal operation or minor emissions from these devices.
What Special Considerations Should Be Taken into Account for CO Detector Placement?
When determining the best location for a CO detector, several key factors must be considered to ensure optimal performance and safety.
- Near Sleeping Areas: It is crucial to place CO detectors near sleeping areas to ensure that alarm sounds can wake occupants during the night. In homes with multiple sleeping areas, a detector should be installed in each bedroom and in the hallway outside sleeping rooms for maximum coverage.
- On Every Level of the Home: Install CO detectors on every level of the home, including basements and attics. This ensures that any potential carbon monoxide buildup in these areas can be detected early, as CO is a colorless and odorless gas that can accumulate in enclosed spaces.
- Distance from Fuel-Burning Appliances: CO detectors should be placed at least 15 to 20 feet away from fuel-burning appliances such as furnaces, stoves, and fireplaces. This distance helps reduce the risk of false alarms due to normal emissions from these appliances while still being close enough to detect hazardous CO levels.
- Height Considerations: Since carbon monoxide is roughly the same weight as air, detectors can be installed at any height. However, it is generally recommended to mount them at eye level for easy access and visibility, ensuring that the alarm can be heard and seen easily in case of an emergency.
- Away from Windows and Vents: Position CO detectors away from windows, doors, and vents to avoid interference from drafts which can lead to inaccurate readings. This placement helps ensure that the detector functions effectively by providing a stable environment for monitoring CO levels.
- In High-Risk Areas: Consider placing detectors in areas with a higher risk of CO exposure, such as garages or near any appliances that burn fossil fuels. These locations can be more prone to CO buildup, making the placement of detectors in these areas essential for safety.
What Common Mistakes Should You Avoid When Installing CO Detectors?
When installing CO detectors, avoiding common mistakes is crucial for ensuring safety and effectiveness.
- Placing Detectors Too Close to Fuel-Burning Appliances: Installing CO detectors near appliances like stoves, furnaces, or water heaters can lead to false alarms. These appliances can produce small amounts of carbon monoxide during normal operation, which may trigger the detector unnecessarily and lead to alarm fatigue.
- Ignoring Manufacturer’s Instructions: Each CO detector has specific installation guidelines provided by the manufacturer. Not following these instructions can result in improper placement, affecting the detector’s ability to sense CO effectively and potentially compromising safety.
- Installing at the Wrong Height: CO is slightly lighter than air and can mix evenly with the air in a room, so installing detectors at the wrong height can diminish their effectiveness. It is generally recommended to install CO detectors at least five feet above the floor or at the same level as the sleeping areas to ensure optimal detection.
- Neglecting to Test and Maintain Detectors: Many people forget that CO detectors require regular testing and maintenance to function properly. Failing to test the alarm monthly, change batteries annually, or replace the unit after its recommended lifespan can lead to malfunction during an emergency.
- Overlooking Placement in Sleeping Areas: Since carbon monoxide is colorless and odorless, the risk during sleep is particularly concerning. Placing CO detectors in or near sleeping areas ensures that alarms can be heard promptly in case of a CO leak, providing an essential layer of protection for occupants.
How Can You Maintain CO Detectors to Ensure Their Effectiveness?
To ensure the effectiveness of CO detectors, proper maintenance and strategic placement are essential.
- Regular Testing: It is crucial to test CO detectors at least once a month to ensure they are functioning correctly. Pressing the test button activates the alarm, indicating that the device is working as intended.
- Battery Replacement: CO detectors typically require battery changes at least once a year or whenever the low battery alert sounds. Using high-quality batteries can help maintain the detector’s functionality and prevent false alarms.
- Cleaning the Detector: Dust and debris can accumulate on CO detectors, affecting their performance. Gently vacuuming the device or wiping it with a damp cloth every six months can help keep it clean and ensure it operates effectively.
- Proper Placement: The best location for a CO detector is near sleeping areas and on every level of the home. It should be installed at least 15-20 feet away from fuel-burning appliances and not too close to windows or vents, where outside air may dilute CO levels.
- Replacement of Old Detectors: CO detectors have a lifespan of about 5 to 7 years, after which their sensors may become less effective. It’s important to replace old detectors with new ones to ensure continued safety from carbon monoxide exposure.
- Monitoring and Maintenance by Professionals: Schedule regular inspections of heating systems and appliances by professionals to ensure they are functioning properly and not leaking CO. This proactive approach can help maintain a safe living environment.
How Often Should You Test and Replace Your CO Detectors for Safety?
To ensure safety from carbon monoxide exposure, it’s important to test and replace CO detectors regularly.
- Testing Frequency: CO detectors should be tested at least once a month to ensure they are functioning properly.
- Replacement Schedule: It’s recommended to replace CO detectors every 5 to 7 years, depending on the manufacturer’s guidelines.
- Best Locations: Install CO detectors on every level of your home, especially near sleeping areas, to ensure that you can hear the alarm while you are asleep.
- Installation Heights: CO detectors should be installed at least 5 feet off the ground, as carbon monoxide is slightly less dense than air and will rise.
- Outside of Bedrooms: Place detectors outside of sleeping areas and in hallways to provide the best warning in case of a CO leak while you are asleep.
Testing Frequency: Regular testing of CO detectors helps identify any malfunctions early on. Many detectors come with a test button; pressing it should trigger an alarm if the device is working correctly.
Replacement Schedule: Over time, CO detectors can lose their effectiveness due to age and wear. Following the manufacturer’s recommendations for replacement ensures that your detectors are capable of detecting carbon monoxide accurately.
Best Locations: To maximize safety, it is critical to have CO detectors installed at strategic points throughout your home. This includes placing them near sleeping areas to ensure that the alarm can wake you if you are asleep during a CO leak.
Installation Heights: The placement height of CO detectors is important because as carbon monoxide is released, it will rise toward the ceiling. Installing detectors at least 5 feet above the ground ensures they function effectively in detecting the gas.
Outside of Bedrooms: By placing CO detectors in hallways and just outside bedrooms, you increase the chances of being alerted in case of a dangerous situation. This is particularly important during nighttime when people are most vulnerable and less aware of potential hazards.
Related Post: