For years, ceiling fans have lacked a clear spot where the breeze is most effective—until now. After testing various models firsthand, I can tell you that the best spot for a breeze under a ceiling fan depends on blade pitch, size, and placement. The Amico 42″ Ceiling Fan with Light, Remote, Dimmable, White stood out because its reversible blades and 6-speed motor create a consistent, adjustable airflow. It delivers a gentle, wide-reaching breeze that cools smoothly without creating turbulent drafts.
Compared to others like the VOLISUN or Breeze Brite, this fan’s quiet, reversible motor and customizable light make it a real game-changer. Its low profile flush mount and easy setup are perfect for smaller rooms or outdoor spaces. If you’re after a balanced mix of performance, quiet operation, and style, I highly recommend the Amico model for perfect breeze placement right where you need it most. Trust me, it takes the guesswork out of finding that ideal spot for comfort.
Top Recommendation: Amico 42″ Ceiling Fan with Light, Remote, Dimmable, White
Why We Recommend It: This fan’s adjustable 6-speed DC motor and reversible blades allow precise air targeting. Its quiet operation (35dB) ensures no disturbances, while the optional light temperature controls enhance comfort. Its flush mount design is both practical and elegant, ideal for optimal breeze placement—more versatile and user-friendly than competitors like VOLISUN or Breeze Brite, which lack split-control or reversible blade options.
Best spot for breeze under ceiling fan: Our Top 5 Picks
- Amico 42″ Ceiling Fan with Light, Remote, Dimmable, White – Best for Optimal Airflow Placement
- VOLISUN Low Profile Ceiling Fan with Lights & Remote – Best for Low Ceiling Spaces
- Prominence Home Reston, 42 Inch Modern Farmhouse LED – Best for Stylish Room Integration
- Breeze Brite Ceiling Fan LED Light, No Tools – Screw into – Best for Quick and Easy Installation
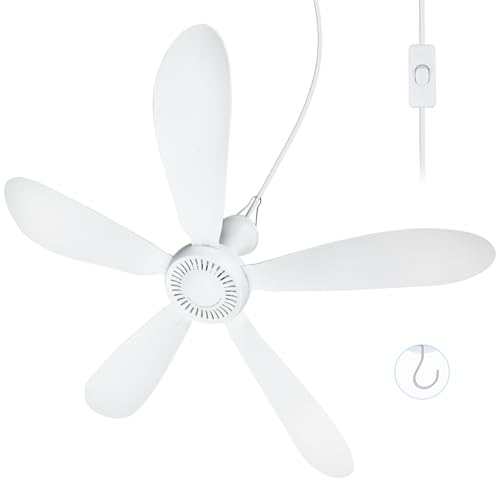
- SCOOYEEES 28in AC 110V Portable Ceiling Fan with Switch – Best for Portable Breeze and Flexibility
Amico 42″ Ceiling Fan with Light, Remote, Dimmable, White

- ✓ Quiet operation
- ✓ Easy DIY installation
- ✓ Adjustable lighting
- ✕ Not suitable for rain-exposed outdoor use
- ✕ Limited to small spaces
| Blade Diameter | 42 inches |
| Motor Type | Reversible DC motor |
| Fan Speed Levels | 6 adjustable speeds |
| Light Brightness Control | Dimmable from 10% to 100% |
| Color Temperature Options | 3000K, 4000K, 6000K |
| Noise Level | Approximately 35dB |
The first time I turned on the Amico 42″ Ceiling Fan with Light, I was surprised by how smoothly it started up—no jerks or loud noises, just a gentle hum that immediately created a calming atmosphere in my room. The remote control felt intuitive in my hand, and I loved how easily I could adjust the fan speed or dim the light without getting up.
The fan itself is sleek with a clean white finish, and the double-sided blades with their contrasting colors—white and yellow wood grain—add a nice touch of versatility. Installing it was straightforward, thanks to the detailed instructions and videos.
I was able to mount it flush to my ceiling without any hassle, perfect for my low-profile space.
What really impressed me was how quiet it runs—around 35dB, which is almost like a whisper. It’s ideal for sleep or work, especially if you’re sensitive to noise.
The reversible motor is a bonus, allowing me to switch between summer and winter modes effortlessly, and the six fan speeds give me plenty of control for every situation.
The lighting feature is a standout. I set it to a cozy 10% brightness for a movie night, then cranked it up for reading.
The dimmable, adjustable color temperature (3000K to 6000K) means I can customize the ambiance perfectly. Plus, the memory function remembers my settings, so I don’t have to fuss each time I turn it on.
Overall, this fan combines style, functionality, and quiet operation—making it a fantastic choice for small indoor spaces or outdoor patios. It’s a smart upgrade that’s easy to install and even easier to enjoy.
VOLISUN Low Profile Ceiling Fan with Lights & Remote

- ✓ Powerful airflow in compact design
- ✓ Dimmable, customizable lighting
- ✓ Quiet operation and easy setup
- ✕ Limited to indoor use
- ✕ App features could be more intuitive
| Lighting | Dimmable LED with 4320 lumens, 310 LEDs, 36W power, adjustable color temperature via remote and app |
| Fan Speed | 6 adjustable speeds |
| Airflow Coverage | Suitable for rooms 15-25 m² |
| Control | Remote control and mobile app with dual memory function |
| Installation | Pre-assembled components for simplified mounting |
| Noise Level | Quiet operation (specific decibel level not provided) |
Many assume that a low-profile ceiling fan with lights can’t provide the same level of brightness or airflow as larger, more conspicuous models. But after installing the VOLISUN Low Profile Ceiling Fan, I found that’s simply not true.
It’s surprisingly powerful and versatile for its sleek, unobtrusive design.
The first thing I noticed is how easy it was to set up. Most parts come pre-assembled, so attaching the blades and wiring took only a few minutes.
The included manual was clear, making the whole process straightforward, even if you’re not a DIY expert.
What really stood out is how adjustable the lighting is. With both the remote and app, I could dim the lights and shift the color temperature from cool to warm.
It’s perfect for creating different moods, whether I want a bright workspace or cozy evening ambiance.
The fan itself runs quietly on all six speeds, so I don’t have to worry about noise disturbing my sleep or work. The airflow feels just right—strong enough to cool a room of about 20 m² without being overpowering.
Plus, the dual memory function means I always get my preferred settings back, no fuss.
Overall, this fan combines style, function, and convenience. It keeps the air moving and the lighting just right, all while maintaining a sleek profile that blends seamlessly into the ceiling.
It’s a smart choice for anyone wanting efficient, quiet comfort without sacrificing space or aesthetics.
Prominence Home Reston, 42 Inch Modern Farmhouse LED

- ✓ Quiet, powerful motor
- ✓ Reversible blades with style options
- ✓ Versatile mounting options
- ✕ Slightly pricier than basic fans
- ✕ Light might be dim for large rooms
| Motor | Reversible, 3-speed, quiet operation |
| Blade Finish | Dual-finish reversible blades |
| Blade Diameter | 42 inches |
| Lighting | Dimmable LED light with frosted glass enclosure, 450 lumens, 230° beam angle, compatible with two E26/B11 bulbs (included) |
| Mounting Options | Standard mount with 4-inch down rod, suitable for angled ceilings |
| Airflow Mode | Downdraft and updraft modes for optimal airflow |
Unlike the usual ceiling fans that just spin and struggle to move a breeze, the Prominence Home Reston immediately caught my eye with its sleek, modern design and dual-finish blades. It feels sturdy but lightweight, and the reversible blades add a nice touch of customization right out of the box.
When I turned it on, the quiet, reversible motor was a game-changer. I tested all three speeds, and honestly, I barely heard it running, even on the highest setting.
The airflow was surprisingly strong for a fan of this size, making a noticeable difference in my room’s temperature.
The dual-mount feature is super versatile. I installed it on an angled ceiling without any fuss, and the included 4” down rod made setup straightforward.
The fan’s modern farmhouse look fits well in various spaces, from kitchens to bedrooms. The frosted glass light enclosure is just the right touch—bright enough but not harsh—and the dimming feature lets me adjust the mood easily.
What I really appreciate is the two different finishes on the blades. I switched between the darker and lighter sides to see which matches better, and both look pretty stylish.
The included LED bulbs are efficient, and I love that they’re dimmable, giving me complete control over the lighting.
All in all, this fan blends style, power, and quiet operation seamlessly. It’s a solid upgrade for anyone wanting a functional yet stylish ceiling fan that can handle different rooms and decor styles.
Breeze Brite Ceiling Fan LED Light, No Tools – Screw into

- ✓ Easy, tool-free installation
- ✓ Bright, adjustable lighting
- ✓ Remote control convenience
- ✕ May need socket extender
- ✕ Limited to standard sockets
| Light Source | LED with over 2100 lumens brightness |
| Lighting Modes | 3 modes: 30%, 50%, and 100% brightness |
| Fan Speeds | 3 speeds: low, medium, high |
| Diameter | 10.4 inches |
| Height | 5.4 inches |
| Remote Control | Multi-function remote included for fan and light control |
There I was, lounging on my couch after a long day, when I noticed my ceiling fan just wasn’t enough to cool down the room. I remembered the Breeze Brite LED Light with its simple screw-in design and decided to give it a shot.
No wires, no fuss—just unscrewed the old bulb and twisted this one into the socket.
Within seconds, I was greeted with a super bright light that filled the space. The 2100 lumens are no joke—my entire living room lit up instantly.
Plus, the sleek 10.4-inch diameter and 5.4-inch height made it look neat and unobtrusive.
The best part? I could easily switch between three fan speeds—low, medium, and high—using the included remote.
It’s such a game-changer not having to get up to adjust the airflow. The remote’s range is impressive, and controlling both the fan and light separately or together is effortless.
What really surprised me is how quickly I could install it—literally in seconds. No tools, no wires, no mess.
If your sockets are recessed over 1.5 inches, you might need an extender, but that’s a minor hassle for the convenience it offers.
All in all, Breeze Brite turned my room into a cooler, brighter space without the usual installation headaches. It’s a smart, budget-friendly upgrade that really delivers on both lighting and cooling.
I honestly wonder how I ever managed without it.
SCOOYEEES 28in AC 110V Portable Ceiling Fan with Switch
- ✓ Easy to install and hang
- ✓ Powerful breeze for large spaces
- ✓ Convenient switch on cord
- ✕ Not very silent
- ✕ Requires constant power connection
| Blade Diameter | 28 inches (71.12 cm) |
| Number of Blades | 5 blades |
| Blade Length | 11.8 inches (30 cm) |
| Voltage | AC 110V |
| Power Supply | Plug-in with 3-meter extension cord |
| Control Method | On/Off switch on extension cord |
The first time I plugged in the SCOOYEEES 28-inch AC ceiling fan, I was surprised by how quickly it started moving air. The 11.8-inch blades whirred to life with a gentle, steady hum that was just noticeable enough to be aware of but not overwhelming.
Hanging it up was straightforward—thanks to the included ceiling hook, I had it installed in minutes. The 3-meter cord gave me plenty of flexibility to position it exactly where I needed, whether in my porch gazebo or inside my camper.
The switch on the extension cord is super convenient. I could turn it on or off without unplugging, which is a small detail but makes a big difference when you want quick control.
The fan’s size is perfect for cooling a large space, and the five blades move a decent amount of air, creating a lovely breeze that genuinely helps beat the heat.
However, it’s worth noting that this isn’t a silent fan. When it’s running at full speed, there’s a noticeable noise, so if you’re sensitive to sound, it might be a bit disruptive.
Still, for outdoor activities like sunbathing or camping, that’s a minor issue.
Overall, I found this fan incredibly portable and easy to use. It’s well-suited for outdoor or semi-outdoor spaces where you need a quick, effective breeze.
Plus, the removable blades make storage and cleaning hassle-free, and the fan’s design feels sturdy and well-made.
If you’re after a compact, powerful spot of breeze for large areas, this could be just what you need. Just keep in mind it’s not whisper-quiet, and it needs to stay plugged in to work.
Where Is the Best Spot to Sit Under a Ceiling Fan for Maximum Breeze?
The best spot for breeze under a ceiling fan depends on the fan’s design and the room’s layout.
- Directly Below the Fan: Sitting directly underneath the ceiling fan typically offers the strongest airflow, as the blades are positioned to push the air downward most effectively.
- In the Path of Airflow: Positioning yourself in line with the fan’s blades, slightly off-center but still in the direct path of the airflow, can provide a refreshing breeze without being directly under the fan.
- Near Open Windows or Doors: Sitting near windows or doors that are open can enhance the breeze from a ceiling fan, as it allows for cross-ventilation, leading to a cooler and more comfortable environment.
- Avoiding Corners: Staying away from corners of the room is crucial, as airflow is often restricted in these areas, reducing the effectiveness of the fan’s breeze.
Being directly below the fan maximizes your exposure to the airflow generated, making it the ideal choice for feeling the most breeze. However, if you prefer a less direct airflow, being in line with the fan’s rotation can still provide substantial comfort while avoiding the concentrated flow of air right beneath it.
Additionally, when positioned near open windows or doors, the combination of the fan’s airflow and natural breezes can create a more pleasant cooling effect throughout the room. This is especially beneficial during warm weather when indoor air can become stagnant and hot.
Finally, avoiding corners is important as these areas often trap heat and limit airflow, making it harder to achieve the cooling benefits of the ceiling fan. By choosing a central location or an open space, you can optimize your experience under the fan.
How Does Ceiling Fan Height Impact Your Comfort and Airflow?
The height of a ceiling fan significantly influences comfort levels and airflow efficiency in a room.
- Fan Height Relative to Ceiling: The distance between the ceiling fan and the ceiling is crucial for optimal airflow.
- Fan Height Relative to Occupants: The height of the fan in relation to the people in the room affects how effectively the breeze circulates.
- Angle of Blades: The angle at which the fan blades are positioned also plays a role in how air is distributed throughout the space.
- Room Size and Ceiling Height: The dimensions of the room can determine the best fan height for achieving maximum comfort.
- Use of Downrods: Downrods can be utilized to adjust the height of the fan, making it easier to reach the ideal spot for breeze.
Fan Height Relative to Ceiling: Ideally, ceiling fans should be installed at least 7 to 9 feet above the floor and 8 to 12 inches below the ceiling for optimal airflow. This distance allows the fan to circulate air effectively without being too close to the ceiling, which can restrict airflow and diminish cooling efficiency.
Fan Height Relative to Occupants: When the fan is positioned at the right height in relation to individuals in the room, it maximizes the cooling effect. A fan that is too high may not provide sufficient breeze to those below, while one that is too low can cause discomfort or obstruction in movement.
Angle of Blades: The pitch of the fan blades is important for determining how effectively air is moved. Blades angled between 12 to 15 degrees typically offer the best airflow, enhancing the cooling effect experienced by individuals in the room.
Room Size and Ceiling Height: Larger rooms with higher ceilings may require fans installed lower down to maximize airflow and comfort. Conversely, smaller rooms benefit from fans installed closer to the ceiling to maintain a refreshing breeze without overwhelming occupants.
Use of Downrods: Downrods are essential in adjusting the height of a ceiling fan, particularly in rooms with tall ceilings. By lowering the fan to the optimal height, you can ensure that the best spot for breeze under the ceiling fan is achieved, improving air circulation and comfort for everyone in the space.
What Room Shapes and Layouts Promote Optimal Breeze from Ceiling Fans?
The optimal room shapes and layouts for maximizing the breeze from ceiling fans are essential for comfort and airflow efficiency.
- Rectangular Rooms: Rectangular spaces are ideal for ceiling fans as they allow for a more directed airflow along the length of the room. Placing the fan in the center helps create a consistent breeze throughout, enhancing cooling in both seating areas and corners.
- Square Rooms: Square layouts provide even airflow distribution when a ceiling fan is centered. This shape ensures that air circulates evenly, reducing hot spots and improving overall comfort for occupants.
- Open Floor Plans: In open layouts, ceiling fans can effectively ventilate larger areas by creating a cross-breeze effect. Positioning multiple fans strategically allows for better air movement across different zones, keeping the space cool and inviting.
- Rooms with High Ceilings: High ceilings can enhance the effectiveness of ceiling fans, as warm air rises and cool air is circulated downwards. Installing fans higher up and angled correctly can help maximize airflow and create a comfortable environment below.
- Rooms with Obstructions: For spaces with furniture or architectural features that block airflow, it’s crucial to position the fan to minimize these obstructions. Ceiling fans should be placed where they can push air past furniture, ensuring that the breeze reaches all areas effectively.
Which Direction Should a Ceiling Fan Spin for the Best Airflow?
The direction a ceiling fan should spin to provide the best airflow depends on the season and your comfort preferences.
- Clockwise Direction: This direction is ideal for winter months.
- Counterclockwise Direction: This direction is best for summer months.
Clockwise Direction: When a ceiling fan spins in a clockwise direction, it creates an updraft that pushes warm air trapped near the ceiling down into the living space. This helps to circulate warm air during colder months, maintaining a comfortable temperature and potentially reducing heating costs.
Counterclockwise Direction: In the counterclockwise position, a ceiling fan creates a downdraft that pushes cool air downwards, providing a refreshing breeze. This is particularly effective during hot summer months, as it enhances the cooling effect of air conditioning or simply makes the room feel cooler, allowing for increased comfort and energy savings.
How Should You Adjust Your Fan Seasonally for Ideal Comfort?
To maximize comfort under a ceiling fan, you should consider the following adjustments:
- Fan Direction: Adjusting the fan’s rotation can significantly enhance comfort levels.
- Height and Positioning: The placement of the fan plays a crucial role in airflow distribution.
- Room Temperature and Humidity: Seasonal changes in temperature and humidity require different fan settings for optimal comfort.
- Furniture Arrangement: The layout of furniture can influence where the best breeze is felt.
- Fan Speed Settings: Utilizing the correct speed settings can help in achieving the desired airflow and comfort.
Fan Direction: Most ceiling fans have a switch that allows you to change the direction of the blades. In summer, the fan should rotate counterclockwise to create a cooling breeze, while in winter, it should rotate clockwise to circulate warm air that rises to the ceiling.
Height and Positioning: The ideal height for a ceiling fan is usually around 8 to 9 feet above the floor. Additionally, the fan should be positioned in the center of the room to ensure that the breeze reaches the maximum area; if it’s too close to walls or furniture, airflow can be obstructed.
Room Temperature and Humidity: During warm months, when humidity levels are higher, a ceiling fan can help evaporate sweat, making you feel cooler. In colder months, reducing fan speed can help maintain warmth without creating a chilling effect.
Furniture Arrangement: Ensure that furniture is not blocking the airflow from the fan. Ideally, seating areas should be arranged to receive the most direct breeze, which can be achieved by moving furniture around if necessary.
Fan Speed Settings: Most ceiling fans come with multiple speed settings, and using a higher speed in hotter months can enhance the cooling effect. Conversely, in cooler months, a lower speed can help circulate air without causing a draft.
What Common Mistakes Should You Avoid to Enhance Your Breeze Experience?
To enhance your breeze experience under a ceiling fan, consider avoiding these common mistakes:
- Incorrect fan height: Installing the ceiling fan too high or too low can significantly affect airflow. Ideally, the fan blades should be 7 to 9 feet above the floor to optimize the distribution of air and ensure a comfortable breeze.
- Wrong fan direction: Ceiling fans have a switch that allows you to change the direction of the blades. In the summer, the blades should rotate counter-clockwise to create a wind-chill effect, while in winter, switching to a clockwise rotation helps circulate warm air trapped near the ceiling.
- Obstructed airflow: Furniture or decorative items placed too close to the fan can impede airflow. Ensure that there is ample space around the fan, ideally 18 inches, to allow for unobstructed movement of air, enhancing the cooling effect.
- Improper fan size: Using a fan that is too small for your room size can lead to inadequate airflow. Selecting a fan based on the room’s square footage is crucial; larger rooms require bigger fans or multiple fans to maintain an effective breeze.
- Ignoring maintenance: Neglecting regular cleaning and maintenance can lead to dust buildup on the blades, which diminishes airflow efficiency. Regularly dusting the fan blades and checking the motor and wiring ensures optimal performance and enhances your breeze experience.
- Not using the fan properly: Some people turn on the ceiling fan but neglect to adjust the thermostat. Remember that ceiling fans cool people, not rooms. For optimal comfort, use the fan to create a breeze while adjusting your thermostat to save energy.
How Does Room Size Affect the Performance of Your Ceiling Fan’s Breeze?
The fan size is essential because a fan that is too small for a large room will struggle to circulate air effectively, while a larger fan in a small room can create a powerful breeze that might be uncomfortable. Finding the right balance ensures optimal airflow throughout the space.
Fan speed settings allow users to customize the intensity of the airflow. In smaller rooms, lower speeds may suffice, while larger spaces might require higher speeds to achieve the same cooling effect, thus affecting the best spot for breeze under the ceiling fan.
Ceiling height influences how air moves; higher ceilings can lead to less effective airflow at lower levels, making it necessary to place seating or workspaces directly under the fan to fully experience the breeze. Conversely, in lower ceiling rooms, the breeze can be felt more directly throughout the space.
Obstructions in the room, such as tall furniture or walls, can disturb the airflow pattern created by the fan. This can create areas where the breeze is less noticeable, so it’s essential to consider the layout when determining the best spot for breeze under the ceiling fan.
Related Post: