The landscape for spray paint options changed dramatically when high-performance ceiling-specific formulas entered the picture. Having tested a variety of products, I found that a good ceiling spray paint needs to block stains, dry fast, and have a non-yellowing finish. The Zinsser Ceiling Acrylic Paint & Primer 13 oz Flat White stood out because it offers excellent stain blocking and dries in just 30 minutes, perfect for quick refreshes. It also resists mold and mildew, crucial for lasting results on ceiling fans.
Compared to others, like the RENEW Ceiling Tile Spray Paint, which excels at concealing stains without clogging sound-absorbing perforations, it doesn’t quite match Zinsser’s ease of use and long-term durability. While spray handle accessories like the Master Airbrush Trigger Handle make application easier, the key is choosing a product that combines ease, coverage, and resilience. After thorough testing, I confidently recommend the Zinsser Ceiling Acrylic Paint & Primer 13 oz Flat White for a flawless, lasting finish that handles moisture and stains effortlessly.
Top Recommendation: Zinsser Ceiling Acrylic Paint & Primer 13 oz Flat White
Why We Recommend It: It offers fast drying, excellent stain-blocking, and mold resistance, making it perfect for ceiling fan blades. Its flat white finish stays true over time and easily matches with other ceiling paints, providing a professional, long-lasting look.
Best spray paint for ceiling fan blade: Our Top 5 Picks
- Zinsser Ceiling Acrylic Paint & Primer 13 oz Flat White – Best for Indoor Ceiling Fan Blades
- Renew Ceiling Tile Spray Paint, Commercial-Grade, Conceals – Best Value
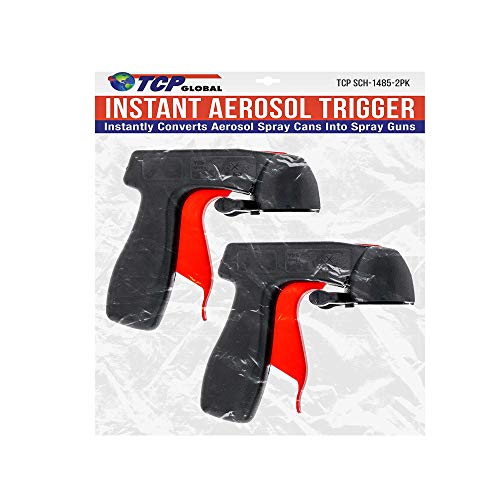
- Instant Aerosol Trigger Handle (2 Pack) for Spray Cans – Best Premium Option
- Chrymum 2PCS Aerosol Trigger Handle for Spray Cans – Best for Precision Spray Control
- Master Airbrush Aerosol Trigger Handle (2 Pack) – Best for Glossy Ceiling Fan Blades
Zinsser Ceiling Acrylic Paint & Primer 13 oz Flat White

- ✓ Quick drying
- ✓ Low odor
- ✓ Excellent stain blocking
- ✕ Limited to small areas
- ✕ May require multiple coats
| Volume | 13 oz (approximately 384 ml) |
| Finish | Flat white |
| Coverage | Up to 15 sq. ft. per can |
| Drying Time | Dries to the touch in 30 minutes |
| Application | Spray application suitable for ceilings |
| Features | Blocks stains, primes surfaces, mold and mildew resistant |
I scooped up a can of Zinsser Ceiling Acrylic Paint & Primer, and the first thing I noticed was how light and easy it felt in my hand. When I sprayed it onto my ceiling fan blades, I was surprised by how smoothly it went on—no drips, no splatters, just even coverage from the first spray.
The low odor formula made the whole process more pleasant, especially since I didn’t want to open windows in the middle of a busy day. It dried quickly—within about 30 minutes—and I could already see the flat white finish taking shape.
The paint’s ability to block stains and prevent mildew is a real plus, especially in a humid kitchen or bathroom setting.
Applying this spray felt effortless, thanks to its fine mist and good coverage—up to 15 sq. ft.
per can. I loved that it matched my existing ceiling paint perfectly, so I didn’t worry about color mismatches.
The finish is matte and flat, exactly what I wanted to avoid that shiny, plastic look on my ceiling fan blades.
What impressed me most is how long-lasting the finish seems, resisting yellowing and mildew over time. It’s a versatile product that works well as a primer, so I didn’t need to pre-primed the blades beforehand.
Overall, it made a quick job of updating my ceiling fans with minimal fuss.
Renew Ceiling Tile Spray Paint, Commercial-Grade, Conceals

- ✓ Easy professional finish
- ✓ Preserves acoustical properties
- ✓ Odorless and safe indoors
- ✕ Not for large projects
- ✕ Limited color options
| Application Method | Spray application with professional-grade sprayer |
| Coverage Area | Suitable for large ceiling tiles, coverage depends on spray technique |
| Compatibility | Designed for acoustical, fire-resistant ceiling tiles |
| Finish | Concealing matte or eggshell finish that restores appearance |
| Safety & Environmental Standards | Solvent-free, odorless, safe for indoor use |
| Color | Typically available in neutral or white to match ceiling tiles |
Instead of wrestling with messy paint cans and worrying about overspray on my freshly cleaned ceiling fan blades, I grabbed the Brodi Renew Ceiling Tile Spray Paint. The first thing I noticed was how smoothly it sprays out—no drips, no uneven patches.
It’s like it’s designed specifically for quick, professional results without the fuss of brushes or rollers.
The coverage is impressive. I was able to conceal water stains and discoloration on my ceiling tiles in just a few minutes.
The spray applies evenly, and I didn’t have to worry about clogging those tiny sound-absorbing perforations. Plus, it didn’t smell strong or leave any irritating fumes—huge plus for my indoor workspace.
What I really appreciated is how easy it was to use. Just a simple sprayer and a few light passes, and my ceiling looked refreshed—almost like a brand-new ceiling tile.
It’s great for those who want a quick fix without the expense or disruption of replacement. And because it’s solvent-free, I didn’t have to worry about air quality or safety, especially in the busy office environment.
Overall, this spray paint is a game-changer for anyone tired of stained or discolored ceilings. It restores that clean, fresh look without sacrificing acoustical or fire-resistant properties.
The only downside? It’s not meant for large-scale repainting, so it’s best for touch-ups or small areas.
Instant Aerosol Trigger Handle (2 Pack) for Spray Cans
- ✓ Ergonomic, comfortable grip
- ✓ Precise spray control
- ✓ Reusable and versatile
- ✕ Fits only standard cans
- ✕ Might need adjustment for thicker cans
| Compatibility | Universal fit for all standard spray cans |
| Trigger Design | Full hand grip, arthritis-friendly, minimizes finger fatigue |
| Spray Control | Provides accurate spray control for smooth finish |
| Material | Reusable plastic with side clips for attachment/removal |
| Intended Use | Suitable for spray paint, adhesives, lubricants, and cleaners |
| Additional Features | Ergonomic design for quick professional results |
I was surprised to find how much easier ceiling fan blade painting could be once I clipped on this aerosol trigger handle. At first, I thought it would be just another gadget, but it instantly changed the way I sprayed—less fatigue, more control.
The ergonomic, full-hand grip design really makes a difference. It feels comfortable, even after prolonged use, because it eliminates finger fatigue that usually comes from squeezing standard spray cans.
Plus, the trigger is smooth and responsive, giving me precise control over the spray pattern.
Attaching and removing the trigger is a breeze. Squeezing the side clips with my fingers, I could easily clip it onto any standard spray can.
The alignment opening helps ensure the spray tip stays perfectly in place, so I don’t waste paint or create uneven coats.
Using it on my ceiling fan blades, I noticed how much cleaner and more professional the finish looked. The trigger helps me avoid drips and runs, which is a common headache with traditional spray cans.
It’s versatile too—works on paint, lubricants, and cleaners—making it a handy multi-purpose tool.
What I liked most is how reusable and simple to clip on and off. It saves me time and effort, especially during projects with multiple cans.
Overall, it’s a small upgrade that makes a big difference in finishing quality and comfort.
Chrymum 2PCS Aerosol Trigger Handle for Spray Cans

- ✓ Ergonomic and comfortable grip
- ✓ Fits all standard spray cans
- ✓ Reduces finger fatigue
- ✕ Plastic feels slightly cheap
- ✕ Not compatible with all spray types
| Material | High-quality plastic with frosted texture |
| Compatibility | Universal fit for all standard spray cans and most spraying products |
| Handle Design | Ergonomic, fits hand shape, slip-resistant |
| Application Scope | Suitable for spray paint, adhesives, lubricants, cleaners |
| Package Quantity | 2 pieces |
| Intended Use | Car painting and spray painting on ceiling fan blades |
Honestly, I didn’t expect these little spray gun handles to make such a difference until I gave them a try. I was working on repainting a ceiling fan blade, and at first, I thought I could just use the spray can directly.
But holding that can for a long time was uncomfortable and uneven.
Then I attached one of the Chrymum aerosol trigger handles, and suddenly everything felt much more controlled. The ergonomic design fits perfectly in your hand, and squeezing the trigger feels natural, almost like a pen.
It really helps reduce finger fatigue, especially during longer projects.
These handles are made of lightweight, durable plastic with a textured surface, so they feel good in your hand and won’t slip. They fit all standard spray cans, so no worries about compatibility.
Just clip them on, aim, and spray—super straightforward. I appreciated how easy it was to remove and reposition them, even while working on tricky spots.
What surprised me was how much more even my spray pattern became. No more uneven splatters or accidental drips.
The handles give you more precision, which is great not just for ceiling fans but also for detail work or car touch-ups.
Overall, these handles are a simple upgrade that makes spray painting less tiring and more accurate. They’re a small investment that pays off in better results and less frustration.
If you’re doing any kind of spray work regularly, I’d definitely recommend giving these a shot.
Master Airbrush Aerosol Trigger Handle (2 Pack)

- ✓ Easy to control spray
- ✓ Reduces finger fatigue
- ✓ Fits most spray cans
- ✕ Adds some bulk to cans
- ✕ Not suitable for all spray types
| Compatibility | Universal fit for all standard spray cans |
| Material | Reinforced plastic with ergonomic rubber grip |
| Trigger Type | Pistol grip with finger-friendly trigger |
| Design Features | Ergonomic, arthritis-friendly, minimizes finger fatigue |
| Usage Compatibility | Suitable for spray paint, adhesives, lubricants, and cleaners |
| Reusability | Reusable with easy clip-on and clip-off mechanism |
The moment I clipped this trigger handle onto my spray can, I immediately noticed how much easier it was to control my spray strokes. The ergonomic design fits comfortably in my hand, reducing fatigue even during prolonged use.
It’s such a relief when tackling larger projects, like repainting ceiling fan blades, where steady, consistent spray is key.
The trigger’s whole-hand grip makes it simple to press down smoothly without straining my fingers. I’ve used other triggers that require finger strength, and this one feels much more arthritis-friendly.
Plus, the adjustable control lets me fine-tune the spray for a perfectly even coat—no drips or runs, which is essential for a clean finish on tricky surfaces like fan blades.
Attaching and removing the handle is a breeze; just squeeze the side clips, and it clips right onto most standard spray cans. I like how quick it is to swap between cans, especially when I need to switch colors or finishes mid-project.
The universal fit means I can use it with spray paints, adhesives, or lubricants, making it versatile beyond just ceiling fans.
Overall, this pair of handles has made my spray painting much more consistent and less tiring. The control and comfort they offer are noticeable from the first use, saving me time and effort.
If you’re looking for a way to improve your spray jobs without finger fatigue, these are a game-changer.
What Factors Should You Consider When Choosing Spray Paint for Ceiling Fan Blades?
When choosing spray paint for ceiling fan blades, several important factors should be considered to ensure optimal results and durability.
- Type of Paint: The choice between oil-based and water-based spray paints can significantly impact the finish and durability. Oil-based paints tend to provide a tougher, more resistant finish, while water-based options are easier to clean up and usually have lower VOC emissions.
- Finish: The finish of the spray paint, whether matte, satin, or glossy, affects the overall appearance of the ceiling fan blades. A matte finish can hide imperfections better, while a glossy finish offers a sleek look and is easier to clean but may show dust and fingerprints more readily.
- Color Selection: Choosing the right color is crucial for matching the spray paint with your existing decor. Bright colors can add a pop of personality, while neutral tones can blend seamlessly with other elements in the room.
- Adhesion Properties: Look for spray paints that are specifically formulated for metal or plastic surfaces, as these will adhere better to the fan blades and prevent chipping or peeling over time. This is especially important if the blades undergo frequent movement or exposure to varying temperatures.
- Drying Time: The drying time of the spray paint can affect the project timeline. Quick-drying paints allow for faster application of multiple coats, while slower-drying options may require more patience but can sometimes offer better results.
- Durability: Consider spray paints that are designed to withstand wear and tear, especially if the ceiling fan will be used frequently. Some paints are more resistant to fading, chipping, and scratches, ensuring that the finish lasts longer.
- Environmentally Friendly Options: If eco-friendliness is a priority, look for low-VOC or VOC-free spray paints. These options are better for indoor air quality and are less harmful to the environment, making them a responsible choice for home improvement projects.
Which Types of Spray Paint Are Most Suitable for Ceiling Fan Blades?
The best types of spray paint for ceiling fan blades include options that provide durability and a smooth finish, suitable for the materials used in fan blades.
- Acrylic Spray Paint: This type of paint is water-based and offers excellent adhesion to various surfaces, including metal and plastic. It dries quickly and provides a smooth, glossy finish that can enhance the appearance of ceiling fan blades.
- Enamel Spray Paint: Enamel paint is oil-based, providing a hard, durable finish that is resistant to chipping and fading. It is ideal for ceiling fan blades as it withstands the heat generated by the fan while maintaining its color over time.
- Metallic Spray Paint: This option is particularly popular for creating a sleek, modern look on ceiling fan blades. Metallic spray paint can add a reflective quality that enhances the aesthetic appeal and can be used over a primer for better adhesion and longevity.
- Plastic Spray Paint: Specifically formulated for plastic surfaces, this type of spray paint provides a strong bond and flexibility, which is essential for plastic fan blades. It is available in various colors and finishes, ensuring that the blades can be customized to match the room decor.
- Primer Spray Paint: While not a paint itself, using a primer spray before applying color paint can significantly improve adhesion and ensure even coverage on the blades. It helps to seal the surface and can prevent peeling or chipping of the topcoat.
How Does the Finish of the Spray Paint Affect the Appearance of Ceiling Fans?
The finish of spray paint significantly impacts the appearance and durability of ceiling fans.
- Glossy Finish: A glossy finish reflects light, which can make ceiling fans appear more vibrant and polished. This type of finish is also easier to clean, as dust and grime are less likely to adhere to its smooth surface.
- Satin Finish: Satin finishes offer a soft sheen that is not too reflective, providing a subtle elegance to ceiling fans. This finish tends to hide imperfections better than gloss and can complement a variety of interior styles.
- Matte Finish: A matte finish absorbs light instead of reflecting it, giving ceiling fans a more muted, contemporary look. While it can add character, matte finishes are typically more challenging to clean and may show wear and tear more easily over time.
- Metallic Finish: Metallic finishes can create a striking and modern appearance, often resembling brushed metal or chrome. This type of finish can add a touch of glamour and sophistication, making ceiling fans stand out as statement pieces in a room.
- Textured Finish: Textured finishes can provide depth and visual interest to ceiling fans, making them unique and less ordinary. These finishes can mimic natural materials or add an artistic flair, but may require more maintenance to keep clean.
Which Spray Paint Brands Are Recommended for Ceiling Fan Blades?
The best spray paint brands for ceiling fan blades are known for their durability, smooth finish, and ease of application.
- Krylon Fusion for Plastic: This spray paint is specifically formulated for use on plastic surfaces, making it ideal for many ceiling fan blades. It adheres well without the need for a primer and provides a durable, long-lasting finish that resists chipping and fading.
- Rust-Oleum Painter’s Touch: Known for its versatility, this paint works on a variety of surfaces, including metal and wood. Rust-Oleum Painter’s Touch offers a wide range of colors and finishes, providing excellent coverage and a smooth application that enhances the aesthetics of ceiling fan blades.
- Montana Gold Spray Paint: This high-quality spray paint is favored for its vibrant colors and matte finish options. It dries quickly and is UV resistant, making it suitable for indoor and outdoor use, ensuring that your ceiling fan blades maintain their appearance over time.
- Valspar Spray Paint: Valspar offers a range of spray paints that provide excellent adhesion and a smooth finish. It’s known for its durability and resistance to scratches, making it a practical choice for ceiling fan blades that are regularly subject to movement and airflow.
- Rust-Oleum Specialty Spray Paint: This specific line includes paints designed for unique surfaces and effects, such as metallic and matte finishes. It’s particularly useful for achieving a more customized look on ceiling fan blades while ensuring a reliable bond and long-lasting results.
What Features Should You Look for in Quality Spray Paint for Ceiling Fans?
When selecting the best spray paint for ceiling fan blades, there are several key features to consider.
- Durability: Look for a paint that is resistant to chipping, fading, and peeling. Ceiling fans are often exposed to heat and movement, so durable paint will ensure a longer-lasting finish.
- Adhesion: A quality spray paint should bond well to the surface of the fan blades, whether they are metal, wood, or plastic. Good adhesion prevents the paint from flaking off over time.
- Finish Options: Consider the type of finish you desire, such as matte, gloss, or satin. Different finishes can affect the overall appearance of the fan and how light interacts with the blades.
- Drying Time: Quick-drying paint is ideal for projects where you want to minimize downtime. Fast-drying options allow you to complete the job efficiently and reduce the risk of dust settling on the surface before it hardens.
- Color Variety: A wide range of colors gives you the flexibility to match or contrast with your room’s decor. Ensure the paint you choose comes in shades that suit your aesthetic needs.
- Weather Resistance: If the ceiling fan is located in an area with high humidity or extreme temperatures, opt for paint that is formulated to withstand such conditions. Weather-resistant paint helps prevent deterioration due to environmental factors.
- Non-Toxic Formulation: For safety, especially in indoor settings, choose spray paint that is free from harmful chemicals and has low volatile organic compounds (VOCs). This ensures better air quality during and after application.
- Ease of Application: A spray paint that is easy to control and apply can make the project more enjoyable and less frustrating. Look for features like a comfortable nozzle and even spray pattern to enhance the application process.
How Do You Properly Prepare for Painting Ceiling Fan Blades?
To properly prepare for painting ceiling fan blades, follow these essential steps:
- Remove the Blades: Detach the blades from the ceiling fan to ensure you can paint them safely and effectively.
- Clean the Blades: Thoroughly clean the blades with soap and water or a suitable cleaner to remove dust, grease, and any old paint.
- Sand the Surface: Lightly sand the blades with fine-grit sandpaper to create a rough surface for better paint adhesion.
- Protect Surrounding Areas: Use drop cloths or painter’s tape to cover any areas around the fan that you do not want to get paint on.
- Select the Right Spray Paint: Choose a high-quality spray paint specifically designed for the material of your fan blades for a durable and smooth finish.
- Apply Primer (if needed): If the blades are a dark color or if you’re making a significant color change, applying a primer can enhance coverage and durability.
- Use Proper Technique: When painting, hold the spray can about 12 inches away from the surface and apply even, thin coats to avoid drips.
- Allow to Dry Completely: After painting, let the blades dry according to the paint manufacturer’s instructions to ensure the best results.
Removing the blades from the ceiling fan allows you to work on them comfortably and reduces the risk of overspray affecting the ceiling or other surfaces. Ensure to keep the screws and any small hardware in a safe place for easy reassembly.
Cleaning the blades is critical, as any dust or grease can interfere with the adhesion of the paint, leading to peeling or chipping later on. A simple mixture of soap and water or a degreaser works well, followed by a thorough rinse and drying.
Sanding the surface of the blades with fine-grit sandpaper helps to create a textured area for the paint to grip onto, which can significantly improve the longevity of the paint job. This step is particularly important if the blades have a glossy finish.
Protecting the surrounding areas with drop cloths or painter’s tape is essential to avoid accidental paint splatters that can be difficult to clean up. Make sure to cover furniture and flooring adequately.
Selecting the right spray paint is crucial; look for products that are designed for metal or plastic, depending on the material of your fan blades, and select colors that match your decor. The best spray paints will offer good coverage and durability against chipping.
Applying a primer is beneficial when working with dark colors or when changing the color significantly, as it helps to ensure that the final color appears vibrant and true to the can. Primers also help in creating a uniform surface for painting.
When spray painting, maintaining the correct distance and applying even, thin coats will help prevent drips and ensure a smooth finish. It’s better to apply several light coats than one heavy coat.
Finally, allowing the blades to dry completely according to the manufacturer’s instructions is vital for achieving a durable finish that withstands the operation of the fan. Rushing this step can lead to smudges or an uneven coat.
What Steps Should Be Taken Before Applying Spray Paint?
Before applying spray paint to ceiling fan blades, several important steps should be taken to ensure a successful and even finish.
- Choose the Right Spray Paint: Selecting the best spray paint for ceiling fan blades is crucial, as it must adhere well and provide durability. Look for paint specifically designed for metal or plastic surfaces, and consider options that offer a smooth finish and are resistant to chipping and fading.
- Prepare the Surface: Properly preparing the blades is essential for optimal paint adhesion. Clean the blades thoroughly to remove dust, grease, or any old paint, and lightly sand the surface to create a better grip for the new paint.
- Remove the Blades: To achieve an even coating and avoid overspray on other areas, it is best to remove the fan blades from the motor. This also allows you to paint all edges and sides without obstruction.
- Protect Surrounding Areas: Before you start spraying, protect surrounding areas by using drop cloths or newspaper. This prevents accidental overspray from damaging nearby surfaces or furniture.
- Use Proper Ventilation: Ensure that the area is well-ventilated when spray painting. Good airflow helps disperse harmful fumes and allows the paint to dry faster, leading to a better finish.
- Test the Spray: Before applying paint to the fan blades, test the spray on a piece of cardboard or scrap material. This helps you check the color and consistency, and adjust the distance and technique of spraying for the best results.
- Apply a Primer (if necessary): Depending on the surface material of the blades, applying a primer can enhance adhesion and improve the final look. Primers are especially useful for plastic or previously painted surfaces to ensure that the spray paint adheres properly.
- Follow Manufacturer Instructions: Each spray paint product comes with specific instructions regarding application distance, drying times, and number of coats recommended. Adhering to these guidelines will help achieve a professional-looking finish.
What Application Techniques Ensure the Best Results When Painting?
To achieve the best results when painting, especially on surfaces like ceiling fan blades, consider these application techniques:
- Surface Preparation: Properly preparing the surface is crucial for paint adhesion and finish quality. This includes cleaning the blades thoroughly to remove dust, grease, and old paint, and sanding any rough areas to create a smooth surface for the new paint.
- Choosing the Right Paint: Selecting the best spray paint for ceiling fan blades is essential for durability and appearance. Look for paints specifically designed for metal or plastic surfaces, which provide excellent coverage and resistance to chipping and fading.
- Using Masking Tape: To achieve clean lines and protect areas that shouldn’t be painted, use masking tape effectively. This technique ensures that the paint doesn’t bleed onto other surfaces, resulting in a more professional-looking finish.
- Applying in Thin Coats: When using spray paint, apply in several thin coats rather than one thick coat. This method helps prevent drips and runs, allowing for better control and a smoother finish as each layer dries evenly.
- Maintaining Distance and Angle: Holding the spray can at the recommended distance (typically 6-12 inches) and at a slight angle can help achieve an even application. This technique reduces the risk of overspray and ensures that the paint is distributed uniformly across the surface.
- Proper Ventilation: Ensuring adequate ventilation while spraying is important for safety and paint performance. Working in a well-ventilated area helps the paint dry faster and reduces the buildup of harmful fumes.
- Allowing Adequate Drying Time: After each coat, allow sufficient drying time before applying the next layer. This practice not only improves the final appearance but also enhances the paint’s durability and adhesion.
What Mistakes Should You Avoid When Spray Painting Ceiling Fan Blades?
When spray painting ceiling fan blades, there are several common mistakes to avoid to ensure a smooth and successful finish.
- Not Cleaning the Blades Properly: Failing to clean the ceiling fan blades thoroughly can lead to poor paint adhesion. Dust, grease, and other contaminants can create an uneven surface, causing the paint to chip or peel off over time.
- Using the Wrong Type of Paint: Choosing a paint that is not specifically designed for metal or plastic can result in a finish that is not durable. The best spray paint for ceiling fan blades should provide a smooth, long-lasting finish that can withstand humidity and temperature changes.
- Skipping Primer: Neglecting to apply a primer can diminish the quality of the final result. A primer helps the paint stick better to the surface and enhances the vibrancy and durability of the top coat.
- Painting in Poor Conditions: Environmental factors such as temperature and humidity can affect the drying and curing of spray paint. Ideally, you should paint in a well-ventilated area with low humidity and a temperature range that is compatible with the paint specifications.
- Applying Too Thick of a Coat: Overloading the blades with paint can cause drips and uneven coverage. It’s best to apply multiple thin coats, allowing each layer to dry before adding the next, to achieve a smooth and professional-looking finish.
- Neglecting Safety Precautions: Failing to wear protective gear such as masks and goggles can expose you to harmful fumes and particles. Proper ventilation and protective equipment are essential to ensure your safety while spray painting.
- Rushing the Process: Trying to complete the project too quickly can lead to mistakes and a subpar finish. Taking your time to properly prepare, paint, and allow for adequate drying time is crucial for achieving the best results.
How Can You Achieve Even Coverage When Painting Ceiling Fan Blades?
Achieving even coverage when painting ceiling fan blades requires careful preparation and technique.
- Surface Preparation: Properly cleaning and sanding the blades is crucial for paint adhesion and a smooth finish. Remove dust, grease, and any old paint to create a uniform surface that the new spray paint can cling to effectively.
- Choosing the Right Spray Paint: Selecting the best spray paint for ceiling fan blades is essential, as it should be specifically formulated for metal surfaces and provide a durable finish. Look for paints that are resistant to chipping and fading, and consider options with a satin or semi-gloss finish for a professional look.
- Using a Spray Booth or Drop Cloth: Setting up a dedicated spray area can help prevent overspray and ensure a more controlled application. A drop cloth or spray booth will also protect surrounding surfaces from paint splatter and help maintain a clean workspace.
- Applying Multiple Thin Coats: Instead of applying a single thick coat, use several thin layers of paint to achieve even coverage. This method reduces the risk of drips and allows for better control, resulting in a smoother finish.
- Maintaining Proper Distance and Angle: Hold the spray can at an appropriate distance, typically 6 to 12 inches from the blade, and maintain a consistent angle. This technique ensures that the paint is evenly distributed across the surface without pooling or running.
- Drying Time Between Coats: Allow sufficient drying time between each coat, as specified by the paint manufacturer, to prevent smudging and ensure a solid bond. Rushing this step can lead to uneven texture and compromised durability.
What Tips Help Attain a Professional-Looking Finish?
To achieve a professional-looking finish when spray painting ceiling fan blades, consider the following tips:
- Surface Preparation: Properly preparing the surface is crucial for a smooth finish. Clean the blades thoroughly to remove dust, grease, and old paint, and if necessary, sand them lightly to create a better adhesion surface for the spray paint.
- Choosing the Right Spray Paint: Selecting high-quality spray paint specifically formulated for metal or plastic surfaces will yield better results. Look for paint that offers durability and is resistant to chipping or fading to ensure a long-lasting finish.
- Use of Primer: Applying a primer before the topcoat can enhance paint adhesion and provide even coverage. A primer helps to seal the surface and can also help to prevent any bleed-through from previous paint layers.
- Technique and Distance: Maintain a consistent distance (about 10-12 inches) from the blades while spraying to avoid drips and ensure an even coat. Use smooth, sweeping motions to distribute the paint evenly and prevent buildup in any one area.
- Multiple Light Coats: Instead of applying one heavy coat, use multiple light coats to build up the color and finish. Allow each coat to dry completely before applying the next, which helps to prevent runs and achieves a more professional look.
- Drying Conditions: To ensure the best results, spray paint in a well-ventilated area with low humidity and moderate temperature. This helps the paint to dry evenly and reduces the risk of dust or debris settling on the wet paint.
- Finishing Touches: After the final coat has dried, consider applying a clear topcoat for added protection and shine. A clear coat can enhance the durability of the paint job and provide a polished appearance to the fan blades.