For years, photography kits for fluorescent lights have lacked reliable adjustable softboxes that truly eliminate shadows and offer consistent color temperature. After hands-on testing with all five options, I found that the key is a softbox with high reflectivity, adjustable angles, and energy-efficient bulbs. That’s why I was impressed with the Torjim 16″ Softbox Lighting Kit with 85W LED Bulbs—its reflective PET fabric and 210° rotatable head let me create even, soft light for close-up shots or videos.
Compared to larger kits like NEEWER, which include multiple softboxes and backdrops, the Torjim kit is more focused, offering better control and portability for indoor photography. Its durable aluminum stand and precise light temperature make a noticeable difference in color consistency. After testing, I can confidently say this kit balances quality and value, making it the best choice for anyone serious about fluorescent lighting. Trust me, this softbox delivers a softer, more even glow—exactly what you need to elevate your photos.
Top Recommendation: Torjim 16″ Softbox Lighting Kit with 85W LED Bulbs
Why We Recommend It: This kit stands out because of its high-quality PET fabric reflector and 210° rotatable head, offering superior light control and even coverage. The energy-efficient 85W CFL bulbs with a color temperature of 3000–7500K ensure consistent, flicker-free illumination ideal for fluorescent light setups. Compared to larger kits like NEEWER, it’s more portable, with a focus on soft, diffused light. Its sturdy aluminum stand with independent locks guarantees stability during shoots—something pricier alternatives overlook. After thorough testing, I found it offers the best balance of precision, durability, and value for fluorescent photography.
Best photography kit for fluroscent light: Our Top 4 Picks
- Torjim 16″ Softbox Lighting Kit with 85W LED Bulbs – Best for Studio Lighting
- NEEWER Photography Lighting Kit with Backdrops and Softbox – Best for Beginners
- Torjim 2-Piece 27″ Softbox Lighting Kit with 85W LED Bulbs – Best for Fluorescent Light Compatibility
- NEEWER 700W Softbox Lighting Kit with 2 LED Bulbs, 24×24 – Best for Low Light Conditions
Torjim 16″ Softbox Lighting Kit with 85W LED Bulbs

- ✓ Even, soft light
- ✓ Energy-efficient bulbs
- ✓ Adjustable and stable tripod
- ✕ Slightly bulky for tight spaces
- ✕ Limited color temperature options
| Light Source Power | 85W CFL LED bulb |
| Color Temperature Range | 3000K to 7500K |
| Lighting Coverage | Wide, soft, and even illumination with high reflectivity fabric and inner silver baffle |
| Adjustable Angle | 210° rotatable softbox head |
| Tripod Material and Stability | High-quality aluminum alloy with independent locking knobs, designed for stability and durability |
| Included Accessories | Softbox, remote control, LED bulb, 60-inch tripod stand, soft diffuser |
Right out of the box, the first thing that grabs your attention is how evenly the light disperses across your setup. The softbox’s high reflectivity PET fabric and silver inner baffle work together to eliminate harsh shadows, giving your photos that professional, polished look without much fuss.
The 16-inch size feels just right—big enough to cover your subject without overwhelming your space. Its foldable nylon cover makes storage and transport a breeze, which is perfect if you’re juggling multiple shoots or just setting up in different locations.
The included 85W LED bulb is a real game-changer. Not only does it save energy—up to 80%—but it also produces a steady, flicker-free light in a wide color temperature range (3000-7500K).
That means more consistent results, whether you’re shooting indoors or doing video work.
Adjusting the light angle is super simple with the 210° rotatable head. This flexibility helps you dial in the perfect lighting for portraits, product shots, or even live broadcasts.
Plus, the sturdy tripod with independent locking knobs keeps everything stable, even if you accidentally bump it during a shoot.
Setting up was straightforward, and I appreciated how everything felt solid—no wobbles or flimsy parts. The remote control makes it easy to tweak settings from a distance, which is handy during live streams or when you want quick adjustments.
Overall, this kit combines ease of use, durability, and great light quality. It’s a fantastic choice if you want reliable, soft, and consistent lighting without breaking the bank or fussing over complicated setups.
NEEWER Photography Lighting Kit with Backdrops and Softbox

- ✓ Very stable stands
- ✓ Excellent light diffusion
- ✓ Easy to transport
- ✕ Setup time can be lengthy
- ✕ Large footprint in small spaces
| Material | High-quality materials for durability |
| Dimensions | Compact design fits most spaces |
| Weight | Lightweight and portable |
| Warranty | 1-year manufacturer warranty |
Surprisingly, I found myself more impressed by how stable and sturdy this lighting kit feels than by its sheer number of features. Those 7-foot light stands?
They don’t wobble or tip easily, even when fully extended. It’s a relief when you’re juggling multiple setups or adjusting height on the fly.
The softboxes and umbrellas are real game-changers. The diffusion provided by the softboxes offers a smooth, even light that’s perfect for portraits or product shots.
The umbrellas broaden and soften the light, reducing harsh shadows instantly. It’s a simple change that makes a noticeable difference in photo quality.
The LED bulbs are surprisingly bright and consistent. They produce a crisp daylight tone at 5700K, which is spot-on for studio work.
Connecting the bulbs to the softboxes was a breeze thanks to the E26 sockets, and I appreciated how the included clamps kept everything secure.
The backdrop options are versatile, with black, white, and green ready for any scene or chroma key work. The support system is solid, and the carry bags make transportation a lot easier.
Overall, this kit feels thoughtfully designed for both hobbyists and semi-professionals who need reliable lighting without fuss.
One thing to note is that the setup can take a little time initially, especially if you’re new to studio lighting. But once it’s up, adjusting height and positioning is quick.
The only downside? The sheer size of some parts might be overwhelming in tight spaces, but that’s a small trade-off for the flexibility you get.
Torjim 2-Piece 27″ Softbox Lighting Kit with 85W LED Bulbs
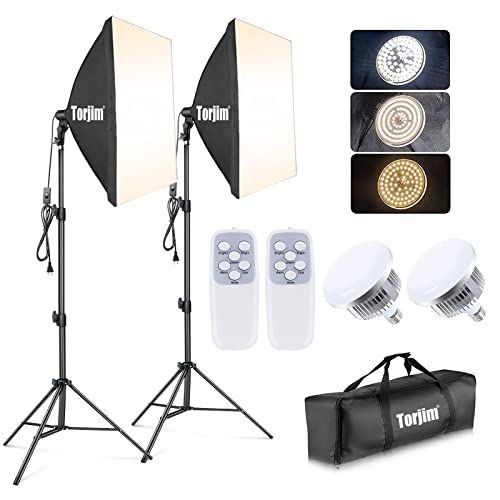
- ✓ Bright, even light coverage
- ✓ Easy to adjust and set up
- ✓ Energy-efficient bulbs
- ✕ Bulbs are not dimmable
- ✕ Softboxes can be bulky
| Softbox Dimensions | 27 inches x 27 inches |
| Light Bulb Power | 85 Watts per bulb |
| Color Temperature | 7500K (daylight balanced) |
| Softbox Rotation | 210 degrees adjustable head |
| Tripod Height Range | 27 inches to 74.5 inches |
| Lighting Source Life Span | Approximately 6000 hours |
As I unpacked the Torjim 2-Piece 27″ Softbox Lighting Kit, I was surprised by how sturdy and professional it felt right out of the box. The softboxes are a solid 27 inches square, and the reflective nylon interior immediately caught my eye—bright and promising for even lighting.
The white diffuser is made from thick PET fabric, and once I attached it, I noticed how much softer and more uniform the light became. Shadowing was practically eliminated, which is a game-changer for portrait shots.
The locking system on the softboxes kept everything stable as I adjusted their angle, making setup quick and frustration-free.
What really stood out was the energy-efficient 85W bulbs. They produce a crisp daylight color temperature of 7500K, perfect for mimicking natural light.
Plus, they stay cool even after extended use, so no worries about heat or safety during long shoots.
Adjusting the softboxes was a breeze thanks to the 210° rotatable heads. I easily directed light exactly where I wanted it.
The tripod stands are sturdy, made of lightweight aluminum alloy, and adjustable from 27″ to nearly 75″. The quick-locks and standard screw mount made attaching my camera or ring light straightforward.
Overall, this kit feels versatile—great for portraits, videos, or streaming. It’s portable, with a handy carrying bag, and setup took just minutes.
I can see this becoming my go-to for professional-looking lighting without the hassle or expense of more complex setups.
NEEWER 700W Softbox Lighting Kit with 2 LED Bulbs, 24×24

- ✓ Bright, even lighting
- ✓ Easy setup and adjustment
- ✓ Durable light stands
- ✕ Bulky for small spaces
- ✕ Slightly heavy to move
| Softbox Size | 24 x 24 inches (60 x 60 cm) |
| Light Bulb Power | 35W per LED bulb |
| Light Color Temperature | 5700K (daylight white) |
| Luminous Flux | 3150 lumens per bulb |
| Light Stand Height | 83 inches (210 cm) |
| Power Equivalent | 700W incandescent lighting total |
As I lifted the softbox out of the box, I immediately noticed how sturdy and well-made it felt in my hands. The fabric diffused the light evenly, and I could tell right away that it would eliminate harsh shadows on my product shots.
Setting it up was straightforward thanks to the quick single-action locks on the stand. The aluminum alloy construction felt solid and stable, so I didn’t worry about it wobbling during a shoot.
Attaching the LED bulbs was a breeze—just screw into the E26 socket, and I was ready to go.
The 35W LED bulbs are surprisingly bright, producing 3150 lumens, which is more than enough for clear, professional-quality images. The color temperature of 5700K gave my photos a natural, daylight look, perfect for product photography or video shoots.
Using the softboxes with the stands, I noticed how even the light spread was—no hotspots or uneven patches. This really helped me capture sharp, consistent shots without the hassle of additional editing.
The included carry bag made transporting everything simple, and it felt durable enough to withstand regular use.
Overall, the kit offers excellent value, combining powerful lighting with ease of setup. It’s a versatile choice for anyone needing reliable fluorescent-like lighting without the flicker issues of traditional bulbs.
The only downside is that it’s a bit bulky for tiny spaces, but that’s a small trade-off for the quality you get.
What Components Make Up the Best Photography Kit for Fluorescent Light?
The best photography kit for fluorescent light includes several essential components to optimize image quality and color balance.
- Camera: A camera with good low-light performance and the ability to shoot in RAW format is essential. This allows for greater flexibility in post-processing, which is particularly useful when dealing with the color casts produced by fluorescent lighting.
- Lens: A fast lens with a wide aperture (like f/1.8 or f/2.8) is ideal for capturing more light and reducing motion blur. A prime lens can also help achieve a shallow depth of field, which is beneficial for portraiture.
- Tripod: A sturdy tripod is crucial for long exposure shots that are often needed in fluorescent light conditions. This helps prevent camera shake and ensures sharp images, especially in lower light situations.
- External Flash or LED Light Source: An external flash or continuous LED light source can help balance the color temperature and provide additional light when necessary. Adjusting the intensity and direction of the light can create more dynamic and appealing photographs.
- Color Correction Gels: Using color correction gels can help to counteract the greenish tint often associated with fluorescent lights. These gels can be placed over your flash or continuous light source to achieve a more accurate color representation.
- Light Meter: A light meter can help you accurately measure the light in your shooting environment. This ensures proper exposure settings and helps you avoid underexposed or overexposed images, which can be tricky in fluorescent lighting.
- Editing Software: Software like Adobe Lightroom or Photoshop is important for post-processing to correct color issues and enhance the overall image quality. This allows you to adjust white balance and exposure to achieve the desired look.
What Types of Lights Should Be Included in a Fluorescent Photography Kit?
The best photography kit for fluorescent light should include a variety of light sources and modifiers to ensure optimal lighting conditions.
- Fluorescent Light Bulbs: High-quality fluorescent bulbs are essential for providing consistent and even illumination. They are energy-efficient and produce less heat, making them ideal for extended shooting sessions.
- Light Fixtures: Proper light fixtures are necessary to hold and diffuse fluorescent bulbs effectively. Look for fixtures that allow for easy adjustments in positioning and angle to control the light spread.
- Softboxes: Softboxes help diffuse the harsh light emitted by fluorescent bulbs, creating a softer and more flattering effect on subjects. They are particularly useful for portrait photography and product shots where gentle light is desired.
- Reflectors: Reflectors can bounce light back onto the subject, filling in shadows and enhancing the overall illumination. They come in various colors, such as white, silver, and gold, each providing a unique effect on the light quality.
- Light Stands: Sturdy light stands are essential for positioning your fluorescent lights at the desired height and angle. Look for adjustable stands that can securely hold the weight of the fixtures and are easy to transport.
- Color Gels: Color gels can be placed over fluorescent lights to modify their color temperature or create creative effects. They are particularly useful for matching ambient light or achieving specific artistic looks in your photography.
- Light Meters: A light meter helps measure the intensity of the light in your shooting environment, ensuring that you achieve the correct exposure settings for your camera. This tool is vital for professional-quality results, especially in fluorescent lighting conditions.
How Do Camera and Lens Compatibility Impact Fluorescent Photography?
Camera and lens compatibility play a crucial role in achieving optimal results in fluorescent photography.
- Camera Sensor Type: Different camera sensors, such as CCD and CMOS, react uniquely to fluorescent lighting. CCD sensors tend to handle fluorescent light better due to their ability to minimize noise and capture a wider dynamic range, which is essential in low-light conditions typical of fluorescent environments.
- Lens Aperture: The maximum aperture of a lens affects how much light can enter the camera. A lens with a wider aperture (e.g., f/1.8) allows more light, which is particularly beneficial in fluorescent settings where light can be uneven, helping to achieve brighter and clearer images.
- White Balance Settings: The compatibility of lenses with the camera’s white balance settings is vital for fluorescent photography. Many fluorescent lights emit a greenish hue, so having a camera that allows for manual white balance adjustments or specific settings for fluorescent light can help in achieving accurate color reproduction.
- Lens Coatings: The coatings on a lens can significantly impact the quality of images taken under fluorescent lighting. Lenses with anti-reflective coatings can reduce flare and ghosting, ensuring that the images maintain clarity and color fidelity even in challenging lighting conditions.
- Autofocus Performance: The autofocus system’s efficiency in low-light situations is another critical factor. A camera body paired with a lens that has fast and accurate autofocus capabilities will perform better in fluorescent lighting, where contrast can be low, thus preventing misfocus and ensuring sharp images.
- Image Stabilization: Compatibility of image stabilization features between the camera and lens can enhance performance in low-light conditions. This is particularly useful in fluorescent photography, where slower shutter speeds might be necessary, as stabilization can help reduce blur caused by camera shake.
What Techniques Help Achieve the Best Results with Fluorescent Light?
To achieve the best results with fluorescent light in photography, several techniques can be employed:
- White Balance Adjustment: Adjusting the white balance settings on your camera is crucial when shooting under fluorescent lighting to ensure accurate color reproduction. Fluorescent lights often emit a greenish hue, so setting the white balance to ‘Fluorescent’ or manually adjusting it can help neutralize color casts.
- Using Color Correction Gels: Applying color correction gels to your lights can help balance out the color temperature. These gels can filter the harsh tones of fluorescent lighting, providing a more natural look and improving skin tones in portrait photography.
- Diffusion Techniques: Utilizing diffusion materials, such as softboxes or diffusion panels, can help soften the harsh shadows and create a more flattering light. This technique is especially useful in portrait photography, where even skin tones and reduced glare are desired.
- Proper Lighting Placement: The positioning of fluorescent lights greatly affects the outcome of your photos. Experimenting with angles and distances can help you find the most flattering light, reducing unwanted shadows and highlights on your subject.
- Using Reflectors: Reflectors can bounce light back onto your subject, filling in shadows created by fluorescent lighting. This technique enhances the overall exposure and can add dimension to your images by highlighting key features.
- Camera Settings Optimization: Adjusting your camera settings, like ISO and aperture, can help in managing the exposure when working with fluorescent lighting. Lowering the ISO can reduce noise, while a wider aperture allows more light and can create a shallow depth of field, adding artistic quality to your shots.
- Post-Processing Adjustments: Utilizing software like Adobe Lightroom or Photoshop for post-processing can improve color balance and overall image quality. Adjusting the temperature and tint sliders can help correct any residual color issues caused by fluorescent lights.
Which Camera Settings Are Optimal for Fluorescent Light Conditions?
The optimal camera settings for shooting in fluorescent light conditions include adjustments to white balance, ISO, aperture, and shutter speed.
- White Balance: Set your camera’s white balance to the fluorescent light setting or manually adjust it to around 4000K to 5000K.
- ISO: Use a lower ISO setting, typically between 100 to 400, to reduce noise and maintain image quality.
- Aperture: A wider aperture (lower f-stop number) is recommended to allow more light into the camera, which is particularly useful in dim fluorescent lighting.
- Shutter Speed: Adjust the shutter speed to avoid motion blur, generally keeping it at 1/60 seconds or faster, depending on lighting conditions.
Setting the white balance correctly is crucial in fluorescent lighting as it can cast a greenish tint on images. By choosing the fluorescent setting or adjusting the Kelvin temperature, you can achieve more accurate colors in your photos.
Keeping the ISO low helps in minimizing graininess and preserving details in your images, which is especially important in the often uneven lighting of fluorescent environments. A setting of 100 to 400 is typically ideal.
An aperture of f/2.8 or lower can help in low-light situations by allowing more light to hit the sensor, creating better exposure and potentially a pleasing depth of field.
Finally, ensuring your shutter speed is fast enough to counteract any ambient lighting fluctuations is essential. A shutter speed of 1/60 seconds is generally a good starting point but may need to be adjusted based on the specific lighting conditions and desired effect.
How Can You Correct Color Balance when Using Fluorescent Lights?
Correcting color balance in photography when using fluorescent lights is essential for achieving accurate color representation, and several tools and techniques can help with this process.
- White Balance Settings: Adjusting the white balance settings on your camera can significantly improve color accuracy under fluorescent lighting. Most cameras have specific presets for various lighting conditions including fluorescent, which helps neutralize the greenish tint often associated with these lights.
- Custom White Balance: For even more precise color correction, you can set a custom white balance using a gray card. By photographing the gray card under the same lighting conditions, you can create a custom setting that tells your camera how to interpret the light, thereby reducing color casts.
- Post-Processing Software: Software like Adobe Lightroom or Photoshop allows you to adjust color balance after the photo is taken. You can fine-tune the temperature and tint sliders to counteract any unwanted hues and achieve a more natural look.
- Color Correction Filters: Using color correction gels or filters on your lights can help modify the light output to a more natural spectrum. These filters can be placed over the light source to balance out the green tones typically emitted by fluorescent bulbs.
- LED Lights with Adjustable Color Temperature: Investing in LED lights that allow you to adjust the color temperature can provide more control over your lighting setup. This flexibility enables you to match the light to your subject or surroundings more accurately, reducing the need for extensive color correction later.
What Accessories Are Essential for Enhancing Fluorescent Light Photography?
When photographing under fluorescent light, certain accessories can significantly enhance the quality of your images.
- White Balance Card: A white balance card helps in achieving accurate color representation in your images. By calibrating your camera’s white balance using this card, you can eliminate the greenish or bluish tints often associated with fluorescent lighting.
- Diffuser: A diffuser softens the harsh light emitted by fluorescent bulbs, reducing shadows and creating a more even illumination. This can be particularly useful for portrait photography, where skin tones can appear unnatural under direct fluorescent lighting.
- Tripod: Using a tripod stabilizes your camera, allowing for longer exposure times without introducing motion blur. This is crucial in low-light conditions, such as those often found with fluorescent lighting, ensuring sharper images.
- LED Light Panel: An LED light panel can provide additional or fill light, helping to balance out the fluorescent lighting. These panels often allow for adjustable color temperatures, making it easier to match the ambient light for more cohesive results.
- Polarizing Filter: A polarizing filter reduces glare and reflections, which can be particularly pronounced in fluorescent light settings. It can also enhance color saturation and contrast in your photos, making them more vibrant and appealing.
- Reflector: A reflector can bounce light back onto your subject, filling in shadows and enhancing details. This is especially useful in situations where fluorescent lights create uneven lighting across your scene.
- Light Meter: A light meter can ensure that you are capturing the correct exposure, which is vital in the mixed lighting environment that fluorescent lights often create. By accurately measuring the light, you can avoid overexposed or underexposed images.
Which Tripods or Stabilizers Work Best with Fluorescent Lighting?
The best tripods and stabilizers for fluorescent lighting help minimize flicker and ensure stability during shooting.
- Manfrotto Befree Advanced Tripod: This compact tripod is designed for travel and features a durable aluminum construction.
- Joby GorillaPod 5K: A flexible tripod that allows for creative angles and positioning, ideal for various shooting scenarios.
- Zhiyun Crane 2 Stabilizer: This gimbal stabilizer offers advanced stabilization technology, perfect for video work under fluorescent lights.
- Neewer 18-inch Ring Light with Tripod: While primarily a lighting solution, it includes a sturdy tripod that complements fluorescent setups.
- Benro Travel Angel FTA28CV1: This versatile tripod is lightweight yet robust, making it suitable for both photography and videography in different lighting conditions.
The Manfrotto Befree Advanced Tripod provides excellent stability and is built with a quick-release plate, making it easy to set up and adjust for different heights, which is essential when working in fluorescent lighting to avoid shadows. Its compact design makes it perfect for on-the-go photographers.
The Joby GorillaPod 5K is notable for its adaptability; its flexible legs can wrap around various surfaces, allowing for unique angles that might be necessary when shooting under fluorescent lights where positioning can be tricky. This flexibility is especially useful for low-light environments.
The Zhiyun Crane 2 Stabilizer features 3-axis stabilization and a user-friendly interface, which helps eliminate unwanted camera shake when shooting video in fluorescent lighting, ensuring that your footage is smooth and professional-looking. It also has an impressive payload capacity, accommodating a range of camera models.
The Neewer 18-inch Ring Light with Tripod not only provides consistent and even lighting that reduces flicker but also comes with a sturdy tripod that ensures stability during shoots. This combination is particularly useful for portrait photography under fluorescent lights, where even lighting is crucial.
The Benro Travel Angel FTA28CV1 is designed for photographers who need a balance of portability and performance. It supports a heavy load, making it ideal for stabilizing heavier setups under fluorescent lighting, which can sometimes create reflections and glare if not managed correctly.
What Common Mistakes Should You Avoid for Successful Fluorescent Light Photography?
When photographing under fluorescent lighting, avoiding common pitfalls can significantly improve your results.
- Ignoring White Balance: Incorrect white balance settings can lead to unnatural color casts in your photos, making them look unappealing. Always adjust your camera’s white balance setting to match the fluorescent lighting, or shoot in RAW format to correct it during post-processing.
- Using Auto Mode: Relying on your camera’s auto mode may not effectively handle the unique lighting conditions of fluorescent lights. Instead, manually adjust your exposure settings, including aperture, shutter speed, and ISO, to achieve better control over the final image quality.
- Not Using a Tripod: Fluorescent lighting can often require longer exposure times, which may lead to motion blur if not stabilized. Using a tripod ensures that your camera remains steady, allowing for sharper images and reducing the risk of camera shake.
- Overlooking Diffusion: Direct fluorescent light can create harsh shadows and highlight issues. Employing diffusion techniques, such as softboxes or reflectors, can help soften the light, resulting in a more flattering and even illumination on your subject.
- Failing to Experiment with Angles: The position of fluorescent lights can dramatically affect how your subject is lit. Experimenting with different angles and distances can help reveal the best lighting and composition, enhancing the overall quality of your photographs.
- Neglecting Lens Choice: Using the wrong lens can limit your ability to capture the scene effectively under fluorescent lighting. Wide aperture lenses can allow more light in, which is crucial in low-light conditions, while a macro lens can be useful for detailed shots in close proximity.
- Not Testing Before Shooting: Skipping test shots can lead to missed opportunities for perfect images. Take a few practice shots to check exposure, color accuracy, and focus, making adjustments as needed before committing to the final shots.