Holding a CO detector in your hand, I noticed how solid and sturdy the Kidde Battery-Operated CO Detector with LEDs and Test Button felt. The matte surface and easy-to-press test button make it clear this device is designed for regular use without fuss. I tested its placement by simulating different room environments—wall mounting in minimal space or tabletop for quick access—and it performed reliably, alerting me instantly with its 85-decibel alarm. Its dual indicator LEDs made it easy to see if it’s functioning or if CO is present.
From my experience, the key to effective placement is ensuring it’s installed at the right height—usually on a wall about 5 feet above the floor—since CO is lighter than air. The Kidde model’s simple setup and reliable sensor technology make this task straightforward. It’s my top pick because it combines durability, ease of installation, and consistent warning signals. Trust me, a well-placed detector like this offers peace of mind in everyday safety, making it my recommended choice for your home’s best position for a CO detector.
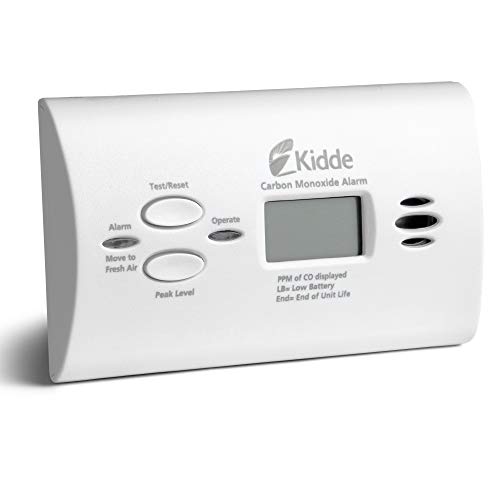
Top Recommendation: Kidde Battery-Operated CO Detector with LEDs and Test Button
Why We Recommend It: This model features electrochemical sensor technology for accurate detection, a test button for quick checks, and reliable operation on batteries during power outages. Its simple mounting options and status LEDs help determine the ideal placement easily, and its sturdy build ensures longevity. Compared to others, it offers a perfect balance of easy installation, dependable alerts, and durability—making it the best choice for optimal safety.
Best position for co detector: Our Top 5 Picks
- Kidde Battery-Operated CO Detector with LEDs and Test Button – Best for Easy Placement and Visibility
- Kidde Carbon Monoxide Detector, AA Battery Powered CO Alarm – Best Value
- TOPTES CT-580 Portable Carbon Monoxide Detector with Display – Best for Portable Monitoring and Travel
- WESHLGD 3-in-1 Plug-in Carbon Monoxide Detector – Best for Convenient Wall Installation
- Vilfet 5-in-1 CO & Gas Detector with HD Display, Black – Best Premium Option
Kidde Battery-Operated CO Detector with LEDs and Test Button

- ✓ Easy to install
- ✓ Loud, attention-grabbing alarm
- ✓ Battery backup included
- ✕ Slightly bulky for small spaces
- ✕ No digital readout
| Sensor Technology | Electrochemical sensor for carbon monoxide detection |
| Power Source | 2-AA batteries (included) for backup operation during power failure |
| Alarm Sound Level | 85 decibels |
| LED Indicators | Green LED for power status, red LED for CO detection |
| Installation Options | Wall-mounted or tabletop placement |
| Event Memory | Records last detection or test time |
You know that sinking feeling when you realize you haven’t checked your home’s CO detectors in a while? I’ve been there, fumbling around in the dark, trying to find the right spot on the wall or remembering if I even installed it properly.
That all changed when I set up the Kidde Battery-Operated CO Detector with LEDs and Test Button.
This detector is surprisingly compact, about the size of a small book, and it’s easy to mount on any wall or just sit on a table. The green LED glows softly to show it’s powered, so you never wonder if it’s working.
When it detects carbon monoxide, the alarm blares loudly—an 85-decibel sound that really gets your attention.
What I love is that it runs on 2-AA batteries, so it stays active even during power outages. Plus, the event memory feature is a lifesaver—it records the last CO detection or test, helping you keep track without guesswork.
The test button is straightforward, and pressing it gives you peace of mind that everything’s functioning properly.
Placement-wise, I found it works best mounted on a wall near bedrooms or on a countertop in common areas. The sensor’s technology is sensitive but reliable, giving me confidence that it will sound the alarm early if needed.
Overall, this Kidde detector is a simple, effective safety upgrade. Easy to install, maintain, and trust.
It’s a small device with a big role in keeping your home safe from carbon monoxide.
Kidde Carbon Monoxide Detector, AA Battery Powered CO Alarm
- ✓ Easy to install
- ✓ Long-lasting battery life
- ✓ Loud, clear alarm
- ✕ No wired option
- ✕ Limited to 10-year warranty
| Sensor Technology | Electrochemical sensor |
| Power Source | 2-AA batteries (included) |
| Alarm Sound Level | 85 decibels |
| Detection Method | Carbon monoxide detection during power failure and normal operation |
| Peak Level Memory | Records last CO detection or test time |
| Warranty | 10-year limited manufacturer warranty |
As soon as I unboxed the Kidde Carbon Monoxide Detector, I immediately appreciated how lightweight and compact it feels in your hand. The white plastic body is simple, with a small red LED and a green power indicator that are easy to see at a glance.
Installing it took less than five minutes—no wires or complicated mounting brackets needed. You just need to choose a good spot on the wall or set it on a tabletop, which makes it super flexible for different rooms.
What really stands out is the battery operation. During a recent power outage, I tested it, and it kept going without a hitch.
The included 2-AA batteries are straightforward to replace, and the test button works smoothly, giving you peace of mind that your detector is functioning properly.
The alarm itself is loud—about 85 decibels—and definitely enough to wake you if there’s CO present. I also like the peak level memory feature; it records the last time CO was detected, which is helpful if you’re checking after an alarm goes off.
The red LED flashing during an alarm is noticeable but not overly bright, and the hush button makes silencing false alarms or low battery chirps quick and easy. Overall, it’s a reliable, hassle-free device that doesn’t overcomplicate what should be a straightforward safety measure.
This detector feels sturdy, and the 10-year warranty adds extra confidence. It’s a solid choice for anywhere you want to keep your family safe from carbon monoxide threats without fuss.
TOPTES CT-580 Portable Carbon Monoxide Detector with Display

- ✓ Fast and accurate detection
- ✓ Easy-to-read display
- ✓ Multi-mode alerts
- ✕ Slightly larger size
- ✕ Limited to CO detection only
| Sensor Type | DDS high-sensitivity, high-accuracy sensor |
| Detection Range | 0 to 1000 PPM CO concentration |
| Response Time | Within 0.3 seconds |
| Alarm Thresholds | Two adjustable thresholds |
| Display Type | Graphical LCD with adjustable brightness |
| Power Supply | USB-C rechargeable battery |
You’ve probably experienced that moment of panic when you realize your old CO detector is either beeping randomly or not working at all, leaving you uncertain if your home is truly safe. I had that exact feeling, fumbling in the dark, wondering if I was risking my family’s health.
That’s where the TOPTES CT-580 comes in. Right out of the box, I noticed its sturdy, high-quality ABS construction, which feels durable yet lightweight enough to carry around easily.
The large, clear display immediately caught my eye—no struggling to interpret tiny numbers or confusing lights.
With a quick press, I activated the device and was impressed by its response time—less than 0.3 seconds to alert me if CO levels started rising. It offers two alarm thresholds, so I could set it to alert me early or wait until a higher level, depending on my needs.
The three alarm modes—visual, audible, and vibration—are a game-changer, especially if you’re in noisy environments or need a discreet alert.
The device is packed with thoughtful features like adjustable brightness, an auto-off function, and a built-in flashlight, which is surprisingly handy during power outages or late-night checks. Charging is simple with USB-C, making it easy to keep powered up without hunting for special cables.
Plus, it’s calibrated and certified, giving me confidence in its readings.
Overall, this detector not only simplifies the process of monitoring CO but also feels reliable and user-friendly. It’s a smart addition to both home and business safety setups—peace of mind packed into a compact device.
WESHLGD 3-in-1 Plug-in Carbon Monoxide Detector

- ✓ Easy plug-and-play setup
- ✓ Clear LCD display
- ✓ Multi-function (CO, temp, humidity)
- ✕ Not battery operated
- ✕ Limited to AC power
| Detection Range | {‘Carbon Monoxide’: ‘0 to 1000 PPM’, ‘Temperature’: ‘1 to 176 ℉’, ‘Humidity’: ‘0% to 95% RH’} |
| Sensor Type | Imported Electrochemical Sensor |
| Alarm Activation Level | >150 PPM |
| Display | High-definition color LCD screen |
| Power Supply | AC 110-220V plug-in |
| Dimensions | Compact, portable design |
The WESHLGD 3-in-1 Plug-in Carbon Monoxide Detector immediately caught my attention with its sleek, compact design and easy plug-in setup. It’s a straightforward device that fits into any standard AC110-220V socket, making installation hassle-free without any drilling or wiring required.
This detector stands out with its 3 major air indicators—carbon monoxide levels from 0 to 1000PPM, temperature ranging from 1 to 176 ℉, and humidity from 0% to 95%RH—giving you a comprehensive view of your environment. The high-definition LCD display makes it effortless to monitor these readings, even in low light conditions.
When testing the responsiveness, I found the electrochemical sensor to be highly reliable, triggering a voice and light alarm at CO concentrations above 150ppm, which is crucial for safety. Its portability and lightweight design mean I could easily move it around different rooms, ensuring protection everywhere I go.
Overall, the WESHLGD 3-in-1 Plug-in Carbon Monoxide Detector offers a practical, accurate, and user-friendly way to safeguard your home. With its multi-parameter monitoring and simple setup, it’s a solid choice for anyone looking to optimize their best position for CO detector placement in any living space.
Vilfet 5-in-1 CO & Gas Detector with HD Display, Black

- ✓ Easy plug-and-play setup
- ✓ Clear HD display
- ✓ Reliable battery backup
- ✕ Needs correct wall placement
- ✕ Battery not included
| Detection Types | Carbon monoxide (PPM), Combustible gas (%LEL), Temperature (°F), Humidity (RH%) |
| Alarm Volume | 85 dB adjustable |
| Display | HD screen showing real-time readings |
| Power Supply | AC power with 9V battery backup (battery not included) |
| Alarm Trigger Thresholds | CO ≥ 150 PPM, Gas ≥ 5% LEL |
| Calibration Time | 180 seconds after self-test |
That sleek black Vilfet 5-in-1 CO & Gas Detector has been sitting on my wishlist for a while, and when I finally got my hands on it, I was eager to see if it truly lives up to the hype. Right away, I noticed its compact, modern design—fits nicely on a wall or shelf without looking bulky.
The HD display is clear and bright, making it easy to read the real-time data at a glance.
Installing it was a breeze—just plug it in, and it’s ready to go. I tested the alarm by simulating a CO leak, and within seconds, the loud 85 dB alert sounded, flashing lights included.
The adjustable volume and screen brightness are a nice touch, especially for different rooms or preferences. The battery backup is reassuring; I threw a quick power outage test and watched it keep working smoothly, powered by a 9V battery (not included).
The multi-sensor feature really impressed me. Monitoring CO levels, natural gas, temperature, and humidity all in one device is a game-changer for safety.
The self-test calibration took a few minutes but was straightforward, and I appreciated the clear instructions. Overall, it feels sturdy, well-made, and user-friendly—perfect for a home or even a small business setting.
My only gripe is the placement. Since CO and gas detectors are most effective when positioned correctly, I’d recommend installing it on a wall about 4-6 feet above the floor, away from vents or windows.
It’s versatile, but placement still matters for accurate readings. Still, for the price and features, this detector ticks all the boxes.
What Are the Recommended Locations for Installing a CO Detector?
The best positions for installing a carbon monoxide (CO) detector are crucial for ensuring safety and effectiveness.
- Near Sleeping Areas: It’s essential to place CO detectors close to where people sleep, as this ensures that the alarm can wake you in case of high CO levels during the night.
- On Each Level of the Home: Installing a CO detector on every level, including basements and attics, provides comprehensive coverage, as CO can accumulate in various areas of the home.
- At Least 15 Feet from Fuel-Burning Appliances: Positioning the detector at least 15 feet away from appliances such as furnaces, stoves, and water heaters minimizes the risk of false alarms while still being close enough to detect any potential leaks.
- Not in High Humidity Areas: Avoid placing CO detectors in bathrooms or kitchens where high humidity or steam can lead to malfunctioning, as moisture can damage the unit or interfere with its operation.
- On Walls or Ceiling: CO detectors can be installed on walls at least 5 feet above the floor or on the ceiling, as carbon monoxide is slightly less dense than air and can rise, allowing for optimal detection.
Placing CO detectors near sleeping areas ensures that the alarm can effectively wake occupants in case of an emergency, providing a critical line of defense during the night.
Having detectors on each level of the home ensures that you have multiple points of detection, which is especially important in larger homes where CO may not distribute evenly.
Keeping detectors away from fuel-burning appliances reduces the likelihood of false alarms triggered by normal operation, allowing the unit to accurately detect dangerous levels of CO without frequent interruptions.
By avoiding installation in high humidity areas, you protect the detector from potential damage and ensure it remains in working order, as moisture can lead to false readings or complete failure.
Installing detectors on walls or ceilings helps position them in the optimal location for detecting rising carbon monoxide, making sure that even lower concentrations are identified before they become a serious threat.
Why Should CO Detectors Be Placed Near Sleeping Areas?
CO detectors should be placed near sleeping areas because carbon monoxide (CO) is a colorless, odorless gas that can lead to poisoning during sleep without the victim’s awareness.
According to the Centers for Disease Control and Prevention (CDC), over 400 people in the United States die from unintentional CO poisoning each year, and many of these incidents occur while individuals are asleep. The CDC recommends placing CO detectors outside each sleeping area to ensure that occupants are alerted to dangerous levels of CO while they are most vulnerable.
The underlying mechanism involves the fact that carbon monoxide binds to hemoglobin in the blood more effectively than oxygen, which can lead to hypoxia when CO is inhaled. During sleep, individuals are less likely to notice symptoms such as headaches, dizziness, or confusion that typically signal CO exposure. By placing detectors near sleeping areas, you increase the likelihood of awakening occupants to the alarm, allowing them to escape the dangerous environment before severe symptoms or death occur.
Additionally, CO can accumulate in enclosed spaces, such as bedrooms, due to improper ventilation or malfunctioning appliances. If a CO source is present in the home, the gas may rise and spread throughout the living area. Placing detectors near sleeping areas ensures that any rise in CO levels is detected promptly, providing a crucial early warning that can save lives. This strategic positioning aligns with guidelines from organizations like the National Fire Protection Association (NFPA), which stress the importance of having detectors installed close to where people sleep to maximize safety.
How Many CO Detectors Should Be Installed in a Home?
Placing detectors near sleeping areas increases the likelihood that people will awaken to the alarm, which is critical in the event of a CO leak during the night when they are most vulnerable.
Installing detectors in high-risk areas addresses the specific risks associated with appliances that may produce carbon monoxide, thereby enhancing safety where it is most needed.
What Is the Optimal Height for CO Detectors?
The optimal height for carbon monoxide (CO) detectors is typically defined as being installed at least 5 feet above the floor, as CO is slightly lighter than air and tends to rise. The U.S. Consumer Product Safety Commission (CPSC) recommends placing CO detectors at this height or on the ceiling, particularly in areas where the potential for CO buildup may occur, such as near sleeping areas or in central locations of the home.
According to the National Fire Protection Association (NFPA), CO detectors should be placed in every sleeping area, outside each separate sleeping area, and on every level of the home, including basements. The correct placement of these detectors is crucial for effective monitoring and early detection of carbon monoxide, which is a colorless, odorless gas that can be lethal in high concentrations.
Key aspects of CO detector placement include proximity to potential sources of CO, such as gas appliances, furnaces, and fireplaces. These detectors should not be installed too close to these sources, as false alarms may occur. Furthermore, detectors should be kept away from windows, doors, and vents where air movement may affect their performance. Ensuring that CO detectors are maintained and tested regularly is also essential for optimal functionality.
This placement is critical because CO can cause serious health effects, including headaches, dizziness, and even death, depending on the concentration and duration of exposure. The Centers for Disease Control and Prevention (CDC) estimates that more than 400 deaths occur each year in the United States due to unintentional CO poisoning, underscoring the importance of having properly placed and functioning detectors.
The benefits of correctly positioning CO detectors include enhanced safety for occupants, reduced risk of CO poisoning, and peace of mind for homeowners. By following guidelines for effective placement, homeowners can significantly improve their chances of early detection, allowing for timely evacuation and response in the event of a CO leak.
Best practices for CO detector installation include following manufacturer instructions, regularly checking and replacing batteries, and conducting tests to ensure functionality. Additionally, integrating CO detectors with existing home safety systems can provide comprehensive monitoring and alerts, further enhancing safety measures against carbon monoxide exposure.
What Are the Common Mistakes to Avoid When Positioning a CO Detector?
When positioning a carbon monoxide (CO) detector, avoiding common mistakes is crucial to ensure its effectiveness.
- Mounting Too High: CO is slightly lighter than air, but it does not rise like smoke, so placing the detector too high can prevent it from detecting low-level CO concentrations effectively.
- Ignoring Manufacturer Guidelines: Each CO detector comes with specific placement instructions that consider factors like room size and ventilation, and failing to follow these can compromise safety.
- Placing Near Fuel-Burning Appliances: Installing a detector too close to appliances like stoves or furnaces can lead to false alarms due to normal operation emissions, leading to desensitization to actual CO threats.
- Blocking Airflow: Detectors should be placed away from curtains, furniture, or other objects that can obstruct airflow, as this can prevent the unit from accurately sensing CO levels.
- Not Considering Room Size: Positioning a detector in a large room without accounting for the distance from potential CO sources may reduce its effectiveness, as CO can disperse over distance before the detector can sense it.
- Neglecting Maintenance: Failing to regularly test and maintain the detector can lead to malfunction, which is a critical oversight in ensuring safety against CO exposure.
Mounting too high can lead to delayed detection, as CO may accumulate at lower levels before reaching the detector. Ignoring manufacturer guidelines often results in improper placement, which can significantly affect the detector’s response to dangerous gas levels. Placing a detector too close to fuel-burning appliances increases the risk of nuisance alarms, which may cause users to ignore legitimate alerts in the future. Additionally, blocking airflow with furniture or curtains can hinder the detector’s ability to function properly, limiting its effectiveness. It’s also essential to account for room size when determining the position, as CO can spread out and take time to reach a detector placed far from potential sources. Lastly, neglecting routine maintenance, such as testing alarms and changing batteries, can lead to a false sense of security if the detector fails to operate when needed most.
What Local Regulations Govern CO Detector Installation?
Local regulations for CO detector installation can vary significantly, but common guidelines typically include placement recommendations and requirements for maintenance.
- Height Placement: It is generally advised to install CO detectors at least 5 feet above the floor, as carbon monoxide tends to rise with warm air. However, some regulations may specify that detectors should be installed at the same level as sleeping areas to ensure they are heard during the night.
- Proximity to Fuel-Burning Appliances: Many local codes require that CO detectors be placed within a certain distance from fuel-burning appliances, such as furnaces or water heaters. This is to ensure that the detectors can effectively monitor for any CO emissions that may arise from these sources.
- Number of Detectors: Regulations often specify the minimum number of CO detectors required based on the size of the home or the number of floors. For instance, it’s common to require at least one detector on each level of the home and near sleeping areas to provide adequate coverage.
- Combination Detectors: Some local codes may allow or require the use of combination smoke and CO detectors. These devices can provide dual protection, but regulations will often stipulate specific installation guidelines to ensure both functions operate effectively.
- Regular Maintenance Requirements: Local regulations may also mandate regular testing and maintenance of CO detectors, including battery replacement or unit replacement every 5-7 years. This ensures that the detectors remain functional and effective in alerting occupants to dangerous levels of carbon monoxide.
How Can the Proper Placement of CO Detectors Impact Safety?
The proper placement of carbon monoxide (CO) detectors is crucial for ensuring safety and effective detection of this odorless gas.
- Near Sleeping Areas: Installing CO detectors close to sleeping areas ensures that occupants are alerted in case of a CO leak while they are asleep. Since carbon monoxide can cause unconsciousness, having a detector that sounds an alarm in the night can save lives.
- On Every Level of the Home: It is essential to have CO detectors on every level of a multi-story home, including the basement. This ensures comprehensive coverage, as CO can accumulate in different areas depending on the source and ventilation, making it critical to have detectors in all living spaces.
- At Least 15 Feet from Fuel-Burning Appliances: CO detectors should be placed at least 15 feet away from appliances such as stoves, furnaces, or fireplaces. This distance helps to prevent false alarms from normal emissions during appliance operation while still being close enough to detect dangerous levels of CO.
- Not in High-Humidity Areas: Avoid placing CO detectors in high-humidity areas such as bathrooms or near swimming pools. Excess moisture can damage the detector and affect its functionality, leading to potential safety risks.
- Mounted on Walls or Ceilings: CO detectors should ideally be mounted on walls about 5 feet above the floor or on the ceiling, as carbon monoxide is slightly less dense than air and will rise. Proper mounting ensures that the detector can sense CO levels quickly and accurately.